
As I bit into the crispy, golden exterior of my Keto Arepas, I couldn’t help but smile. These delicate, low-carb delights whisk me away from the usual fast food frenzy, transporting me to a world where cheesy goodness reigns supreme. Perfect for any meal of the day, this easy Keto Arepas recipe redefines versatility in the kitchen, offering endless possibilities from breakfast to snack time. Not only are they gluten-free, but they also allow for creative fillings like avocado or shredded chicken, making them a delicious canvas for your culinary imagination. If you’re seeking meals that cater to your health-conscious lifestyle without sacrificing taste, you’re in for a treat. What mouthwatering fillings will you experiment with today?

Why are Keto Arepas a game changer?
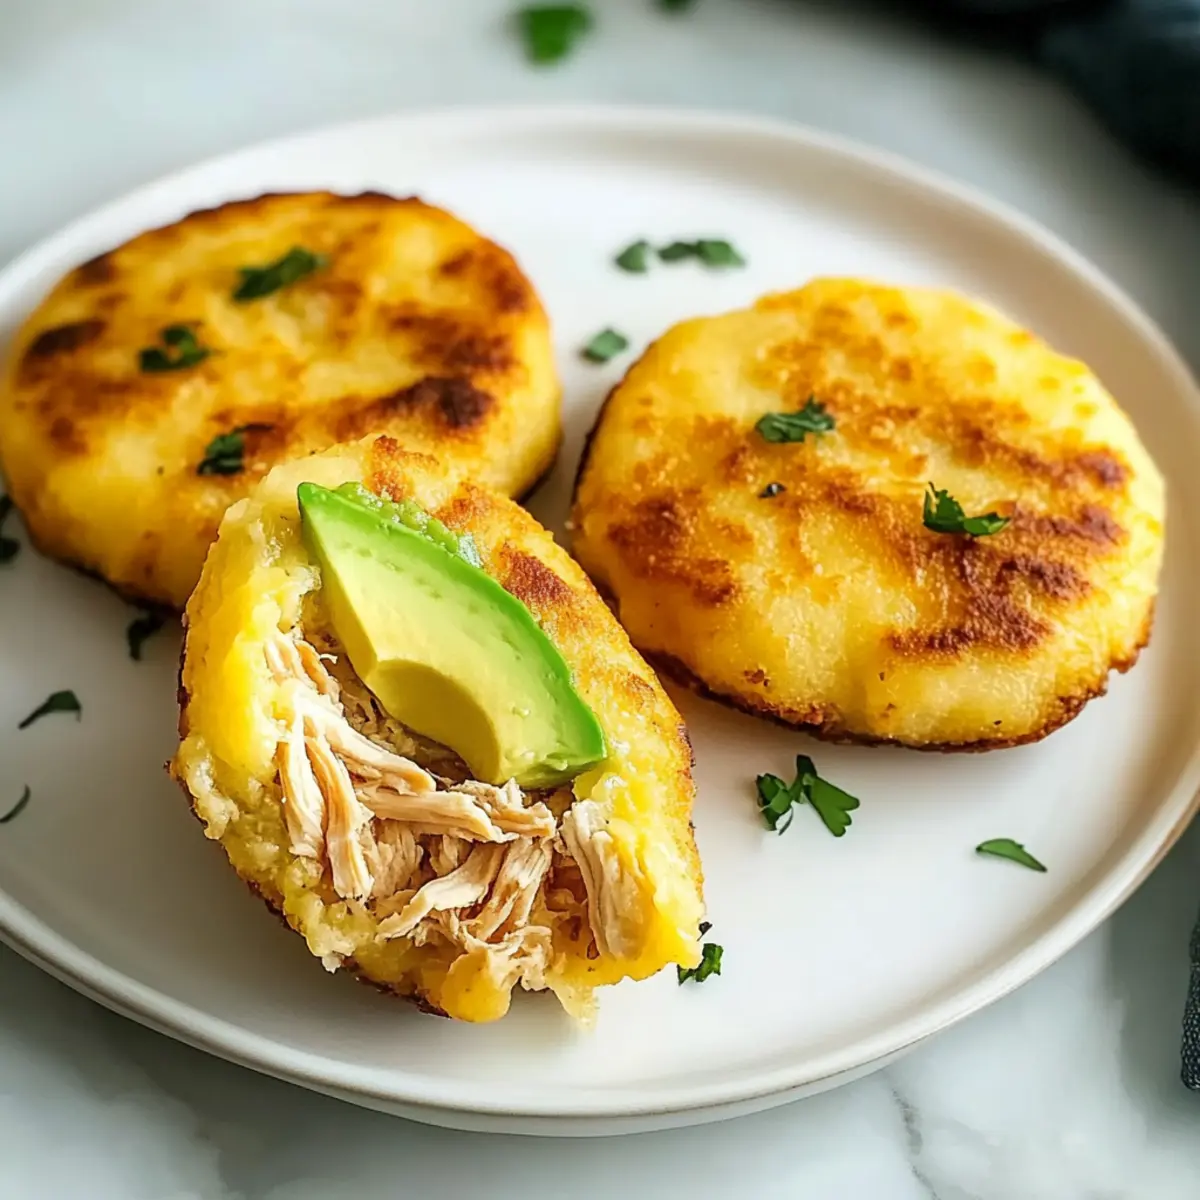
Versatile and Fun: These Keto Arepas are not just a meal; they’re a blank canvas for your favorite fillings. From a sumptuous guacamole to spicy pulled chicken, the options are endless!
Gluten-Free Goodness: Say goodbye to traditional arepas filled with carbs—these are made with almond flour, making them a perfect fit for your low-carb lifestyle.
Easy to Make: This recipe is simple and requires minimal culinary skills, so you can whip up a delicious batch in no time.
Flavorful Indulgence: The cheesy richness of these arepas delivers a satisfying culinary experience that banishes any notion of deprivation from your diet.
Time-Saving: Great for meal prep, they can be made ahead and stored for up to 5 days, offering quick lunches or snacks whenever you need them.
Elevate your mealtime with these delightful Keto Arepas, transforming ordinary moments into extraordinary dining experiences!
Keto Arepas Recipe Ingredients
For the Dough
• Almond Flour – This is your base and structure for delicious Keto Arepas. Substitution: Coconut flour can be used, but reduce to ¼ cup and adjust water accordingly.
• Shredded Mozzarella Cheese – Adds a cheesy richness and binds the arepas beautifully.
• Psyllium Husk – A must for enhancing texture and preventing crumbling. Note: Omitting it may lead to a crumbly result.
• Egg – Serves as a natural binder to hold everything together.
• Warm Water – Hydrates dry ingredients to create the perfect dough consistency.
• Salt – Elevates and enriches the overall flavor of your arepas.
• Butter or Oil – Used for frying to achieve that irresistible crispy texture.
Step‑by‑Step Instructions for Keto Arepas Recipe
Step 1: Combine Dry Ingredients
In a large mixing bowl, combine 1 cup of almond flour, 1 tablespoon of psyllium husk, 1 cup of shredded mozzarella cheese, and ½ teaspoon of salt. Using a whisk, mix the ingredients well until they are evenly blended. This dry mixture will form the base of your Keto Arepas, providing structure and flavor.
Step 2: Add Wet Ingredients
Crack 1 egg into the bowl with the dry ingredients and mix until well incorporated. Gradually pour in ½ cup of warm water while stirring, aiming for a dough that is soft yet not sticky. If needed, adjust with a bit more water or almond flour to achieve the ideal consistency.
Step 3: Shape the Dough
Divide the dough into four equal portions. Gently shape each portion into a ball and then press it down into a thick disc about ½ inch thick. Your goal is to create uniform discs that will cook evenly, forming the classic shape of your Keto Arepas.
Step 4: Heat the Skillet
Preheat a non-stick skillet over medium heat and add 2 tablespoons of butter or oil. Allow the fat to melt, coating the pan evenly; this will help achieve that golden-brown, crispy exterior on your Keto Arepas.
Step 5: Cook the Arepas
Carefully place the arepas in the hot skillet, ensuring they are not crowded. Cook each side for 4–5 minutes, flipping them until they are golden brown and slightly puffed. You’ll know they’re ready when they have a crisp exterior and a soft, chewy inside.
Step 6: Let Them Rest
Once cooked, remove the arepas from the skillet and let them rest on a cutting board for a couple of minutes. This resting time allows the cheese to set, making them easier to slice open without falling apart and creating a perfect pocket for your favorite fillings.

Expert Tips for Keto Arepas
-
Dough Consistency: Ensure the dough isn’t too moist, as this can cause the arepas to crumble during cooking. Adjust water and almond flour as necessary.
-
Non-Stick Skillet: Always use a non-stick skillet to prevent sticking and achieve that perfect golden crust on your Keto Arepas.
-
Cheese Variations: Feel free to experiment with different cheeses such as cheddar or pepper jack for a unique twist on flavor in your keto arepas recipe.
-
Storage Solutions: These delicious arepas can be stored in the fridge for up to 5 days or frozen, making them great for meal prep!
-
Reheating Tips: For a crispy texture, reheat any leftovers in a toaster oven rather than a microwave to keep that delightful crunch.
What to Serve with Keto Arepas Recipe
Imagine delighting your taste buds with a colorful array of sides and toppings that perfectly complement these cheesy, low-carb treasures.
- Savory Guacamole: The creamy, zesty flavors of guacamole balance the crispy texture of the arepas, elevating each bite.
- Spicy Chicken Salad: Each spoonful brings a combination of spice and protein, making your meal satisfying while keeping it healthy and low-carb.
- Fresh Pico de Gallo: The light, refreshing elements of pico add a burst of flavor that’s both vibrant and refreshing alongside your arepas.
- Cilantro-Lime Rice: This fluffy side dish offers a citrusy contrast to the cheese while bringing an additional layer of flavor to your meal.
- Creamy Avocado Dip: Smooth and buttery, this dip aligns beautifully with the crispy arepas, making each bite melt in your mouth.
- Zesty Coleslaw: The crunch and tanginess of coleslaw contrast with the soft texture of the arepas, creating a delightful textural experience.
- Homemade Salsa: A fresh salsa offers a zesty kick, enhancing the cheesy goodness of your arepas and adding a vibrant color to your plate.
- Refreshing Cucumber Salad: Cool and crisp, this salad lightens your meal while adding a burst of freshness that harmonizes with the rich flavors of the arepas.
- Chilled Coconut Water: This subtly sweet drink refreshes the palate while being a perfect complement to your keto feast.
- Mini Cheesecakes: For a sweet finish, these creamy bites make a deliciously light dessert that echoes the cheesiness of your meal without the carbs.
Make Ahead Options
These Keto Arepas are perfect for meal prep, allowing busy home cooks to enjoy delicious meals without the last-minute rush! You can prepare the dough up to 24 hours in advance by following the first three steps of the recipe and storing it in an airtight container in the refrigerator. Additionally, cooked arepas can be stored in the fridge for up to 5 days or frozen with parchment paper between each arepa to prevent sticking. When you’re ready to enjoy, simply reheat the arepas in a non-stick skillet or toaster oven for a crispy texture, and they’ll taste just as delicious as when freshly cooked! Planning ahead has never tasted so good!
Keto Arepas Recipe Variations
Feel free to sprinkle some personal flair into these Keto Arepas and create your own culinary masterpieces!
-
Cheese Swap: Use cheddar or pepper jack instead of mozzarella for a bolder flavor kick. Each cheese brings its unique personality, enriching each bite with extra zest and richness.
-
Herb Infusion: Add fresh herbs like cilantro or chives to the dough for a refreshing twist. This upgrade elevates the taste profile while adding vibrant color.
-
Spicy Kick: Incorporate jalapeños or red pepper flakes into the dough for a delightful heat punch. Perfect for spice lovers, these modifications make for a robust flavor experience.
-
Nut-Free Option: Replace almond flour with sunflower seed flour for a nut-free version. It’s equally tasty while accommodating those with nut allergies, ensuring everyone can savor them.
-
Savory Add-ins: Fold in some cooked bacon bits or chopped spinach for an extra savory surprise. These additions not only amp up flavor but also add delightful texture.
-
Sweet Twist: Add a dash of cinnamon and erythritol to the dough for a sweet treat. Great for breakfast or dessert, this variation creates a delightful, sweeter take on your keto arepas.
-
Make it a Meal: Fill with breakfast favorites like scrambled eggs and avocado for a fulfilling start to your day. This twist turns your arepas into a complete meal that’s perfect for brunch.
-
Classic Fillings: Try traditional fillings like pulled pork or guacamole for a hearty option. These time-tested favorites make great use of leftovers, turning every meal into a delicious adventure.
Discover the world of possibilities with these simple swaps and additions, and don’t hesitate to explore even more delicious ideas! If you’re looking for more insights into tailored meal solutions, check out my tips on preparing easy lunch ideas that align perfectly with your keto lifestyle.
How to Store and Freeze Keto Arepas
Fridge: Store cooked Keto Arepas in an airtight container for up to 5 days, ensuring they retain their delicious flavor and texture.
Freezer: Freeze arepas by placing parchment paper between each to prevent sticking. They can be kept in the freezer for up to 3 months.
Reheating: To crisp them up, reheat the arepas in a toaster oven for a few minutes. This keeps them crunchy on the outside and soft on the inside.
Make-Ahead: Consider making a larger batch of Keto Arepas for quick lunches or snacks during the week.
Keto Arepas Recipe FAQs
What type of almond flour should I use for Keto Arepas?
Absolutely! For the best results, use blanched almond flour, as it provides a fine texture that mimics traditional corn flour. Avoid almond meal, which is coarser and may result in a denser arepa.
How should I store my leftover Keto Arepas?
Store your cooked Keto Arepas in an airtight container in the fridge for up to 5 days. This method ensures they stay flavorful and moist. If you prefer to make a larger batch, consider freezing them for longer storage.
Can I freeze Keto Arepas, and how?
Yes, you can freeze them! Place parchment paper between each arepa to prevent them from sticking together. Transfer them to a freezer-safe bag or container, and they’ll stay fresh for up to 3 months. When you’re ready to enjoy them, thaw overnight in the fridge before reheating.
What should I do if my arepas fall apart during cooking?
If your Keto Arepas are crumbling, it’s likely due to a few reasons: the dough might be too dry or too wet. Make sure you measured the almond flour accurately, and add extra water a tablespoon at a time until you reach the right consistency. If the dough seems too moist, sprinkle in a bit more almond flour.
Are Keto Arepas safe for people with gluten allergies?
Yes! This Keto Arepas recipe is naturally gluten-free, as it uses almond flour instead of traditional corn or wheat. However, always check labels for cross-contamination if you have severe gluten allergies to ensure your ingredients are safe.
What are some filling ideas for my Keto Arepas?
The more the merrier! You can fill your arepas with shredded beef, pulled chicken, or even sautéed veggies. For a delicious twist, consider creamy avocado or a spicy tuna salad! Feel free to get creative with your favorite ingredients!

Keto Arepas Recipe: Cheesy Low-Carb Goodness for All Meals
Ingredients
Equipment
Method
- In a large mixing bowl, combine the almond flour, psyllium husk, mozzarella cheese, and salt. Mix well with a whisk.
- Add the egg to the dry ingredients and mix. Gradually pour in warm water while stirring until a soft dough forms.
- Divide the dough into four portions and shape each into a thick disc about ½ inch thick.
- Preheat a skillet over medium heat and add the butter or oil, melting to coat the pan.
- Place the arepas into the skillet, cooking each side for 4–5 minutes until golden brown.
- Remove the arepas from the skillet and let them rest for a couple of minutes before serving.
Leave a Reply