
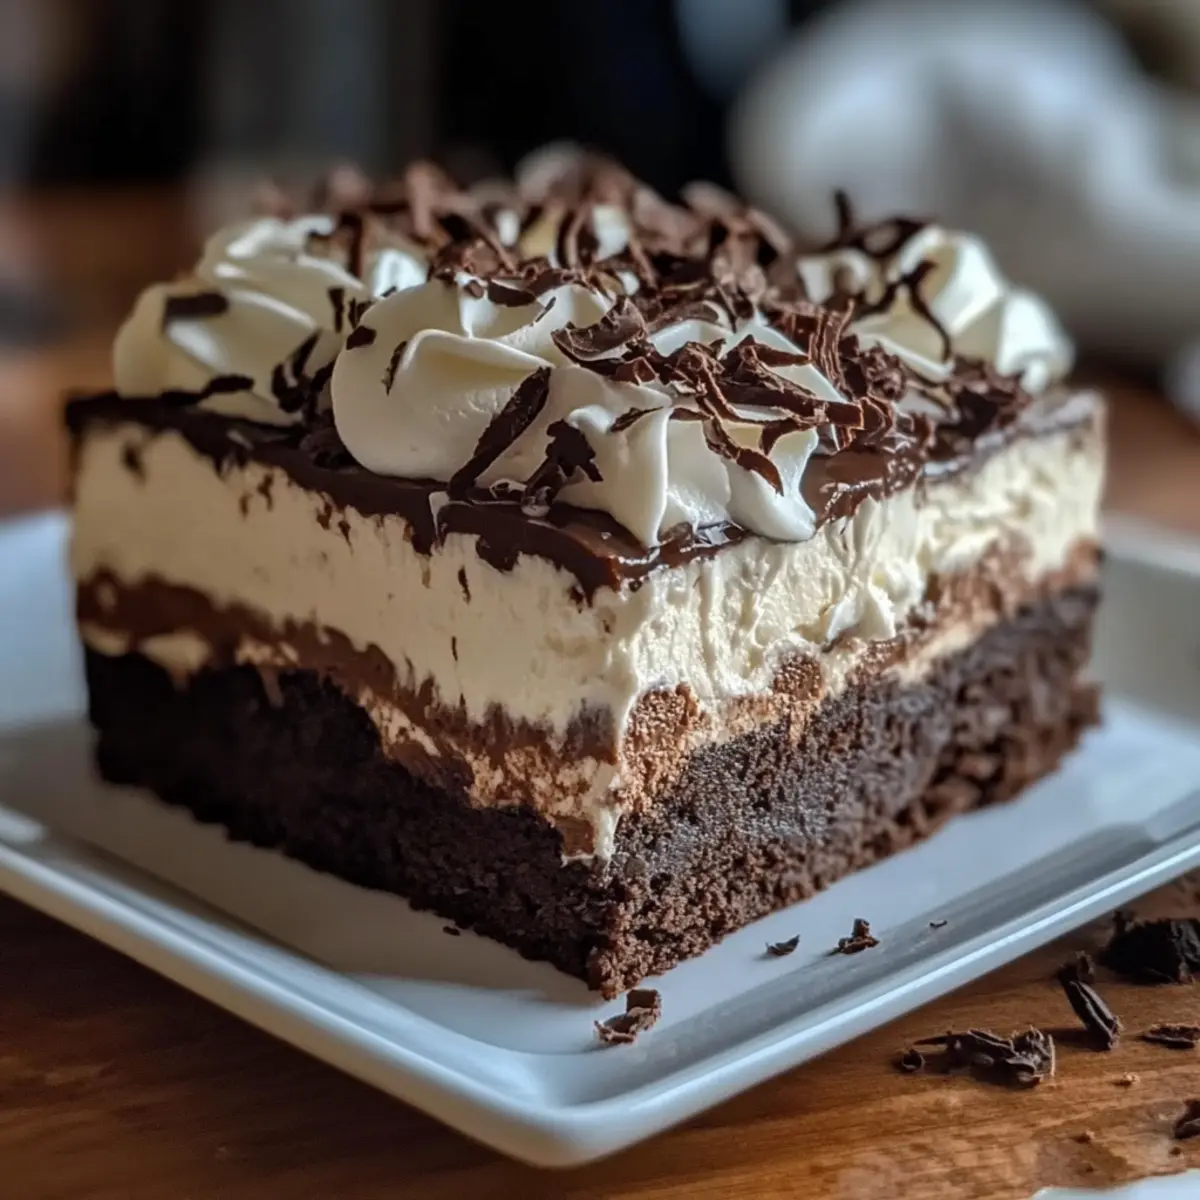
As I stood in my kitchen, I felt that unmistakable tug of nostalgia while reaching for my trusty brownie mix. The idea of creating a No-Bake Brownie Refrigerator Cake suddenly illuminated my afternoon. Picture this: layers of fudgy brownies intertwined with creamy pudding and a cloud-like whipped topping, all without the fuss of turning on the oven. This delightful dessert is perfect for any occasion—quick to prepare and even better when chilled, making it a stress-free crowd-pleaser. Whether you’re hosting a gathering or just craving something sweet for yourself, this decadent treat invites customization to suit your taste. Ready to elevate your dessert game and discover how easy it is to create this layered delight? Let’s dive in!
Why is this Brownie Refrigerator Cake a Must-Try?
Decadence in Every Bite: This dessert is an indulgent treat, layering rich brownies with creamy pudding that’s utterly irresistible.
No-Bake Convenience: Perfect for warm days or busy weekends, you can whip it up without ever breaking a sweat in the kitchen.
Versatile Flavors: Feel free to customize with different puddings and toppings, allowing for creativity with every serving!
Easily Make-Ahead: It’s designed for convenience—the flavors only improve as it sits in the fridge, making it ideal for your next gathering.
Crowd-Pleasing Appeal: It’s a surefire crowd-pleaser, appealing to both adults and kids alike, leaving everyone longing for seconds.
Brownie Refrigerator Cake Ingredients
• Let’s gather everything you need for this decadent masterpiece!
For the Brownies
- Brownie Mix – The foundation of the dessert, providing rich chocolate flavor; use gluten-free brownie mix for a gluten-free option.
- Eggs – Binds the mix for a fudgy, moist base; add an extra egg for a denser texture.
For the Cream Layer
- Cream Cheese – Adds a creamy, cheesecake-like dimension; opt for dairy-free cream cheese if desired.
- Vanilla Extract – Enhances the flavors throughout; pure vanilla will take it to the next level.
For the Pudding Layer
- Instant Chocolate Pudding – Creates a deliciously rich filling; feel free to experiment with different flavors like butterscotch or caramel.
- Milk – Hydrates the pudding mix for a perfect creamy consistency; substitute with almond or oat milk for a dairy-free option.
For the Topping
- Whipped Topping – Provides a light and airy finish; thaw before spreading for easier application.
- Chocolate Chips (optional) – Adds extra chocolatey goodness; skip for a lighter version.
With these ingredients, you’re well on your way to crafting the most delightful Brownie Refrigerator Cake!
Step‑by‑Step Instructions for Brownie Refrigerator Cake
Step 1: Prepare Brownies
Begin by preheating your oven to the temperature specified on your brownie mix package. In a mixing bowl, combine the brownie mix with eggs, stirring until smooth. Pour the mixture into a greased baking pan and spread evenly. Bake according to package instructions, usually around 25-30 minutes, until a skewer inserted in the center comes out clean. Allow the brownies to cool in the pan for at least one hour before layering.
Step 2: Make Cream Cheese Layer
While the brownies cool, prepare the cream cheese layer. In a mixing bowl, beat softened cream cheese and vanilla extract until the mixture is creamy and smooth, about 2-3 minutes. Make sure there are no lumps for a velvety texture. Once the brownies have cooled completely, spread the cream cheese layer evenly over the brownie base, smoothing it with a spatula for an even finish.
Step 3: Prepare Pudding Layer
Next, get ready to make the pudding layer. In a separate bowl, whisk together the instant chocolate pudding mix and milk until well combined, typically about 2 minutes. The pudding should thicken to a creamy consistency, so avoid over-mixing. Carefully pour the pudding over the cream cheese layer, spreading it gently to ensure the layers stay distinct.
Step 4: Layer Whipped Topping
Now it’s time to crown your Brownie Refrigerator Cake with whipped topping. Take the thawed whipped topping and dollop it generously over the pudding layer. Use a spatula to smooth it out, ensuring an even layer that covers the pudding completely. For a decorative touch, consider using a piping bag if you want to create swirls or peaks.
Step 5: Chill the Cake
Finally, it’s essential to chill your masterpiece. Place the assembled Brownie Refrigerator Cake in the refrigerator for at least 2 hours, or overnight for best results. This chilling time allows the flavors to meld and the layers to firm up, making it easier to slice. Before serving, check for a lovely set that will hold its shape beautifully on your plate.
What to Serve with Brownie Refrigerator Cake
Imagine a spread that complements the rich, layered delight of this cake—perfect for any occasion.
-
Vanilla Ice Cream: Creamy, cold vanilla ice cream balances the chocolate richness of the brownies, providing a soothing contrast that enhances every bite.
-
Fresh Berries: A burst of strawberries or raspberries adds a refreshing, tangy flavor that cuts through the sweetness, creating a delightful harmony on your palate.
-
Chocolate Sauce Drizzle: A warm chocolate sauce drizzled over the top creates a decadent touch that elevates the dish, inviting indulgence in every mouthful.
-
Coffee or Espresso: The rich, bitter notes of coffee contrast beautifully with the sweet layers, making it an ideal pairing for the dessert lovers in your life.
-
Caramel Sauce: A drizzle of caramel imparts a buttery sweetness that perfectly complements the fudge layers, enhancing the overall dessert experience with its gooey richness.
-
Whipped Cream: A dollop of fresh whipped cream adds a light, airy texture, balancing the heaviness of the cake while keeping every bite delightfully indulgent.
-
Nutty Topping: Sprinkle some crushed nuts, like pecans or walnuts, for an added crunch and hint of earthiness that contrasts wonderfully with the creamy layers.
-
Mint Leaves: Fresh mint leaves as a garnish not only add a pop of color but also a refreshing note that complements the dessert’s richness, creating a vibrant visual appeal.
Make Ahead Options
These Brownie Refrigerator Cakes are perfect for meal prep enthusiasts! You can prepare the brownies and cream cheese layer up to 24 hours in advance; simply bake the brownies and allow them to cool completely before spreading the cream cheese layer on top. Cover and refrigerate the layers to maintain freshness and prevent drying out.
For added convenience, the pudding layer can be made up to 3 days ahead; just mix it as directed and keep it covered in the fridge. When it’s time to serve, layer the pudding over the cream cheese, top with whipped topping, and let it chill for at least 2 hours before enjoying. This no-bake approach not only saves time but also allows the flavors to deepen for an even more delicious dessert!
Storage Tips for Brownie Refrigerator Cake
Fridge: Keep your Brownie Refrigerator Cake covered in the refrigerator for up to 3 days to maintain its freshness and creamy texture.
Freezer: If you want to store it longer, wrap individual slices in plastic wrap and place them in an airtight container. It can be frozen for up to 1 month.
Thawing: To enjoy your frozen Brownie Refrigerator Cake, move it to the fridge for several hours to thaw gently without losing its luscious layers.
Reheating: This dessert is best served cold straight from the fridge. No reheating required—just slice and serve for a delightful chilled treat!
Brownie Refrigerator Cake Variations & Substitutions
Feel free to let your creativity shine and customize this dessert to suit your taste buds!
-
Gluten-Free: Use a gluten-free brownie mix to create a delicious alternative that everyone can enjoy.
-
Nutty Crunch: Add chopped walnuts or pecans between the layers for a delightful crunch that enhances the texture.
-
Dairy-Free: Substitute cream cheese and whipped topping with dairy-free alternatives for a vegan-friendly treat without sacrificing flavor.
-
Flavor Fusion: Swap traditional chocolate pudding for butterscotch or vanilla pudding to create a unique twist that will surprise your guests.
-
Berry Explosion: Top the cake with fresh berries, like strawberries or raspberries, for a vibrant and refreshing touch that cuts through the richness.
-
Additional Layers: For an even more decadent experience, layer in crushed Oreos or peanut butter between the brownie and pudding layers.
-
Spicy Kick: Add a dash of cinnamon or cayenne pepper to the pudding for an unexpected warmth that complements chocolate beautifully.
If you’re looking for more ideas on how to enhance this no-bake beauty, consider pairing it with a scoop of homemade ice cream or exploring ways to customize it with various toppings like caramel sauce and chocolate shavings. There’s no limit to what you can create!
Expert Tips for Brownie Refrigerator Cake
-
Let It Chill: Ensure the Brownie Refrigerator Cake is refrigerated for at least 2 hours. This helps layers set properly and improves flavor.
-
Avoid Overmixing: When preparing the pudding layer, resist the temptation to overmix. Whisk just until thickened to keep it creamy and firm.
-
Check Brownie Cooling: Allow the brownies to cool completely before layering; otherwise, you risk melting the cream cheese layer, which will affect the overall texture.
-
Thaw Whipped Topping: For easier spreading, make sure to let the whipped topping thaw sufficiently. If it’s too cold, it can be difficult to distribute evenly.
-
Customize Flavors: Feel free to experiment with various pudding flavors and toppings. This Brownie Refrigerator Cake is your canvas, so let your creativity shine!
Brownie Refrigerator Cake Recipe FAQs
What type of brownie mix should I use for my Brownie Refrigerator Cake?
You can use any brand of brownie mix you prefer, but for a gluten-free option, look for a gluten-free brownie mix at your local grocery store. I often use a brand that has great flavor and bakes to a perfect fudgy texture.
How should I store my Brownie Refrigerator Cake?
Keep your Brownie Refrigerator Cake covered in the refrigerator for up to 3 days. This will help maintain its creamy texture and prevent it from drying out. If you’re making it ahead, it’s a perfect make-ahead dessert since it tastes even better after sitting for a day!
Can I freeze my Brownie Refrigerator Cake?
Absolutely! To freeze, wrap individual slices in plastic wrap and place them in an airtight container or freezer-safe bag. This ensures they don’t stick together. You can freeze it for up to 1 month. When you’re ready to enjoy it, simply transfer the slices to the refrigerator and let them thaw for several hours.
What if my pudding layer is too runny?
If you find that your pudding layer turns out runny, it’s likely due to overmixing. Whisk the pudding mix and milk just until combined and thickened, usually around 2 minutes. If it’s already mixed, try refrigerating it a bit longer to help it set. Consider adding a bit more pudding mix as a last resort to thicken it.
Are there any dietary considerations I should be aware of?
Yes! This recipe can be easily adapted for various dietary needs. For gluten-free options, just choose a gluten-free brownie mix. For dairy-free, substitute the cream cheese and whipped topping with dairy-free alternatives. Also, double-check the pudding mix to ensure it meets your dietary requirement.
Decadent Brownie Refrigerator Cake for Easy No-Bake Indulgence
Ingredients
Equipment
Method
- Preheat your oven according to the brownie mix package instructions. In a mixing bowl, combine brownie mix and eggs until smooth. Pour into a greased baking pan and spread evenly. Bake for 25-30 minutes or until a skewer comes out clean. Cool for at least 1 hour.
- In a mixing bowl, beat cream cheese and vanilla extract until creamy and smooth, about 2-3 minutes. Spread the cream cheese layer evenly over the cooled brownies.
- Whisk together instant chocolate pudding mix and milk until well combined, about 2 minutes. Pour the pudding over the cream cheese layer, spreading it gently to keep the layers distinct.
- Dollop thawed whipped topping over the pudding layer and smooth it out with a spatula. Optionally, use a piping bag for decoration.
- Chill the assembled cake in the refrigerator for at least 2 hours, or overnight for best results, to allow flavors to meld and layers to set.
Leave a Reply