
As I savored the delicate sweetness of a milk mochi, I was transported back to bustling street markets in Tokyo, where the aroma of traditional desserts fills the air. This Milk Mochi Recipe brings that beloved experience right to your kitchen, allowing you to enjoy a chewy delight in just five simple ingredients. The creamy richness from the milk elevates this gluten-free treat, making it a perfect option for anyone craving homemade comfort. Not only is this recipe hassle-free and ideal for both novice cooks and seasoned bakers, but its delightful texture and flavor will also have your loved ones asking for seconds. Ready to impress with this scrumptious dessert that’s both easy to make and utterly satisfying? Let’s dive into the world of milk mochi together!
Why is Milk Mochi a Must-Try?
Simplicity at its finest: This Milk Mochi recipe requires just five ingredients, making it both accessible and quick to prepare.
Comforting and unique: The chewy texture combined with creamy milk creates a delightful dessert experience that sets it apart from typical treats.
Versatile options: Feel free to experiment with fillings like red bean paste or fruit purees to create your signature mochi!
Crowd-pleaser: Serve it at gatherings or family dinners, and watch as everyone enjoys this delectable gluten-free delight.
Homemade goodness: Skip takeout and bask in the joy of creating a traditional Japanese dessert right in your own kitchen.
Milk Mochi Ingredients
-
For the Mochi Base
• Glutinous Rice Flour – Provides the essential chewy texture; essential for authentic milk mochi.
• Cornstarch – Softens the texture and prevents the mochi from being overly chewy.
• Sugar – Adds the necessary sweetness to balance the flavors seamlessly.
• Corn Oil – Introduces moisture and a slight richness to the dough.
• Whole Milk – Offers creaminess and enhances the flavor; this is key for making a savory milk mochi. -
For Coating
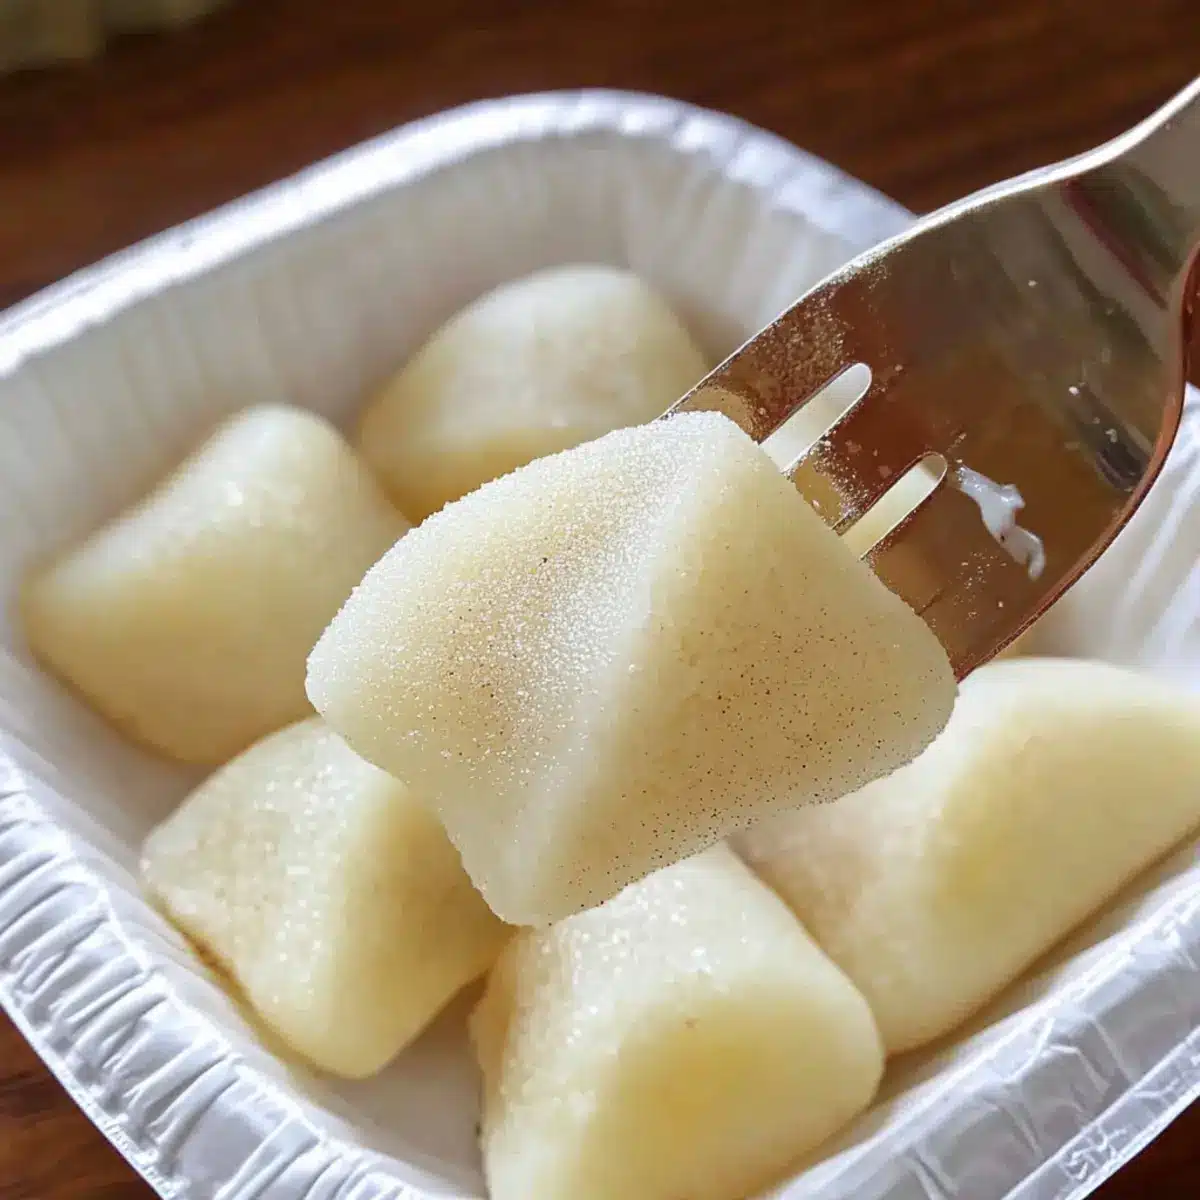
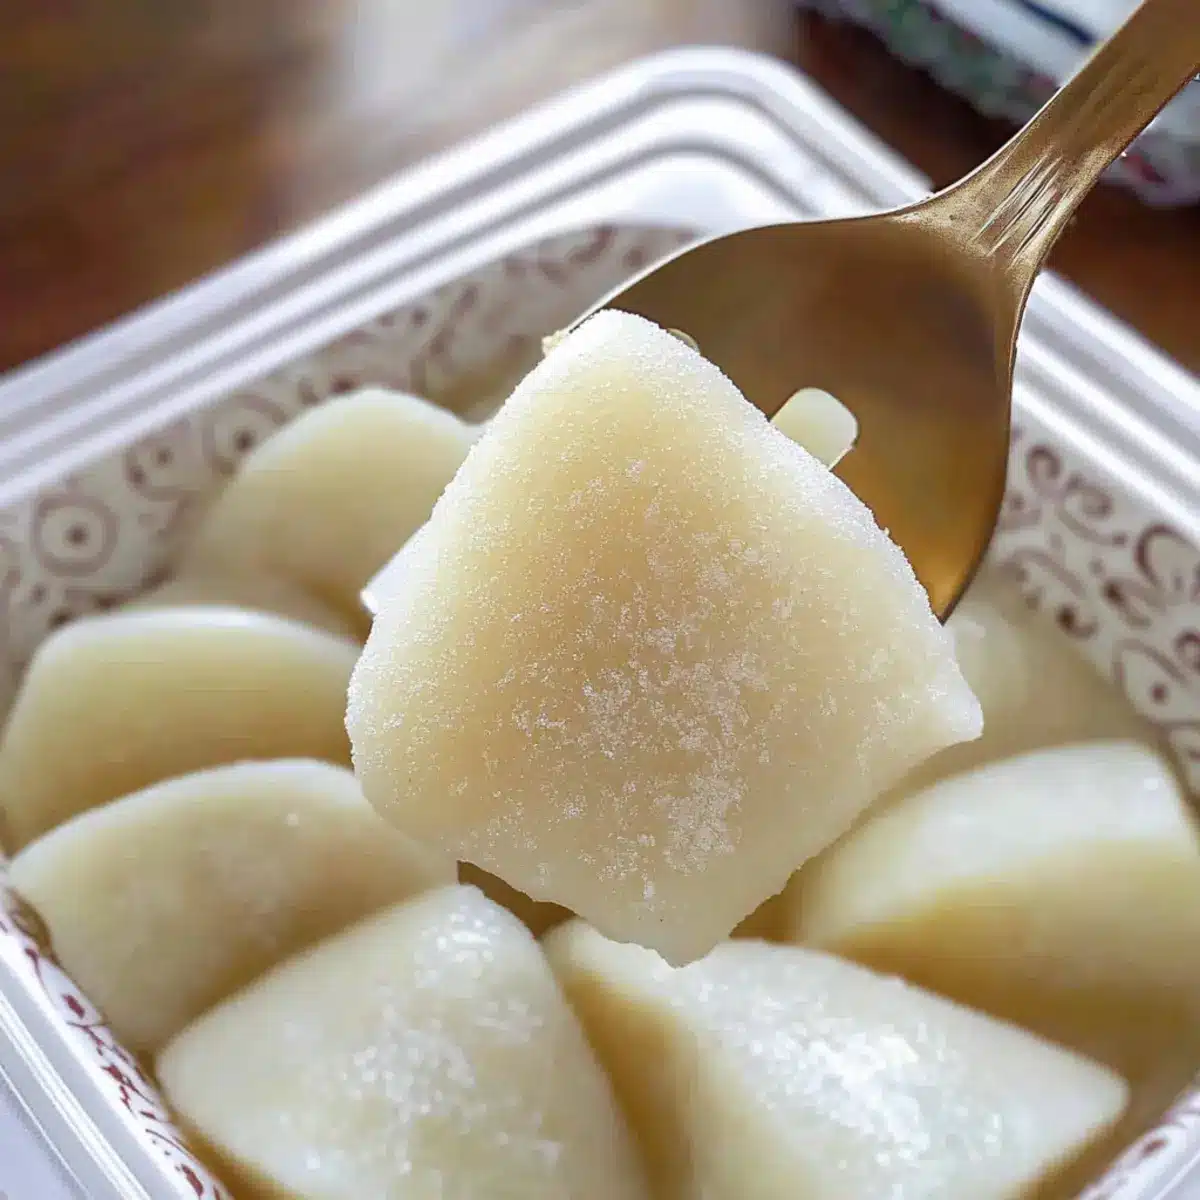
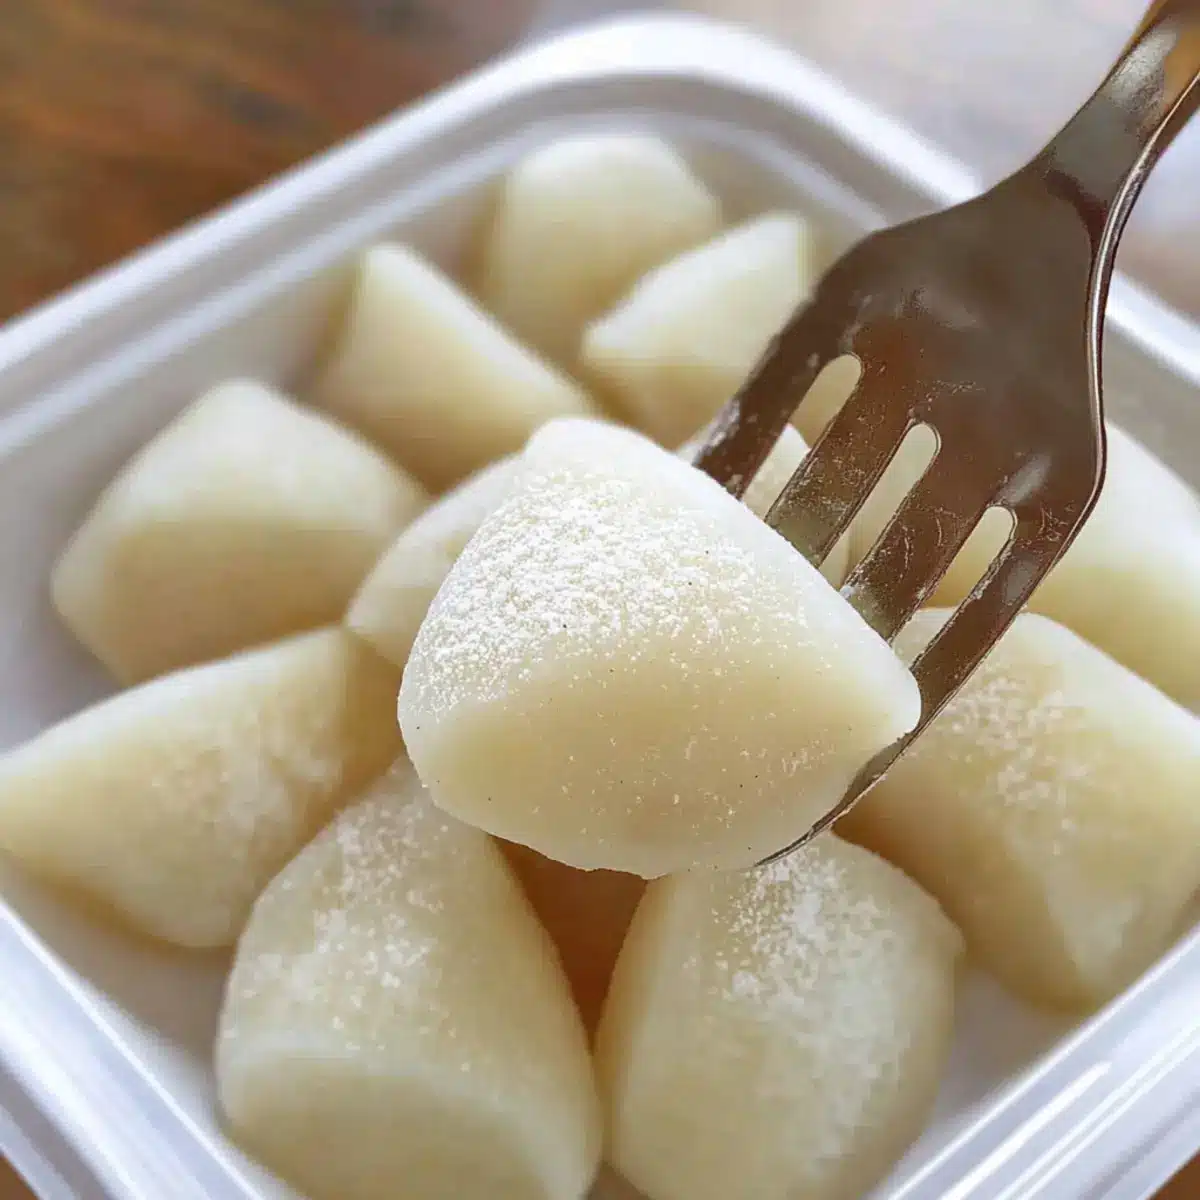
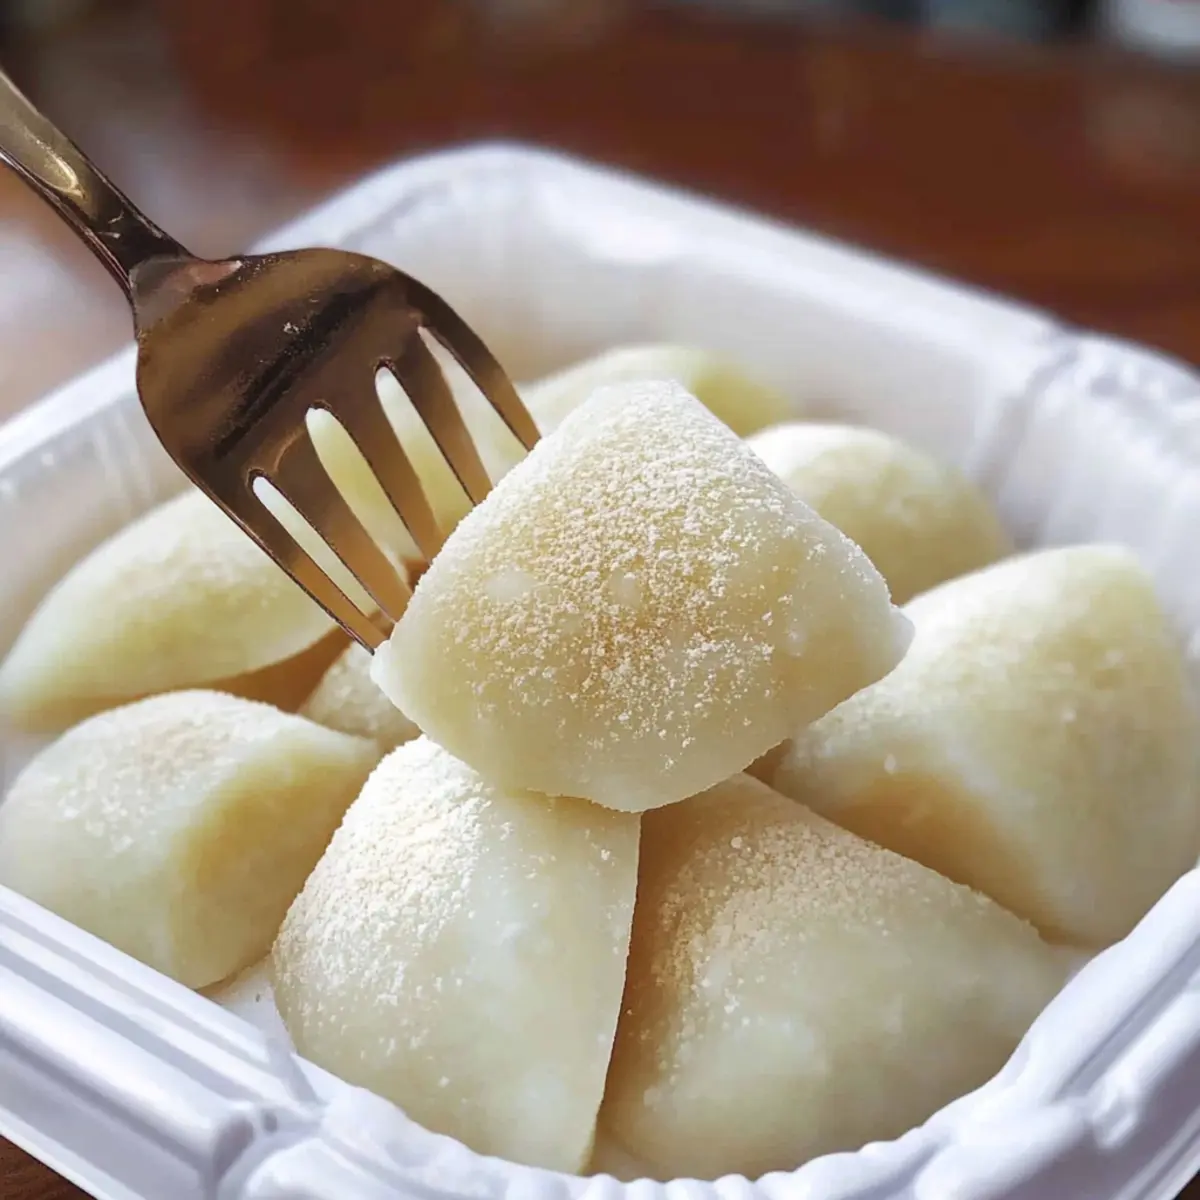
• Roasted Soybean Flour – Coats the mochi pieces, adding a nutty flavor that beautifully complements the sweetness.
Step‑by‑Step Instructions for Milk Mochi Recipe
Step 1: Prepare the Mixture
In a large mixing bowl, combine 150g of glutinous rice flour, 30g of cornstarch, 25g of sugar, 20g of corn oil, and 290g of whole milk. Whisk together until the mixture is smooth and well-combined, ensuring there are no lumps. This mixture serves as the base for your milk mochi, setting the foundation for its delightful chewy texture.
Step 2: (Optional) Strain the Mixture
To achieve an exceptionally smooth consistency for your milk mochi, consider straining the mixture through a fine sieve into another bowl. This step removes any remaining lumps and creates a silky batter, enhancing the overall mouthfeel of the final treat. Take your time with this optional step for the best results.
Step 3: Cook the Mixture
Pour the strained or unstrained mixture into a non-stick pan and place it over low heat. Cook for about 10-15 minutes, stirring continuously with a spatula. You’ll know it’s ready when the mixture thickens and transforms into a cohesive, elastic mass that pulls away from the sides of the pan, indicating it’s time to remove it from the heat.
Step 4: Knead the Dough
Carefully transfer the cooked mixture to a heat-resistant surface or bowl and allow it to cool slightly. Once manageable, wear gloves and knead the dough for approximately 5 minutes until it becomes elastic and smooth. This kneading process is essential as it helps develop the signature chewiness characteristic of your milk mochi.
Step 5: Shape the Mochi
Roll the kneaded dough into a long strip and use a knife or pastry cutter to slice it into your desired shapes. For ease in handling, sprinkle extra glutinous rice flour on the surface to prevent sticking. It’s ideal to keep your pieces uniform in size for even coating and a beautiful presentation of your finished milk mochi.
Step 6: Coat the Mochi
To finish your milk mochi, take each piece and roll it in roasted soybean flour. This classic coating adds a nutty flavor and helps keep the mochi from sticking together. Ensure each piece is generously covered for that delightful contrast in taste, enhancing the overall experience of your sweet treat.
Expert Tips for Perfect Milk Mochi
• Low Heat Cooking: Always cook the mixture on low heat to prevent burning, ensuring the right texture for your milk mochi.
• Consistent Stirring: Stir continuously while cooking to maintain a smooth consistency and avoid lumps in your delicious treat.
• Use Gloves: When kneading the dough, wearing gloves can help you handle the heat and stickiness, making the process easier and more enjoyable.
• Prevent Sticking: Use extra glutinous rice flour when rolling and shaping to keep your pieces from sticking together.
• Taste Variations: Feel free to experiment with fillings like red bean paste or fruits; just be wary of overfilling to maintain the chewy texture!
What to Serve with Easy 5-Ingredient Milk Mochi
Indulging in milk mochi offers a delightful experience, but pairing it with the right accompaniments elevates your dessert game.
- Matcha Green Tea: The earthy notes of matcha complement the sweetness of the mochi, creating a balanced flavor contrast.
- Fresh Berries: Juicy strawberries or raspberries add a vibrant burst of flavor, enhancing the overall freshness of your dessert.
- Sweet Red Bean Paste: Known in Japanese cuisine as “anko,” this richly sweet paste fills the gap for those who enjoy layered flavors and textures.
- Coconut Ice Cream: A creamy scoop of coconut ice cream introduces a refreshing twist, perfect for a tropical vibe alongside your mochi.
- Fruit-Infused Sparkling Water: This effervescent drink adds a light, refreshing lift to your dessert, enhancing the experience without overpowering the mochi’s delicate flavor.
- Sesame Cookies: Crunchy sesame cookies offer a delightful contrast, with nutty flavors that beautifully harmonize with the milky notes of the mochi.
- Honey Drizzle: A touch of honey over the mochi adds an extra sweetness, encouraging an extra layer of indulgence.
- Citrus Salad: A light salad of citrus fruits can cleanse the palate and add a zesty touch that complements the mochi’s rich texture.
- Chilled Mint Tea: The cooling mint notes provide a refreshing pairing that lightens the overall experience, perfect for warm afternoons or a brunch spread.
Make Ahead Options
These delightful Milk Mochi are perfect for meal prep enthusiasts! You can prepare the mochi dough up to 24 hours in advance by following the first five steps of the recipe. After kneading, simply wrap the dough in plastic wrap and refrigerate it to maintain its freshness and prevent drying out. When you’re ready to serve, let it come to room temperature, then roll and cut the dough into shapes. Finish by coating the pieces in roasted soybean flour for that nutty contrast that everyone loves. This way, you can enjoy homemade milk mochi with minimal effort during your busy week!
Milk Mochi Recipe Variations
Get creative with this milk mochi recipe and discover delightful twists to suit your taste preferences!
-
Dairy-Free: Substitute whole milk with almond, coconut, or oat milk for a delicious dairy-free alternative.
-
Flavor Boost: Add 1-2 tablespoons of matcha powder to the base for a unique green tea flavor; it’s refreshing and beautiful to look at!
-
Nutty Delight: Incorporate finely chopped nuts like pistachios or walnuts into the dough for extra crunch and richness.
-
Fruit Fusion: Mix in strained fruit puree such as mango or strawberry for a fruity twist. This adds vibrant flavors and a pop of color!
-
Sweetener Swap: For a low-sugar option, switch regular sugar with coconut sugar or a sugar alternative to maintain sweetness without the calories.
-
Chocolatey Indulgence: Stir in cocoa powder for a chocolate version; consider filling them with ganache for a decadent surprise inside.
Lastly, if you’re interested in perfecting your dessert game, explore how to make traditional Japanese desserts or get inspired by more innovative mochi ideas.
How to Store and Freeze Milk Mochi
Room Temperature: Keep milk mochi in an airtight container at room temperature for up to 3 days. This will preserve its soft, chewy texture while keeping it accessible for snack cravings.
Fridge: For longer storage, refrigerate your milk mochi in an airtight container for up to a week. Note that while it will remain safe to eat, the texture may become slightly firmer when chilled.
Freezer: If you want to extend its shelf life, freeze milk mochi for up to 1 month. Wrap each piece in plastic wrap before placing them in a freezer bag to prevent freezer burn.
Reheating: To enjoy them again, let the frozen pieces thaw at room temperature or microwave for a few seconds until warm and chewy.
Milk Mochi Recipe FAQs
What kind of glutinous rice flour should I use?
Absolutely! For the best results, use sweet glutinous rice flour, which is essential for achieving that chewy texture. You can also experiment with refined glutinous rice flour for a smoother finish. Just avoid regular rice flour, as it won’t provide the same delightful chew.
How should I store leftover milk mochi?
For optimal freshness, store your milk mochi in an airtight container at room temperature for up to 3 days. If you’d like to keep it longer, refrigeration is an option, and it should last up to a week. Just remember that refrigerating can slightly alter the texture, making it firmer, but it will still be delicious!
Can I freeze milk mochi for later?
Yes, you can freeze milk mochi! To do this, wrap each piece in plastic wrap to prevent freezer burn, then place them in a freezer-safe bag. They’ll last for up to 3 months. When you’re ready to enjoy, simply let them thaw at room temperature or warm them in the microwave for a few seconds to regain that lovely chewy texture.
What should I do if my mochi is too sticky?
Very! If you find your mochi is too sticky during the shaping process, don’t panic. Simply dust your hands and the work surface with extra glutinous rice flour to help manage the stickiness. If things still feel unmanageable, consider letting the dough cool a bit longer before shaping. A little patience goes a long way!
Are there any dietary considerations I should be aware of?
For those who are gluten-free, this milk mochi recipe is a fantastic option as it solely uses glutinous rice flour, which is naturally gluten-free. If you’re concerned about allergies, check the labels of your ingredients to ensure there are no cross-contamination issues with gluten. Additionally, feel free to substitute whole milk with dairy-free options like almond or oat milk if you prefer to make it vegan!
Creamy Milk Mochi Recipe: A Sweet Comforting Delight
Ingredients
Equipment
Method
- In a large mixing bowl, combine glutinous rice flour, cornstarch, sugar, corn oil, and whole milk. Whisk until smooth.
- (Optional) Strain the mixture through a fine sieve for a smoother consistency.
- Pour the mixture into a non-stick pan and cook over low heat for 10-15 minutes, stirring until thickened.
- Transfer the mixture to a surface or bowl to cool slightly, then knead for about 5 minutes until smooth.
- Roll the dough into a strip and cut it into desired shapes, using extra glutinous rice flour to prevent sticking.
- Roll each piece in roasted soybean flour to coat, ensuring all sides are covered.
Leave a Reply