
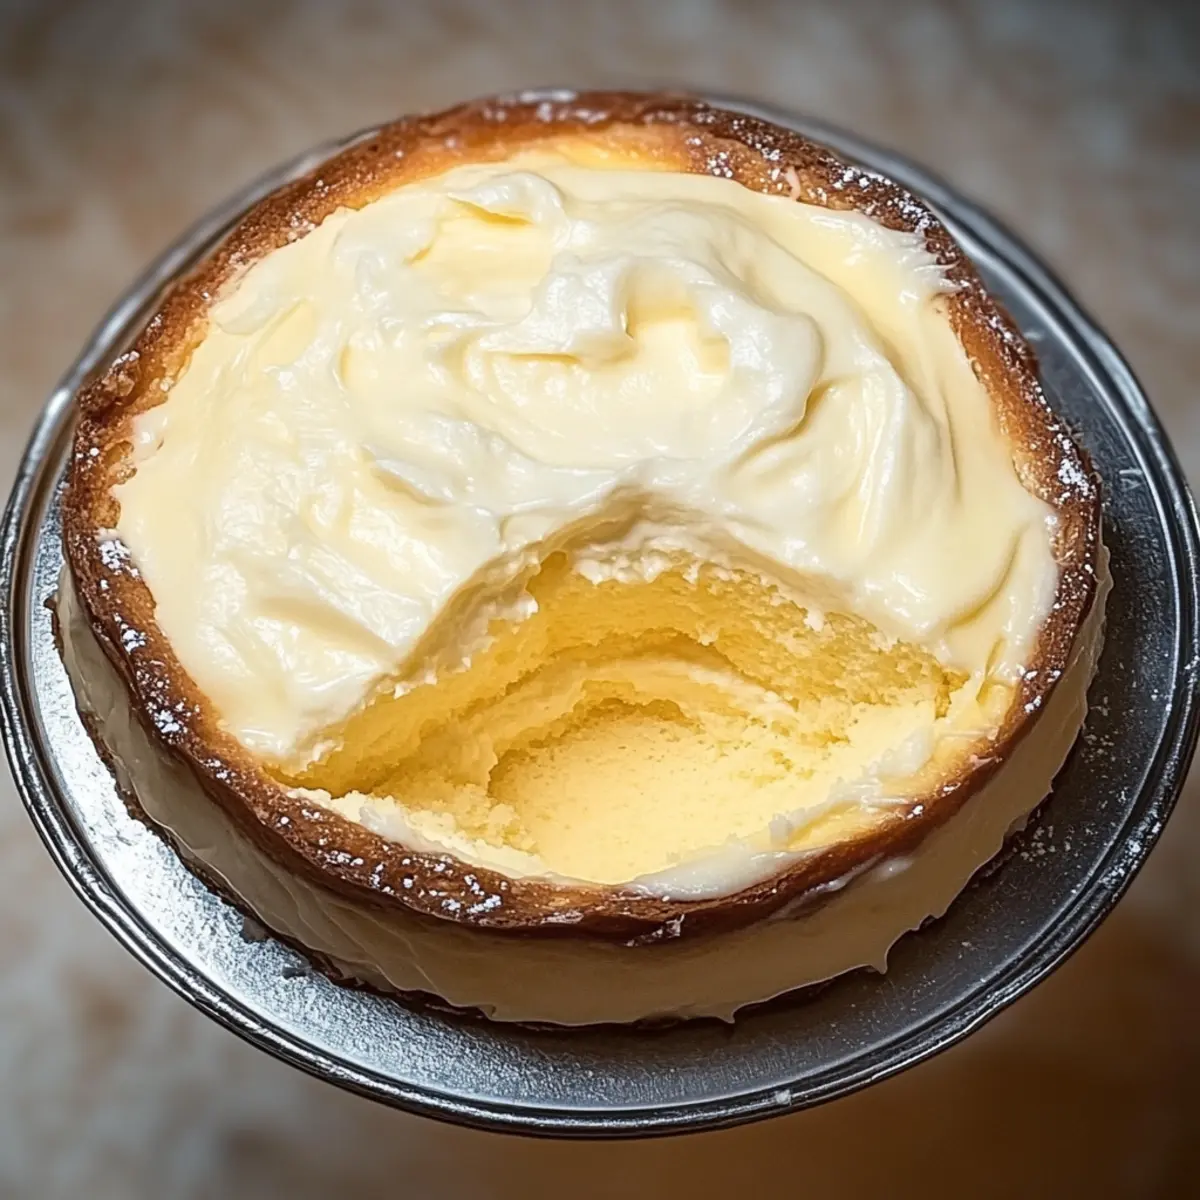
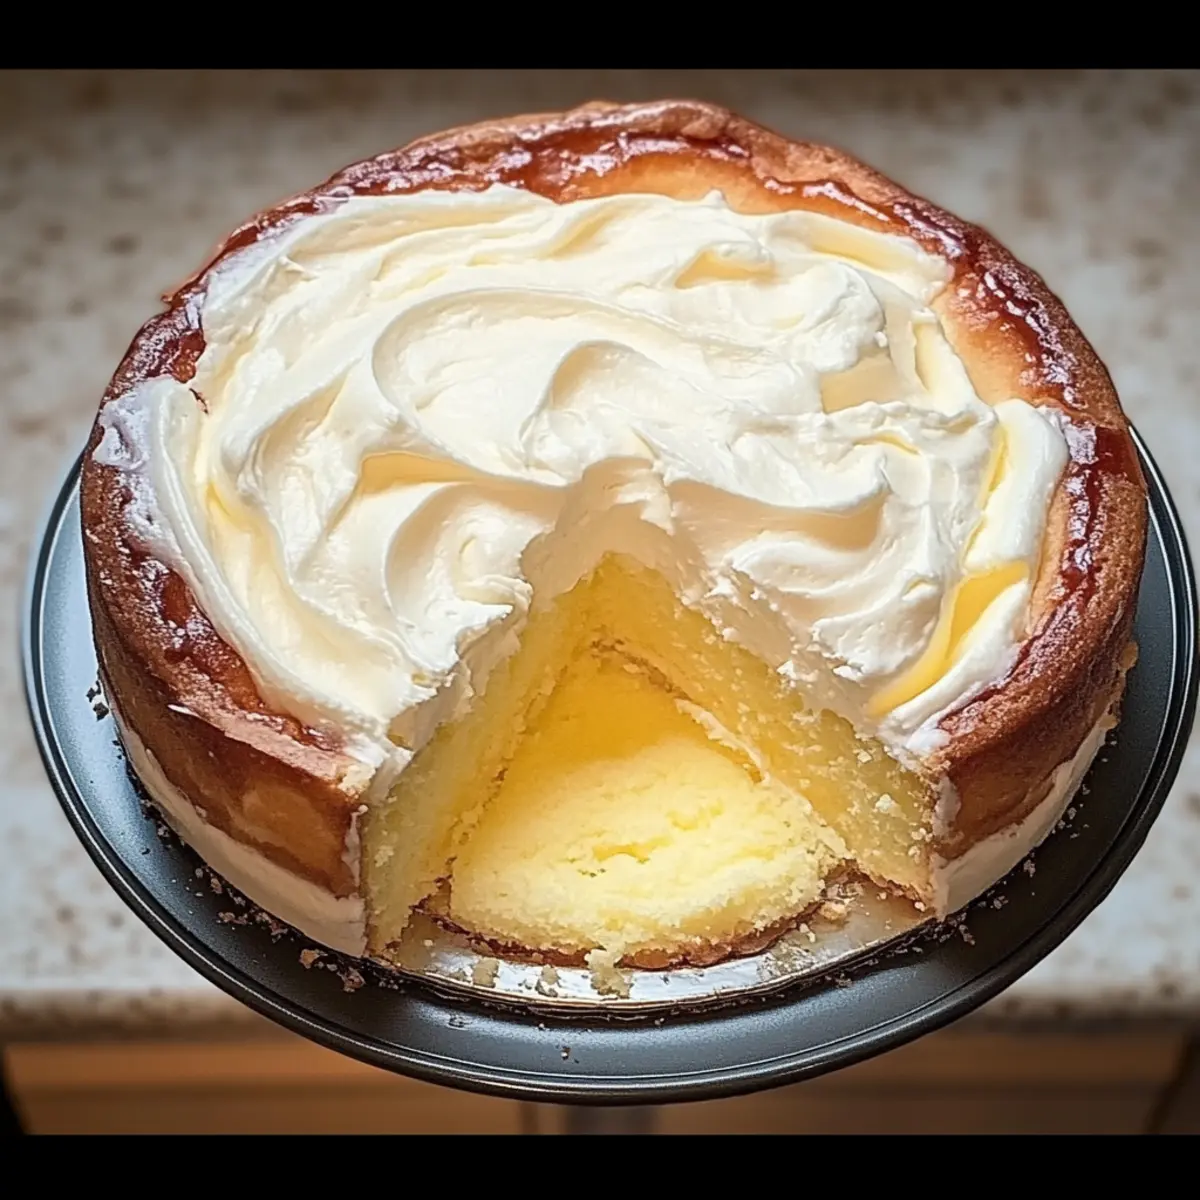
As the aroma of freshly baked goods wafted through my kitchen, I couldn’t help but recall the recipe my grandmother used to make—the “Melt-in-Your-Mouth Cake.” This Polish-inspired delight features wonderfully soft, buttery layers that are perfectly complemented by a rich, creamy filling, creating a dessert that’s not just a feast for the senses, but also a heartfelt gesture of love. With its quick preparation and affordability, this cake is perfect for holiday gatherings or cozy family dinners. Each slice offers a blissful escape from the everyday hustle, inviting you to linger a little longer over your dessert. Ready to bring a touch of tradition to your table? Let’s dive into this deliciously simple recipe!
Why Will You Adore This Cake?
Affordability: Enjoy an indulgent dessert without breaking the bank—perfect for budget-friendly celebrations.
Quick Preparation: This recipe is straightforward and doesn’t require any advanced baking skills, making it accessible for everyone.
Versatile Delight: Ideal for any occasion—from festive holidays to everyday meals—this cake is sure to impress your guests.
Crowd-Pleasing Taste: With its soft, melt-in-your-mouth texture and creamy filling, each bite feels like a luxurious treat that everyone will love.
Explore more affordable and delightful desserts like this Polish classic, and bring joy to your table!
Melt-in-Your-Mouth Cake Ingredients
• Don’t forget the double layers of deliciousness!
For the Dough
- Butter (80 grams) – Provides richness and moisture for the dough; substitute with margarine for a dairy-free option.
- Milk (100 ml) – Adds creaminess; use almond or oat milk for lactose intolerance.
- Water (100 ml) – Hydrates the dough; replace with milk for added richness.
- Salt (½ teaspoon) – Enhances sweetness and balances flavor.
- Flour (500 grams) – The main structure-building agent; all-purpose flour is essential for the right texture.
- Baking Powder (1 teaspoon) – Acts as a leavening agent for a light, airy cake.
- Eggs (4, large) – Provide moisture, richness, and help bind the dough; substitutes may not yield the same results.
- Sugar (150 grams) – Sweetens the cream and adds structure; can be replaced with a sugar alternative for a low-calorie version.
For the Cream Filling
- Eggs (2, large) – A vital ingredient for a rich cream; using the right eggs ensures a creamy texture.
- Sugar (100 grams) – Sweetens the filling while contributing to a thicker texture; can use a sugar substitute if desired.
- Flour (2 tablespoons) – Thickens the cream; crucial for achieving the right consistency.
- Milk (300 ml) – Provides creaminess to the filling; ensure it’s fresh for the best flavor.
- Butter (100 grams) – Adds richness and creaminess to the filling; always start with softened butter for easy blending.
Enjoy crafting your Melt-in-Your-Mouth Cake and filling your home with its delightful aroma!
Step‑by‑Step Instructions for Melt-in-Your-Mouth Cake
Step 1: Prepare the Dough
Melt 80 grams of butter in a saucepan over medium heat, then stir in 100 ml of milk, 100 ml of water, and ½ teaspoon of salt until combined. In a separate bowl, whisk together 500 grams of flour and 1 teaspoon of baking powder. Reduce heat and gradually add the dry mixture to the pan, stirring until the dough forms a smooth ball that pulls away from the edges. Let it cool slightly, then add 4 large eggs one at a time, mixing until smooth and sticky.
Step 2: Bake the Layers
Preheat your oven to 400°F (200°C) and line a 25cm round baking pan with parchment paper. Divide the dough into two equal portions and spread each portion evenly in the prepared pan. Bake for 20 minutes, or until the tops are golden and a toothpick inserted comes out clean. Once baked, remove the layers from the oven and let them cool completely on a wire rack before assembly.
Step 3: Make the Cream Filling
In a medium-sized saucepan, beat 2 large eggs and 100 grams of sugar together until frothy. Gradually mix in 2 tablespoons of flour, stirring continuously until well combined. Slowly add in 300 ml of milk while whisking to prevent lumps. Cook over medium heat, stirring constantly until the mixture thickens, resembling a creamy custard. Once thickened, cover it and allow it to cool completely.
Step 4: Blend the Filling
Once the cream filling has cooled, beat 100 grams of softened butter in a mixer until light and fluffy. Gradually incorporate the cooled cream filling, blending until the mixture is smooth and creamy. This will be the delightful filling that enhances your Melt-in-Your-Mouth Cake, so ensure it’s well combined without lumps.
Step 5: Assemble the Cake
Take one of the cooled cake layers and spread half of the cream filling evenly over the top. Gently place the second cake layer on top, then spread the remaining cream filling over the top and sides of the cake. This creates a beautiful layer of the creamy filling that complements the buttery cake layers perfectly.
Step 6: Refrigerate and Serve
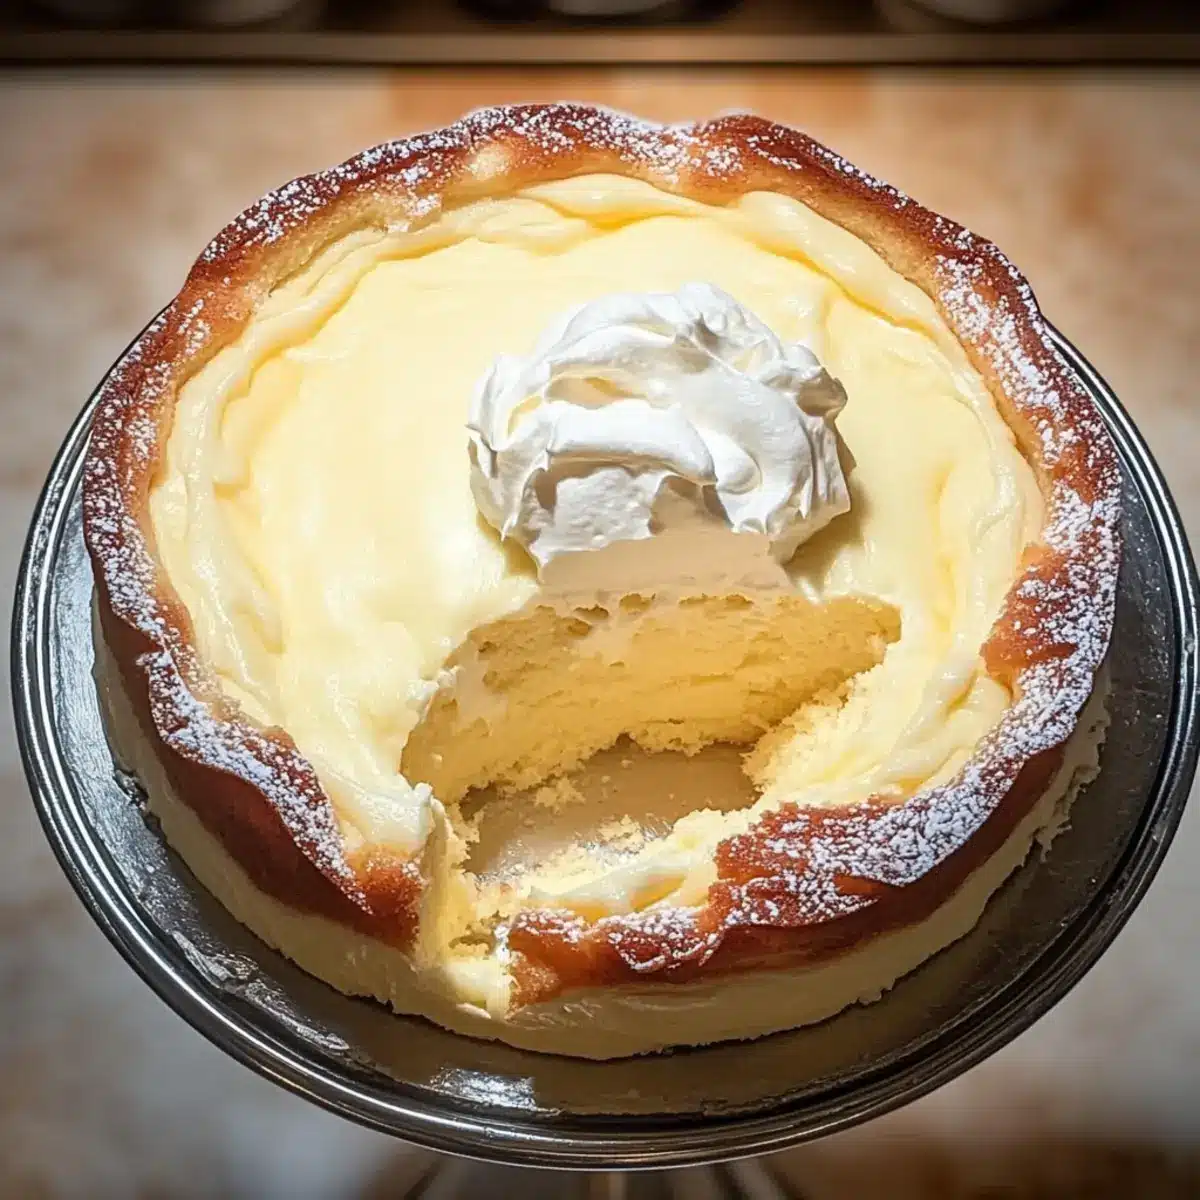
Cover the assembled cake with plastic wrap and refrigerate for at least two hours, allowing the flavors to meld and the filling to set. Prior to serving, dust the top with icing sugar or garnishes of your choice. Slice into generous pieces and savor the delightful tastes of your Melt-in-Your-Mouth Cake together with loved ones.
Melt-in-Your-Mouth Cake Variations
Feel free to get creative with this delightful cake and make it your own with these fun twists!
-
Gluten-Free: Use a gluten-free flour blend to make this dessert accessible for those with gluten sensitivities. Just ensure the blend contains xanthan gum for structure.
-
Dairy-Free: Substitute butter with coconut oil and replace milk with almond or oat milk for a creamy, dairy-free delight. The coconut oil will add a subtle flavor that works beautifully!
-
Enhanced Flavor: Add a splash of vanilla extract or a teaspoon of almond extract to the cream filling for a delightful flavor boost. It pairs exceptionally well with the buttery cake layers.
-
Fruit-Filled Delight: Incorporate fresh berries, such as raspberries or sliced strawberries, between the layers or as a topping to brighten up the flavors. The tartness of the fruit creates a wonderful contrast with the creaminess.
-
Chocolate Lovers: Mix cocoa powder into half of the cream filling for a decadent chocolate twist. This will delight any chocolate lover and create a rich contrast in flavors.
-
Nutty Texture: Fold in finely chopped nuts, such as walnuts or almonds, into the cream filling for added texture and a delightful crunch. It creates a nice balance with the soft cake layers.
-
Spiced Version: Add a teaspoon of cinnamon or pumpkin spice to the dough for a warming twist, making it perfect for autumn or holiday celebrations. This little change can transform the cake into a seasonal favorite!
-
Layered Elegance: Create a tiered cake by doubling the recipe and stacking more layers. It’s a show-stopper for special occasions! And remember, presentation is key, so take your time while decorating.
As you explore these variations, you’re bound to discover a new favorite. Don’t forget to check out more divine cake ideas for your next gathering and let the baking adventure continue!
Make Ahead Options
These Melt-in-Your-Mouth Cakes are perfect for busy home cooks looking to save time! You can prepare the cake layers and the cream filling up to 24 hours in advance. Simply bake the layers, let them cool completely, then wrap them tightly in plastic wrap and refrigerate. For the cream filling, after cooking and cooling, store it in an airtight container in the fridge. When you’re ready to serve, assemble the cake by layering it with the filling, allowing it to sit in the refrigerator for at least two hours to set. This way, you can enjoy a luscious dessert without the last-minute rush, ensuring each bite remains just as delicious!
How to Store and Freeze Melt-in-Your-Mouth Cake
Fridge: Keep the cake tightly covered in the refrigerator for up to 3 days to maintain its freshness and creamy texture.
Freezer: Slice the cake and wrap each piece in plastic wrap, then place them in an airtight container. It will stay fresh for up to 2 months.
Thawing: To enjoy your frozen slice, remove it from the freezer and let it thaw in the fridge overnight. This ensures the Melt-in-Your-Mouth Cake retains its delightful texture.
Reheating: If you prefer a warm dessert, microwave individual slices for about 15-20 seconds before serving—this enhances the creamy filling and cake layers beautifully.
Expert Tips for Melt-in-Your-Mouth Cake
-
Cool the Dough: Make sure to cool the dough adequately before adding eggs. This prevents any curdling and ensures a smooth consistency.
-
Temperature Check: Ensure your cake layers are completely cooled before assembly to prevent melting the cream filling. This step is crucial for a flawless presentation.
-
Parchment Paper: Use parchment paper to line your baking pan. This helps in removing the cake layers without breaking them, resulting in perfect, clean edges.
-
Cream Consistency: When making the cream filling, stir constantly to avoid lumps. A well-prepared filling enhances the overall texture of your melt-in-your-mouth cake.
-
Flavor Additions: Consider adding lemon zest or vanilla extract to the cream for an inviting twist on the classic flavor, making your cake even more irresistible.
What to Serve with Melt-in-Your-Mouth Cake?
Creating the perfect meal involves enhancing your experience with delightful pairings that make each bite more memorable.
- Fresh Berries: The bright, tart flavors of raspberries or strawberries contrast beautifully with the creamy cake, making every bite a taste sensation.
- Whipped Cream: Luxuriously fluffy, a dollop of whipped cream adds a light touch that complements the cake’s richness.
- Coffee: The deep, rich notes of a well-brewed coffee cut through the sweetness, providing a cozy complement as you savor each slice.
- Chocolate Sauce: Drizzling warm chocolate sauce over the top offers a decadent touch, elevating your dessert to new heights of indulgence.
- Vanilla Ice Cream: The cold, creamy texture of vanilla ice cream creates a harmonious balance with the warm, melt-in-your-mouth cake.
- Mint Leaves: Fresh mint leaves not only add a pop of color but also impart a refreshing contrast, enhancing the overall flavor profile.
- Custard Sauce: A smooth vanilla custard adds an extra layer of flavor, making each slice even more luscious and satisfying.
- Iced Tea: A glass of chilled iced tea, sweetened or unsweetened, provides a refreshing counterpoint to the cake’s richness and works as a palate cleanser.
- Lemon Sorbet: This light, zesty treat will cleanse your palate perfectly between bites, offering a refreshing twist to your dessert experience.

Melt-in-Your-Mouth Cake Recipe FAQs
How do I choose the right eggs for this recipe?
Choosing fresh, high-quality eggs is important for achieving the best texture and flavor in your Melt-in-Your-Mouth Cake. Look for eggs that are clean and have intact shells. If possible, choose organic or free-range eggs for a richer taste. Fresh eggs will create a fluffier filling and provide better binding for the dough.
How should I store my Melt-in-Your-Mouth Cake?
Absolutely! Keep your cake tightly covered in the refrigerator. It can stay fresh for up to 3 days. To maintain its creamy texture, use a cake dome or wrap it well with plastic wrap. Alternatively, you can place it in an airtight container to avoid any absorbed odors from other foods.
Can I freeze Melt-in-Your-Mouth Cake?
Yes, you can freeze this delightful cake! Slice it into individual pieces, wrap each slice tightly in plastic wrap, and then place them in an airtight container. The cake will stay fresh in the freezer for up to 2 months. When you’re ready to enjoy a slice, remove it from the freezer and let it thaw in the fridge overnight to keep its delightful texture.
What should I do if my cream filling is lumpy?
If you find that your cream filling is lumpy, don’t worry! Simply use a whisk or a hand mixer to blend it further until smooth. If that doesn’t work, you can strain the mixture through a fine sieve to ensure a creamy texture. Stirring frequently while cooking can also help prevent lumps from forming in the first place.
Is this cake suitable for people with allergies?
While the Melt-in-Your-Mouth Cake is vegetarian, it does contain common allergens including eggs and dairy. If you’re baking for someone with allergies, consider using egg substitutes like flaxseed meal mixed with water or commercial egg replacers, and dairy alternatives such as almond or coconut milk. Always check the labels of any substitutes for potential allergens.
Melt-in-Your-Mouth Cake: A Dreamy Polish Delight to Savor
Ingredients
Equipment
Method
- Melt 80 grams of butter in a saucepan over medium heat, then stir in 100 ml of milk, 100 ml of water, and ½ teaspoon of salt until combined.
- In a separate bowl, whisk together 500 grams of flour and 1 teaspoon of baking powder.
- Reduce heat and gradually add the dry mixture to the pan, stirring until the dough forms a smooth ball that pulls away from the edges.
- Let it cool slightly, then add 4 large eggs one at a time, mixing until smooth and sticky.
- Preheat your oven to 400°F (200°C) and line a 25cm round baking pan with parchment paper.
- Divide the dough into two equal portions and spread each portion evenly in the prepared pan.
- Bake for 20 minutes, or until the tops are golden and a toothpick inserted comes out clean.
- Once baked, remove the layers from the oven and let them cool completely on a wire rack before assembly.
- In a medium-sized saucepan, beat 2 large eggs and 100 grams of sugar together until frothy.
- Gradually mix in 2 tablespoons of flour, stirring continuously until well combined.
- Slowly add in 300 ml of milk while whisking to prevent lumps.
- Cook over medium heat, stirring constantly until the mixture thickens, resembling a creamy custard.
- Once thickened, cover it and allow it to cool completely.
- Once the cream filling has cooled, beat 100 grams of softened butter in a mixer until light and fluffy.
- Gradually incorporate the cooled cream filling, blending until the mixture is smooth and creamy.
- Take one of the cooled cake layers and spread half of the cream filling evenly over the top.
- Gently place the second cake layer on top, then spread the remaining cream filling over the top and sides of the cake.
- Cover the assembled cake with plastic wrap and refrigerate for at least two hours.
- Dust the top with icing sugar or garnishes of your choice. Slice into generous pieces and savor the delightful tastes.
Leave a Reply