
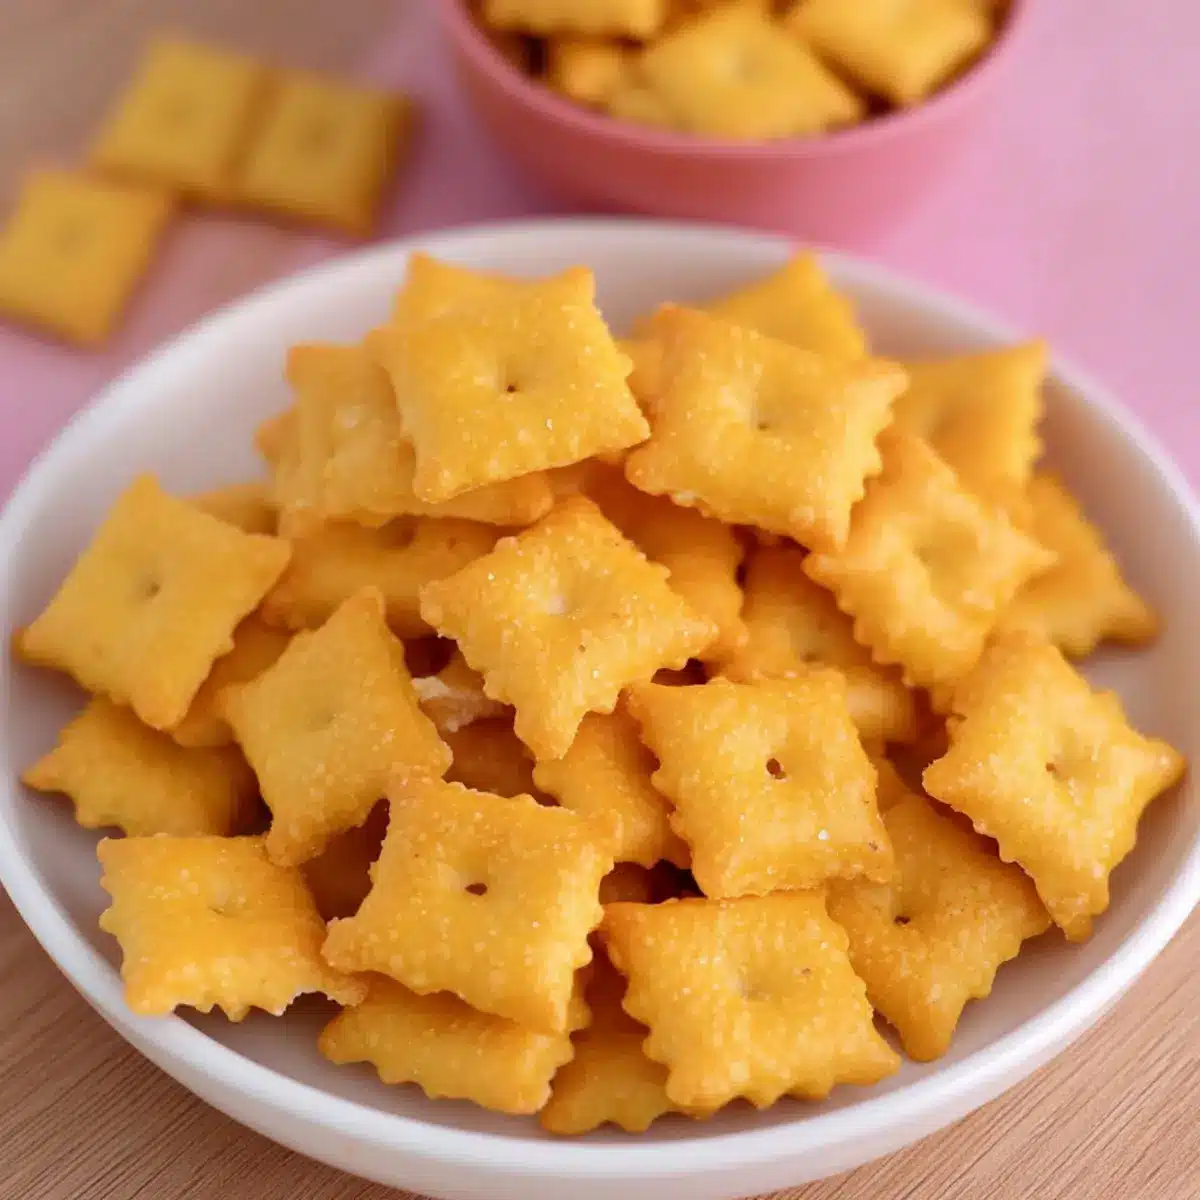
As I pulled the warm tray of golden squares from the oven, the familiar cheesy aroma wafted through my kitchen, instantly transporting me back to carefree childhood snack times. Homemade Gluten-Free Cheez-Its are not just a treat; they’re a satisfying way to reclaim control over what goes into your snacks. With the simplest ingredients like sharp cheddar cheese, gluten-free flour, and a touch of love, this recipe offers a crunchy, cheesy goodness that can beat any store-bought alternative hands down. Plus, they’re quick to whip up, making them the perfect solution for those busy days when you crave a tasty bite without the fuss. Can you imagine serving these delightful crackers at your next gathering or enjoying them solo during a quiet evening? Let’s dive into making a snack that will keep your taste buds dancing with joy!

Why Choose Homemade Cheez-Its?
Homemade Cheez-Its are a delicious alternative to store-bought snacks, ensuring you know exactly what you eat. Gluten-free options mean everyone can enjoy these cheesy delights at gatherings without worry. Quick prep time and simple ingredients make this recipe a go-to for busy weekdays. Customize flavors by mixing in different cheeses or spices, turning them into a unique snack every time! Perfect for dipping, topping soups, or just snacking solo—you’ll find these delightful little crackers impossible to resist. Enjoy the satisfaction of homemade snacks with family and friends
Gluten-Free Homemade Cheez-Its Ingredients
For the Dough
- Sharp Cheddar Cheese – Freshly shredded cheese enhances melting and flavor, ensuring that cheesy goodness in every bite.
- Gluten-Free All-Purpose Flour – Serves as the structure for the crackers; feel free to substitute with regular all-purpose or whole wheat flour if preferred.
- Cold Butter – This adds the rich flakiness of the crackers; replace with solid coconut oil for a dairy-free option.
- Cold Water – Helps to bind the dough; add it gradually until the desired consistency is achieved.
- Salt – Essential for flavor enhancement; adjust based on your preference, especially for lower-sodium options.
For the Finish
- Coarse Salt – Sprinkle on top before baking for a delightful savory crunch.
Dive into this delightful journey of creating your own Gluten-Free Homemade Cheez-Its and enjoy a treat that combines nostalgia with modern eating preferences!
Step‑by‑Step Instructions for Gluten-Free Homemade Cheez-Its
Step 1: Preheat the Oven
Begin by preheating your oven to 350°F (180°C). This ensures that once your Gluten-Free Homemade Cheez-Its are ready, they bake evenly and achieve that perfect golden-brown color. While the oven heats, prepare your work area so that everything is within reach.
Step 2: Combine Ingredients
In a food processor, add your freshly shredded sharp cheddar cheese, gluten-free all-purpose flour, cold butter, and a pinch of salt. Pulse the mixture until it reaches a sandy texture, about 15–20 seconds. This process effectively blends the flavors and creates a crumbly base that will form the delightful gluten-free crackers.
Step 3: Form the Dough
Gradually add cold water, one tablespoon at a time, into the food processor while pulsing. Continue this process until the dough starts to come together, which usually takes about 1–2 minutes. You want the dough to be tacky but not overly sticky.
Step 4: Chill the Dough
Shape the dough into a disc and wrap it tightly in plastic wrap. Refrigerate the wrapped disk for at least 20 minutes so it can firm up, making it easier to roll out. This step is crucial for achieving that crispy texture in your Gluten-Free Homemade Cheez-Its.
Step 5: Roll Out the Dough
After chilling, take the dough from the fridge and place it between two parchment sheets. Using a rolling pin, roll the dough to a thickness of about ⅛ inch. Keeping it even helps the crackers bake uniformly, ensuring all pieces are perfectly crispy.
Step 6: Score the Crackers
Using a ruler as a guide, score the rolled dough into 1-inch squares with a sharp knife. This makes it easier to cut and helps them maintain shape while baking. The scoring also gives them that classic Cheez-It look that everyone loves.
Step 7: Cut and Arrange
With a pastry cutter, carefully cut the scored dough into individual squares, then transfer these to a lightly greased baking sheet lined with parchment paper. Arrange them in a single layer, allowing for some space between each piece for even baking.
Step 8: Poke and Season
Take a skewer or toothpick and poke holes in each square—this helps steam escape during baking. Sprinkle coarse salt over the top of the crackers, which enhances the flavor and gives that delightful crunch.
Step 9: Bake the Crackers
Place the baking sheet in the preheated oven and bake the Gluten-Free Homemade Cheez-Its for 14-16 minutes. Keep an eye on them, as you want them to turn slightly browned and crispy but not burnt. Enjoy the delightful smell wafting through your kitchen as they bake!
Step 10: Cool and Store
Once done, remove the baking sheet from the oven and let the crackers cool on wire racks. This cooling time helps them become even crispier. Store your homemade Cheez-Its in an airtight container at room temperature for up to two weeks, ensuring you can enjoy them whenever the craving hits!

Expert Tips for Gluten-Free Homemade Cheez-Its
-
Choose Fresh Cheese: Using freshly shredded sharp cheddar cheese ensures optimal melting and flavor, making your Gluten-Free Homemade Cheez-Its extra cheesy.
-
Watch the Dough Consistency: Add cold water gradually; the dough should be tacky but not sticky. This balance is key to achieving that perfect cracker texture.
-
Chill Properly: Don’t skip the chilling step! It helps maintain dough structure, resulting in crispiness during baking.
-
Keep an Eye on Baking Time: Bake until slightly browned, but remember that oven types vary; monitor closely as you approach the 14-minute mark to avoid burning.
-
Flavor Variations: Experiment with different cheeses or spices for your Gluten-Free Homemade Cheez-Its. A dash of garlic powder or cayenne can elevate the flavor!
Gluten-Free Homemade Cheez-Its Variations
Feel free to get creative and make these delicious crackers your own with exciting twists and substitutions!
-
Gluten-Free Flour: Use gluten-free all-purpose flour for a safe and scrumptious option for those with gluten sensitivities.
-
Alternative Cheeses: Pepper Jack: Swap sharp cheddar for pepper jack cheese for a spicy kick that adds a delightful flavor dimension. You could even mix or match cheeses for a unique blend that caters to your cheese-loving heart.
-
Add Herbs: Savory Herbs: Incorporate dried herbs like rosemary or thyme into the dough for a fragrant and tasty twist. These delightful additions promise a sophisticated flavor profile that’s sure to impress at any gathering.
-
Spicy Kick: Cayenne Pepper: A pinch of cayenne pepper brings a zesty heat that can elevate your Cheez-Its; just be sure to adjust the amount based on your spice tolerance!
-
Dairy-Free Version: Plant-Based Cheese: Swap out cheddar and butter with a dairy-free cheese and coconut oil to cater to vegan and lactose-free needs. This way, everyone can enjoy a crunchy snack that aligns with their dietary preferences!
-
Whole Wheat Option: Whole Wheat Flour: For a nuttier flavor and added nutrients, substitute gluten-free all-purpose flour with whole wheat flour for an enjoyable texture and taste.
-
Seasoning Boost: Garlic Powder: Add garlic powder or onion powder to the mixture before baking for a delightful rich, savory flavor that will bring your Cheez-Its to the next level.
-
Sweet Twist: Sugar and Cinnamon: For a fun snack, consider a dessert version by adding a sprinkle of sugar and cinnamon to the dough. This unexpected combination creates a sweet and savory treat that’s perfect for munching.
Embrace the joy of experimentation in your kitchen! Once you’ve mastered the basics, consider serving your personalized Gluten-Free Homemade Cheez-Its with dips or alongside hearty soups for the perfect snack pairing.
Make Ahead Options
These Gluten-Free Homemade Cheez-Its are perfect for meal prep enthusiasts! You can prepare the dough up to 24 hours in advance. Simply follow the first three steps, then shape the dough into a disc, wrap it tightly in plastic wrap, and refrigerate. This keeps the dough fresh and easy to work with, ensuring that your crackers come out just as delicious. When you’re ready to bake, roll out the chilled dough, score it into squares, and continue with the baking instructions. You can also bake a larger batch and store them in an airtight container at room temperature for up to two weeks, making your snacking experience effortless and satisfying!
Storage Tips for Gluten-Free Homemade Cheez-Its
Room Temperature: Keep your Gluten-Free Homemade Cheez-Its in an airtight container at room temperature for up to 2 weeks to maintain freshness and crunch.
Fridge: If you prefer, store them in the fridge for extra crispness, but let them come to room temperature before enjoying for the best flavor.
Freezer: To extend shelf life, freeze the crackers in an airtight container for up to 3 months. Reheat in the oven for 5-10 minutes at 350°F (180°C) to restore crispiness.
Reheating: When reheating from frozen, ensure to let them cool on a wire rack after warming to prevent moisture buildup, keeping them deliciously crunchy!
What to Serve with Homemade Gluten-Free Cheez-Its?
Indulging in crispy, cheesy goodness is just the start; here’s how to elevate your snacking experience to new heights.
-
Creamy Hummus: This smooth dip provides a velvety contrast to the crunchy Cheez-Its, creating a delightful textural interplay that is simply irresistible.
-
Fresh Veggie Platter: Crisp carrots and celery sticks add a refreshing crunch that balances the richness of the crackers. Pairing these with a tangy dip can enhance flavor contrasts.
-
Savory Guacamole: The creamy, zesty nature of guacamole makes it a perfect partner to the cheesy bites, offering a flavor explosion in every mouthful.
-
Tomato Soup: A warm bowl of rich, hearty tomato soup complements the Cheez-Its beautifully. The melt-in-your-mouth crackers make for a delightful accompaniment, perfect for dipping.
-
Charcuterie Board: Nestle your Cheez-Its among cured meats, cheeses, and olives for a truly gourmet snacking experience. This variety keeps your taste buds excited!
-
Sparkling Water: A splash of citrus-flavored sparkling water cleanses the palate, leaving a refreshing finish that pairs beautifully with the saltiness of the crackers.
-
Chocolate-Covered Almonds: For a sweet contrast, enjoy these crunchy snacks alongside your Cheez-Its. The sweetness of the chocolate creates a lovely flavor balance.
-
Craft Beer: An ice-cold craft beer is a delightful drink pairing that enhances the cheesy flavor of the crackers and makes for the ultimate snack enjoyment!
-
Fruit Salsa: A medley of sweet and spicy flavors from fruit salsa can surprise your palate, enhancing your experience with the savory crackers.
-
Mini Quiches: These little bites bring another layer of flavor to your snacking experience, providing warmth and a satisfying fullness to counteract the Cheez-Its’ crunch.
Gluten-Free Homemade Cheez-Its Recipe FAQs
How do I choose the best cheese for my Cheez-Its?
Absolutely! For the best flavor in your Gluten-Free Homemade Cheez-Its, I recommend using freshly shredded sharp cheddar cheese. Freshly shredded cheese melts better and releases a deeper, cheesier flavor compared to pre-packaged shredded cheese, which often contains anti-caking agents. You can also experiment with other cheeses like pepper jack, gouda, or even a mix for varied flavor profiles!
What’s the best way to store my homemade Cheez-Its?
Very! Store your Gluten-Free Homemade Cheez-Its in an airtight container at room temperature for up to 2 weeks. This preserves their crunch and freshness. If you prefer, you can also refrigerate them, but allow them to come to room temperature before enjoying for the best crunch!
Can I freeze my Cheez-Its, and if so, how?
Absolutely! To freeze your Gluten-Free Homemade Cheez-Its, place them in an airtight container or a resealable freezer bag. They can be frozen for up to 3 months. To reheat, preheat your oven to 350°F (180°C) and bake for about 5-10 minutes. This will help restore their crispiness—don’t skip this step as it makes all the difference!
What should I do if my dough is too sticky?
No problem! If you find your dough is too sticky while making your Gluten-Free Homemade Cheez-Its, gradually add a little more gluten-free flour, about 1 tablespoon at a time. Pulse the mixture until the dough comes together more easily. Ensure you add only what’s necessary, as you want the dough to remain tacky but manageable.
Are there any allergies I should consider with this recipe?
Very! This recipe contains cheese and butter, which may not be suitable for those with dairy allergies or lactose intolerance. If you need a dairy-free alternative, you can substitute the cheddar cheese with a plant-based cheese and replace butter with solid coconut oil. Additionally, always check your gluten-free flour to ensure it’s processed in a gluten-free facility if you have celiac disease or gluten sensitivity.
Gluten-Free Homemade Cheez-Its: Crunchy, Cheesy Snack Bliss
Ingredients
Equipment
Method
- Preheat your oven to 350°F (180°C).
- In a food processor, combine shredded cheddar cheese, gluten-free all-purpose flour, cold butter, and a pinch of salt. Pulse until sandy.
- Gradually add cold water one tablespoon at a time while pulsing until the dough starts to come together.
- Shape the dough into a disc, wrap in plastic wrap, and refrigerate for at least 20 minutes.
- Roll the chilled dough between two parchment sheets to about ⅛ inch thickness.
- Score the dough into 1-inch squares using a ruler as a guide.
- Cut the scored dough into individual squares with a pastry cutter and place on a prepared baking sheet.
- Poke holes in each square and sprinkle with coarse salt.
- Bake in the preheated oven for 14-16 minutes until browned and crispy.
- Allow to cool on wire racks before storing.
Leave a Reply