
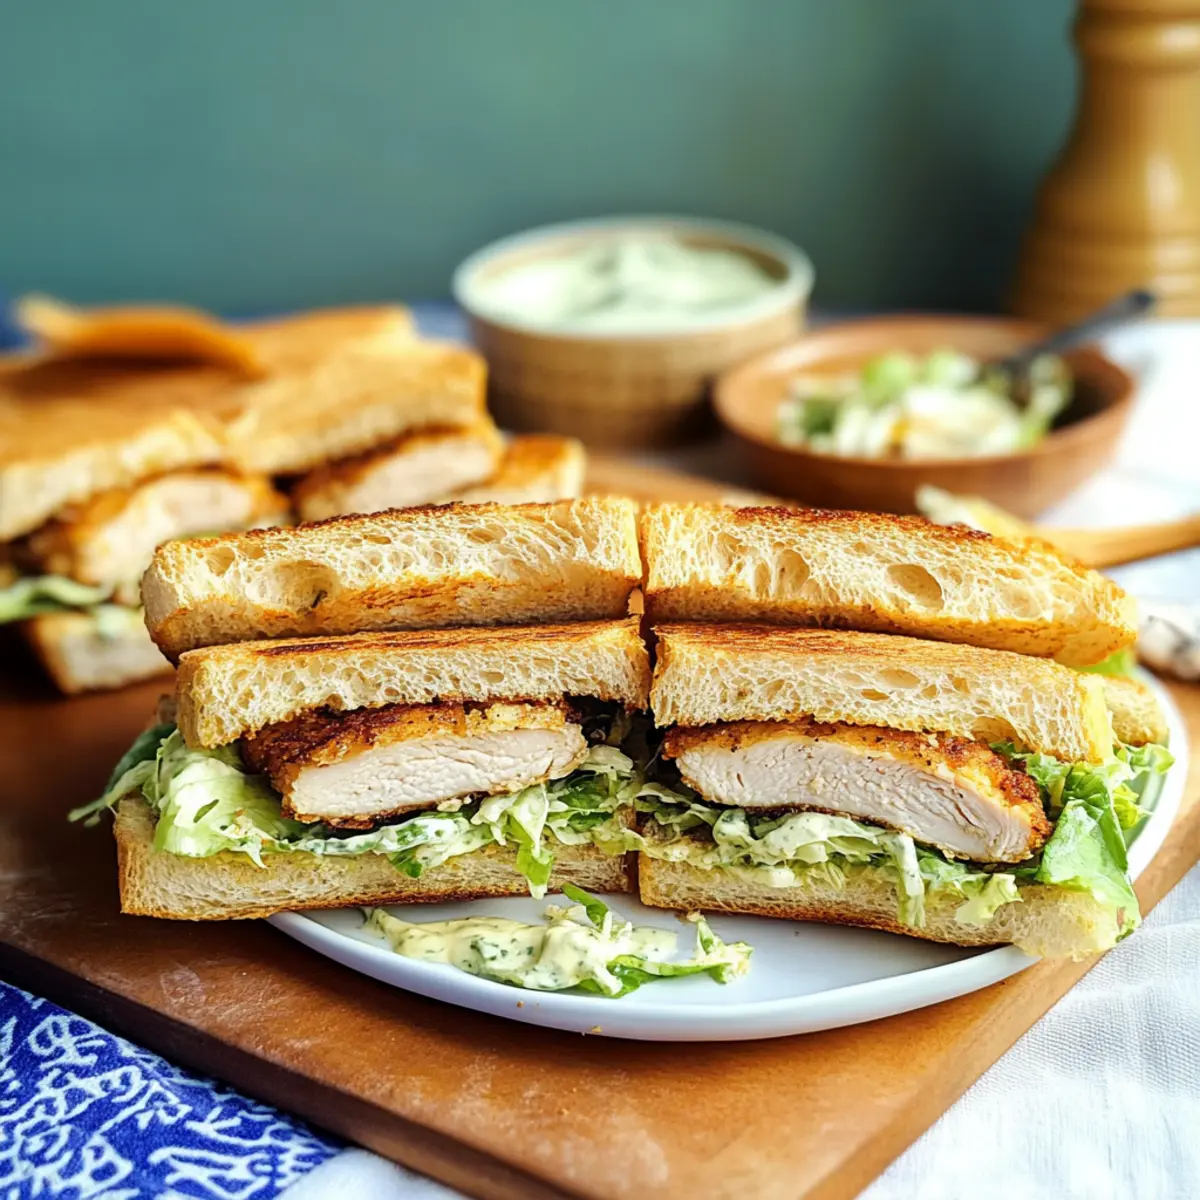
As I took a bite of my first Chicken Caesar Salad Sandwich, I couldn’t help but smile at how effortlessly it married the best of both worlds. Imagine the rich, creamy dressing of a classic Caesar salad transformed into a convenient, handheld delight. This portable meal is not only quick and easy to whip up, but it also brings the satisfying crunch of crispy chicken cutlets and fresh Romaine all nestled between toasty baguette slices. Perfect for a busy lunch or a light dinner, these sandwiches can be enjoyed warm, at room temperature, or cold, making them an ideal make-ahead option for any occasion. Ready to elevate your lunch game? Let’s dive into this delicious recipe!
Why is this Chicken Caesar Sandwich a must-try?
Deliciously Portable: These Chicken Caesar Salad Sandwiches offer all the flavor of the classic dish, perfectly packed for on-the-go enjoyment.
Quick Prep Time: With minimal cooking and prep time, this recipe is a lifesaver for busy weekdays or spontaneous gatherings.
Flavorful Layers: The combination of creamy dressing, crispy chicken, and crunchy Romaine enveloped in toasted baguettes makes every bite a delightful experience.
Customizable Options: Feel free to mix and match ingredients—add roasted veggies or switch the chicken for shrimp for a fun twist!
Crowd-Pleasing Appeal: Whether served at a picnic or an easy weeknight dinner, they’re sure to please everyone, making it a go-to favorite!
You’ll love how effortlessly these sandwiches blend familiar flavors. Check out our suggestions on make-ahead tips to keep them fresh and flavorful!
Chicken Caesar Sandwich Ingredients
For the Dressing
• Garlic cloves – Adds depth and flavor; substitute with garlic powder for a milder taste.
• Anchovy fillets – Provides umami richness; can be replaced with capers or omitted for a fish-free option.
• Fresh squeezed lemon juice – Brightens the dressing; vinegar works in a pinch.
• Dijon mustard – Adds tanginess; optional for those avoiding mustard.
• Worcestershire sauce – Enhances complexity; omit for strict vegetarians or use a vegan alternative.
• Mayonnaise – Serves as the creamy base; Greek yogurt can substitute for a lighter option.
• Grated Parmesan cheese – Contributes richness to the dressing; nutritional yeast can be used for a dairy-free choice.
• Kosher salt – Essential for seasoning; adjust based on dietary needs.
• Crushed black pepper – Provides a hint of spice; white pepper can be an alternative.
For the Chicken
• Thin sliced chicken cutlets – This is your main protein; swap with baked tofu or tempeh for a vegetarian version.
• All-purpose flour – Used for dredging; gluten-free flour is a suitable substitute.
• Large eggs – Binds the breading; a flaxseed egg works for a vegan option.
• Italian bread crumbs – Creates a crispy coating; gluten-free bread crumbs can be used if needed.
• Olive oil – For frying; substitute with avocado oil for a higher smoke point.
For the Sandwich Assembly
• Shredded Romaine lettuce – For crunch and freshness; any salad green can work in this Chicken Caesar Sandwich.
• Grated Parmesan – Perfect for topping; can be omitted for a dairy-free version.
• Large baguette, cut into 4 pieces – The base of the sandwich; use any crusty bread you love.
• Large garlic clove – For rubbing on toasted bread, enhancing flavor.
Embrace the flavors of this Chicken Caesar Sandwich and enjoy a meal that’s as satisfying as it is simple to prepare!
Step‑by‑Step Instructions for Portable Chicken Caesar Salad Sandwiches
Step 1: Prepare Dressing
Start by mincing the garlic cloves and combining them with anchovy fillets, fresh squeezed lemon juice, Dijon mustard, and Worcestershire sauce in a medium bowl. Whisk these ingredients together until smooth, then gradually stir in the mayonnaise and grated Parmesan cheese. Season with Kosher salt and black pepper. Cover the bowl and refrigerate the dressing for at least 30 minutes to meld the flavors for your Chicken Caesar Sandwich.
Step 2: Dredge Chicken
While the dressing chills, season the thin sliced chicken cutlets with salt and pepper to taste. Set up a dredging station: one plate for all-purpose flour, a bowl for the whisked eggs, and another plate for Italian bread crumbs. Dip each cutlet first into the flour, then the eggs, and finally coat them evenly with bread crumbs, making sure they’re well covered for optimum crunch.
Step 3: Cook Chicken
Heat a generous amount of olive oil in a skillet over medium heat until shimmering, about 350°F. Carefully place the breaded chicken cutlets in the skillet, frying them for about 5-8 minutes on each side until they achieve a golden brown color and are cooked through. Use a meat thermometer to ensure they reach an internal temperature of 165°F. Remove the cooked cutlets and let them drain on paper towels.
Step 4: Toast Baguette
While the chicken cooks, prepare your baguette. Cut it into four equal pieces, and split each piece lengthwise. Drizzle or brush the cut sides with olive oil, then place them under the broiler set to high for about 2-3 minutes, or until they turn a lovely golden brown. For added flavor, rub the toasted sides with a large garlic clove to infuse them with aroma.
Step 5: Assemble Sandwiches
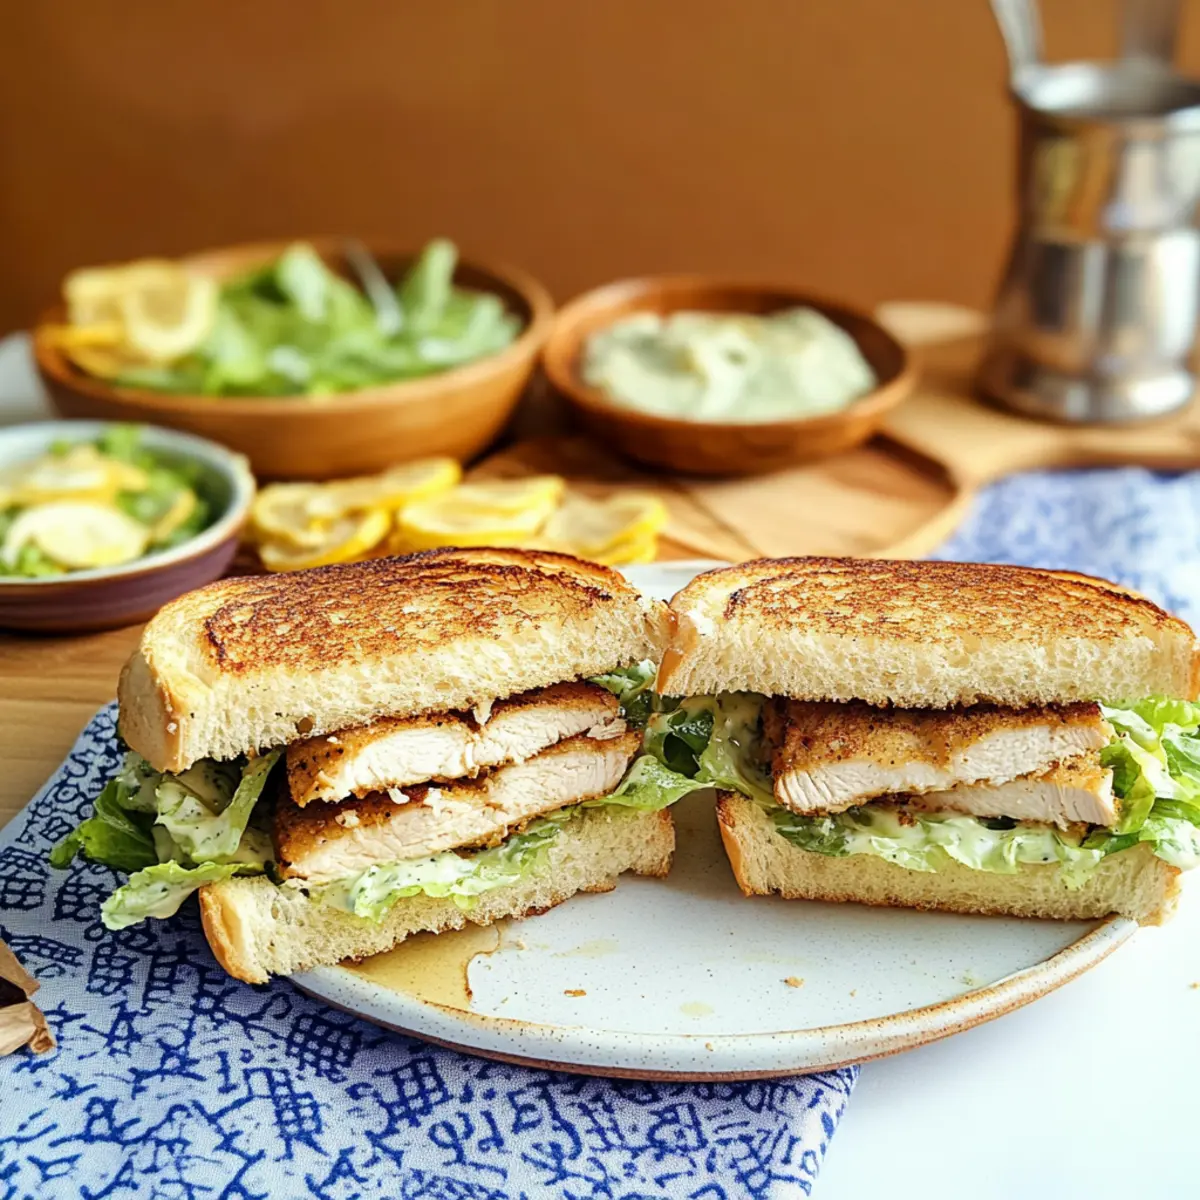
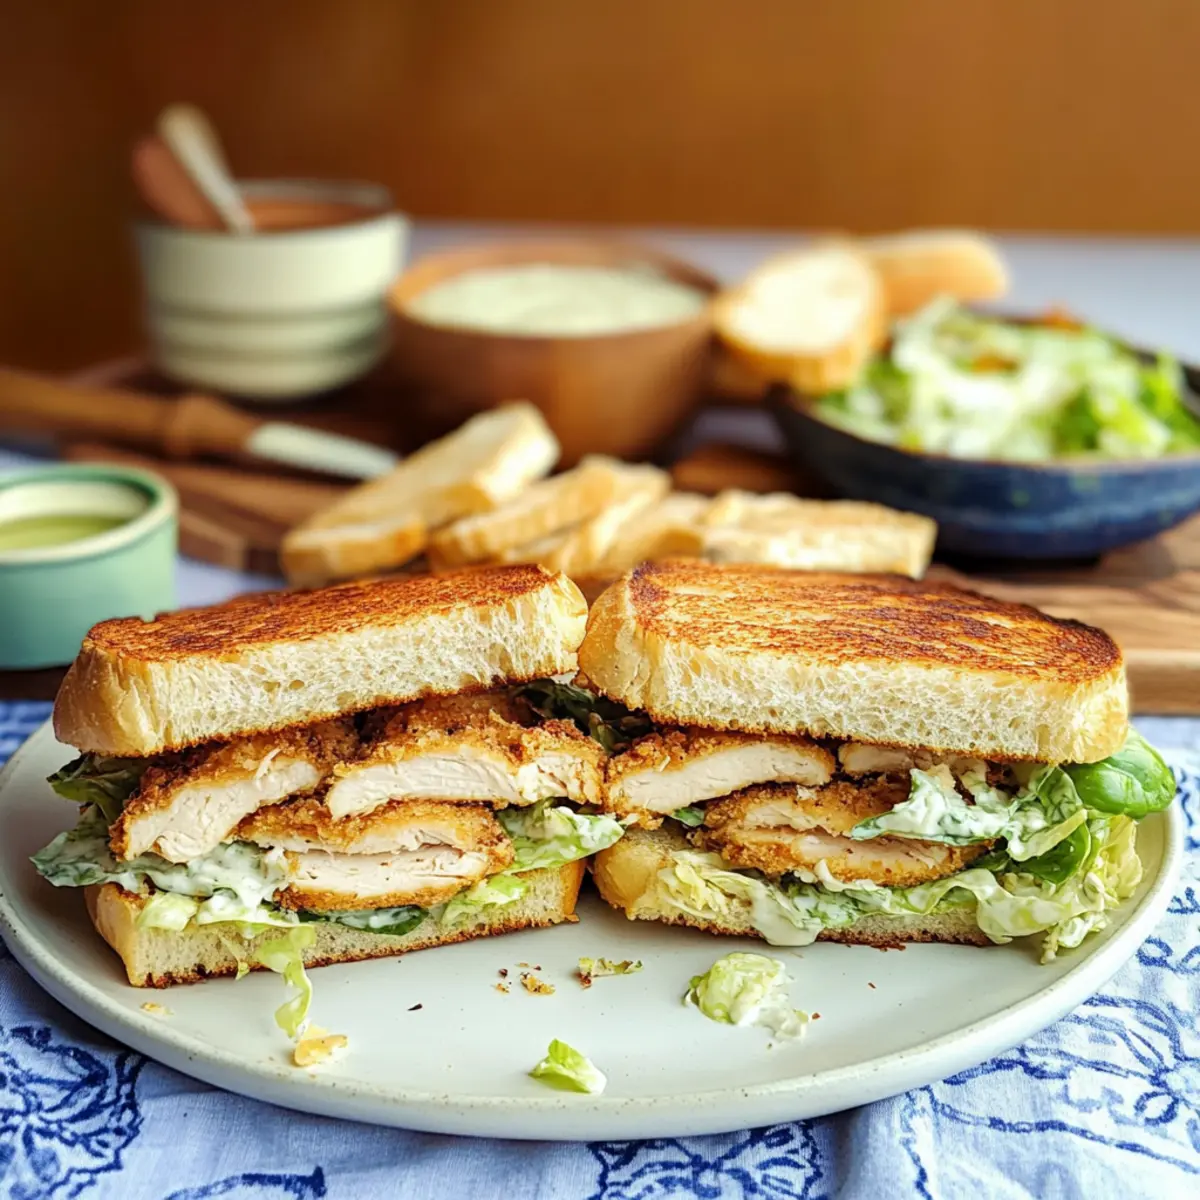
In a mixing bowl, toss the shredded Romaine lettuce with the chilled dressing and half of the grated Parmesan until well coated. Spread a generous layer of the dressing mixture on the toasted baguette. Layer the crispy chicken cutlets on one side, followed by more dressing and a sprinkle of remaining Parmesan. Close the sandwich, slice it in half, and serve immediately or wrap for later. Enjoy this delightful Chicken Caesar Sandwich!
What to Serve with Portable Chicken Caesar Salad Sandwiches
Enhance your meal experience with delightful pairings that complement every bite of your handheld classic.
-
Sweet Potato Fries: The natural sweetness and crispy texture provide a perfect contrast to the savory flavors of the sandwich.
-
Light Tomato Basil Soup: A warm, comforting bowl of soup pairs beautifully, adding a refreshing acidity that cuts through the richness.
-
Garden Salad: Tossed greens with a zesty vinaigrette will bring brightness and a crunch that harmonizes with the sandwich’s crispy elements.
-
Coleslaw: A creamy, crunchy slaw will add an exciting texture and tanginess that brightens the overall meal.
-
Fruit Salad: A vibrant mix of seasonal fruits offers a sweet and refreshing end to your dining experience.
-
Sparkling Lemonade: The effervescent citrus refreshment provides a lively accompaniment that balances the richness of the Chicken Caesar Sandwich.
-
Iced Tea with Mint: A cool, herb-infused tea acts as a soothing complement, enhancing the meal with its refreshing touch.
-
Garlic Parmesan Chips: Those crispy chips add an extra crunch while echoing the flavors in the sandwich for a delightful combo.
-
Chocolate Chip Cookies: For dessert, these warm and gooey cookies will satisfy any sweet tooth and offer a comforting finish to your meal.
Storage Tips for Chicken Caesar Sandwich
Fridge: Store assembled Chicken Caesar Sandwiches in an airtight container for up to 1 day to maintain freshness. To avoid sogginess, keep the dressing separate until ready to serve.
Freezer: For longer storage, freeze the chicken cutlets and dressing separately in airtight containers. The cutlets can be stored for up to 2 months; reheat in the oven or microwave before assembly.
Reheating: If you’ve stored the cutlets in the fridge, reheat them in an oven at 375°F for about 10 minutes or until heated through, ensuring they retain their crunch.
Room Temperature: For best flavor and texture, enjoy these sandwiches right after assembly. They can be set out for a picnic for up to 2 hours before they should be refrigerated again.
Chicken Caesar Sandwich Variations & Substitutions
Feel free to personalize these Chicken Caesar Sandwiches to suit your taste preferences or dietary needs—it’s all about creativity in the kitchen!
- Dairy-Free: Substitute the mayonnaise and cheese with a creamy avocado spread or cashew cream for a delightful dairy-free version.
- Gluten-Free: Use gluten-free bread or lettuce wraps instead of baguettes for a fresh handheld option that caters to gluten sensitivities.
- Acidity Boost: Add a splash of apple cider vinegar or a dash of pickle juice to the dressing for an extra zing!
- Protein Twist: Swap the chicken for grilled shrimp or crispy chickpeas for a fun and tasty variation.
- Herb-Enhanced: Toss in some fresh herbs like basil or parsley into the dressing for an aromatic boost.
- Crunch Factor: Add toasted nuts or seeds like pine nuts or sunflower seeds to the salad mixture for delightful crunch and nutrition.
- Spice It Up: For a spicy kick, mix in some sriracha or hot sauce to the dressing, giving your sandwich an exhilarating flavor.
- Wrap It Up: Transform this recipe into a wrap by using large flour tortillas or gluten-free wraps, perfect for on-the-go lunches.
No matter how you adjust this recipe, you’ll be enjoying a handheld version of the classic Caesar salad that’s perfect for any occasion. For more delicious meal ideas, don’t forget to check out our guide on make-ahead tips that can help you savor every bite!
Make Ahead Options
These Portable Chicken Caesar Salad Sandwiches are fantastic for meal prep enthusiasts! You can prepare the dressing and cook the chicken cutlets up to 3 days in advance. Store the dressing in an airtight container in the refrigerator and reheat the chicken cutlets before assembling. To maintain freshness, keep the shredded Romaine lettuce stored separately to prevent wilting. On the day of serving, simply spread the dressing on toasted baguette pieces, layer with the crispy chicken and lettuce, and enjoy the deliciousness just as if it were freshly made! This makes it easy to have a satisfying meal ready for busy weeknights or packed lunches.
Expert Tips for Chicken Caesar Sandwich
• Avoid Soggy Bread: Assemble the sandwiches right before serving to prevent the toasted baguette from becoming soggy.
• Cook to Perfection: Ensure your chicken reaches 165°F internally; this guarantees food safety and the best taste for your Chicken Caesar Sandwich.
• Customization Is Key: Experiment with toppings like sliced tomatoes or avocado to elevate your sandwich and suit your taste preferences.
• Make-Ahead Success: Prepare the dressing and chicken cutlets in advance, and simply assemble the sandwiches when ready to serve for a fresh meal.
• Fresh Greens Only: Use crisp Romaine lettuce or your favorite salad greens to maintain a satisfying crunch in every bite.

Chicken Caesar Sandwich Recipe FAQs
How should I select the chicken cutlets for my sandwich?
Absolutely! When choosing chicken cutlets, look for ones that are fresh, with a vibrant pink color and no dark spots or off odors. If you’re looking for convenience, pre-sliced cutlets can save time, but ensure they’re thin enough to cook quickly and evenly.
What is the best way to store leftover Chicken Caesar Sandwiches?
Very important! Store assembled Chicken Caesar Sandwiches in an airtight container in the refrigerator, where they will stay fresh for up to 1 day. To avoid the bread becoming soggy, keep the dressing separate until just before serving.
Can I freeze the chicken cutlets for later use?
Definitely! To freeze, allow the cooked chicken cutlets to cool completely. Place them in an airtight container or freezer bag, separating layers with parchment paper to avoid sticking. They can be stored in the freezer for up to 2 months. When ready to use, simply reheat in an oven at 375°F for about 10 minutes or until warmed through.
What should I do if my dressing is too thick?
If you find your dressing is thicker than desired, don’t fret! Add a little water, milk, or extra lemon juice, one tablespoon at a time, whisking until you reach your desired consistency. This will also help enhance the flavor without losing creaminess.
Are there any dietary considerations for this Chicken Caesar Sandwich?
Absolutely! To cater to various dietary needs, simply swap traditional ingredients: use gluten-free bread crumbs and flour for those with gluten intolerance, replace the mayonnaise with Greek yogurt for a lighter version, or use plant-based proteins like tempeh instead of chicken for a vegetarian option. Be sure to check for potential allergies, particularly with ingredients like anchovies and eggs.
What’s the best way to keep my lettuce crisp in the sandwiches?
To maintain crunchy Romaine in your Chicken Caesar Sandwich, assemble the sandwiches right before serving. If you’re prepping in advance, store shredded lettuce in a sealed container with a damp paper towel to help retain moisture and crunch, but keep it separate from the dressing until ready to enjoy!
Irresistible Chicken Caesar Sandwich with a Crunchy Twist
Ingredients
Equipment
Method
- Combine minced garlic, anchovy fillets, lemon juice, Dijon mustard, and Worcestershire sauce in a medium bowl. Whisk until smooth, then stir in mayonnaise and Parmesan. Season with salt and pepper. Refrigerate for at least 30 minutes.
- Season chicken cutlets with salt and pepper. Set up dredging station with flour, whisked eggs, and breadcrumbs. Dip cutlets in flour, then eggs, then breadcrumbs.
- Heat olive oil in a skillet over medium heat. Fry chicken cutlets for 5-8 minutes on each side until golden brown.
- Cut baguette into 4 pieces and split each lengthwise. Brush cut sides with olive oil and broil for 2-3 minutes until golden. Rub toasted sides with garlic.
- Toss shredded Romaine with dressing and half of the Parmesan. Spread dressing on toasted baguette, layer chicken, more dressing, and remaining Parmesan. Close sandwich, slice, and serve.
Leave a Reply