
As I stood in my kitchen, the aroma of marinated chicken sizzling in the pan whisked me away to the bustling streets of Tokyo. These Teriyaki Chicken Onigiri are more than just a meal; they deliver a delightful slice of Japanese cuisine right to your home. Perfect for any occasion, this easy-to-make recipe merges the tender juiciness of savory chicken with the comforting texture of seasoned sushi rice, ensuring they’re both a crowd-pleaser and a go-to snack. Whether you’re enjoying them at a picnic or packing them for lunch, these rice balls offer a satisfying, portable meal that’s quick to prepare. Ready to bring a little taste of Japan to your own table? Let’s dive into these delicious bites!
What Makes Chicken Onigiri So Special?
Simplicity: This recipe is incredibly easy to follow, making it perfect for both novice cooks and seasoned chefs alike.
Flavor-packed: Featuring a mouthwatering teriyaki filling, each bite bursts with the savory goodness of marinated chicken, harmonized perfectly with seasoned sushi rice.
Versatile: Customize your onigiri with unique fillings like avocado or even spicy mayo to suit your taste preferences.
Quick Preparation: In just under 30 minutes, you can whip up a delightful batch that’s ideal for snacking, picnics, or convenient meal prep!
Cultural Connection: Enjoying these traditional rice balls brings you closer to Japanese cuisine, transforming your kitchen into a vibrant culinary experience. Don’t miss out on easy variations or expert tips to enhance your onigiri game—check out our helpful suggestions for more great insights!
Chicken Onigiri Ingredients
For the Sushi Rice
• Sushi Rice – Use short-grain sushi rice for perfect stickiness; it requires 15% more water than regular rice.
• Salt – Fine salt enhances flavor; opt for this for better distribution in the rice.
• Furikake – An optional seasoning mix that adds umami flavor and texture to the rice.
For the Chicken Filling
• Boneless Skinless Chicken – This is the primary protein; drumsticks work well, but thighs or ground chicken can be substitutes.
• Soy Sauce – This marinade ingredient provides a savory base for flavor enhancement.
• Sake – Used in the marinade for tenderness; if unavailable, you can substitute it with water.
• Baking Soda – This ingredient tenderizes the chicken, helping to keep it moist during cooking.
• Cornstarch – Aids in creating a glaze when combined with the sauce.
• Mirin – Adds sweetness and depth to the teriyaki sauce.
• Brown Sugar – A sweetener for teriyaki sauce; make sure to pack it firmly for proper sweetness.
• Oil – Use nonstick oil for cooking the chicken; it will help prevent sticking.
• Minced Garlic – Adds a fragrant base to the chicken filling, enhancing the overall flavor.
For Assembly
• Nori – Seaweed sheets used for wrapping the onigiri; cut them into small rectangles for easy handling.
Bring the joy of making Chicken Onigiri into your kitchen with these fresh and flavorful ingredients!
Step‑by‑Step Instructions for Chicken Onigiri
Step 1: Prepare Sushi Rice
Begin by rinsing 4 cups of short-grain sushi rice under cold water until the water runs clear. Cook the rice according to your rice cooker instructions, adding 15% more water for optimal stickiness. Once cooked, let it cool slightly, then gently mix in a pinch of fine salt and furikake, if using, to enhance flavor. Set aside to allow the rice to reach room temperature.
Step 2: Marinate Chicken
While the rice is cooling, cut boneless skinless chicken into small, bite-sized pieces. In a mixing bowl, combine soy sauce, sake, baking soda, and cornstarch, then add the chicken to this marinade. Toss to ensure the chicken is well coated and refrigerate for at least 30 minutes to allow the flavors to permeate the meat, making it tender and flavorful.
Step 3: Make Teriyaki Sauce
In a small bowl, whisk together soy sauce, mirin, and firmly packed brown sugar until the sugar completely dissolves. This will create your savory teriyaki sauce. Set the sauce aside as you proceed to cook the chicken, ensuring it’s ready to add for a delicious glaze.
Step 4: Cook Chicken
Heat a nonstick skillet over medium heat and add a splash of oil. Once hot, add the marinated chicken pieces, cooking for 2-3 minutes until they are fully cooked and no longer pink. As the chicken nears completion, stir in minced garlic and sauté for an additional 30 seconds, then pour in the teriyaki sauce, stirring until it thickens and glazes the chicken.
Step 5: Shape Onigiri
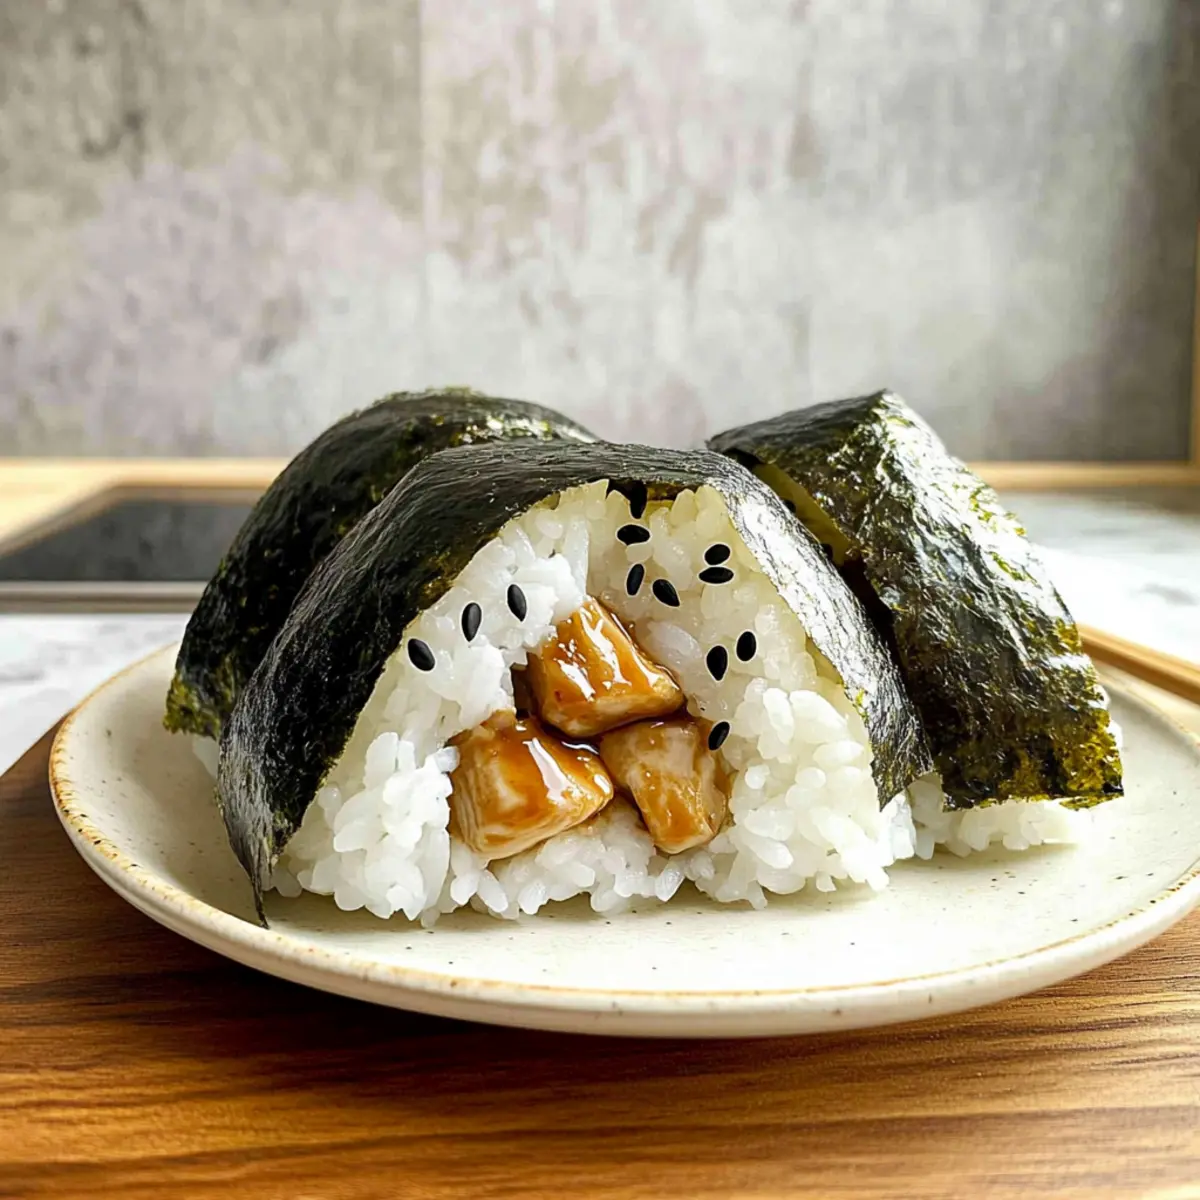
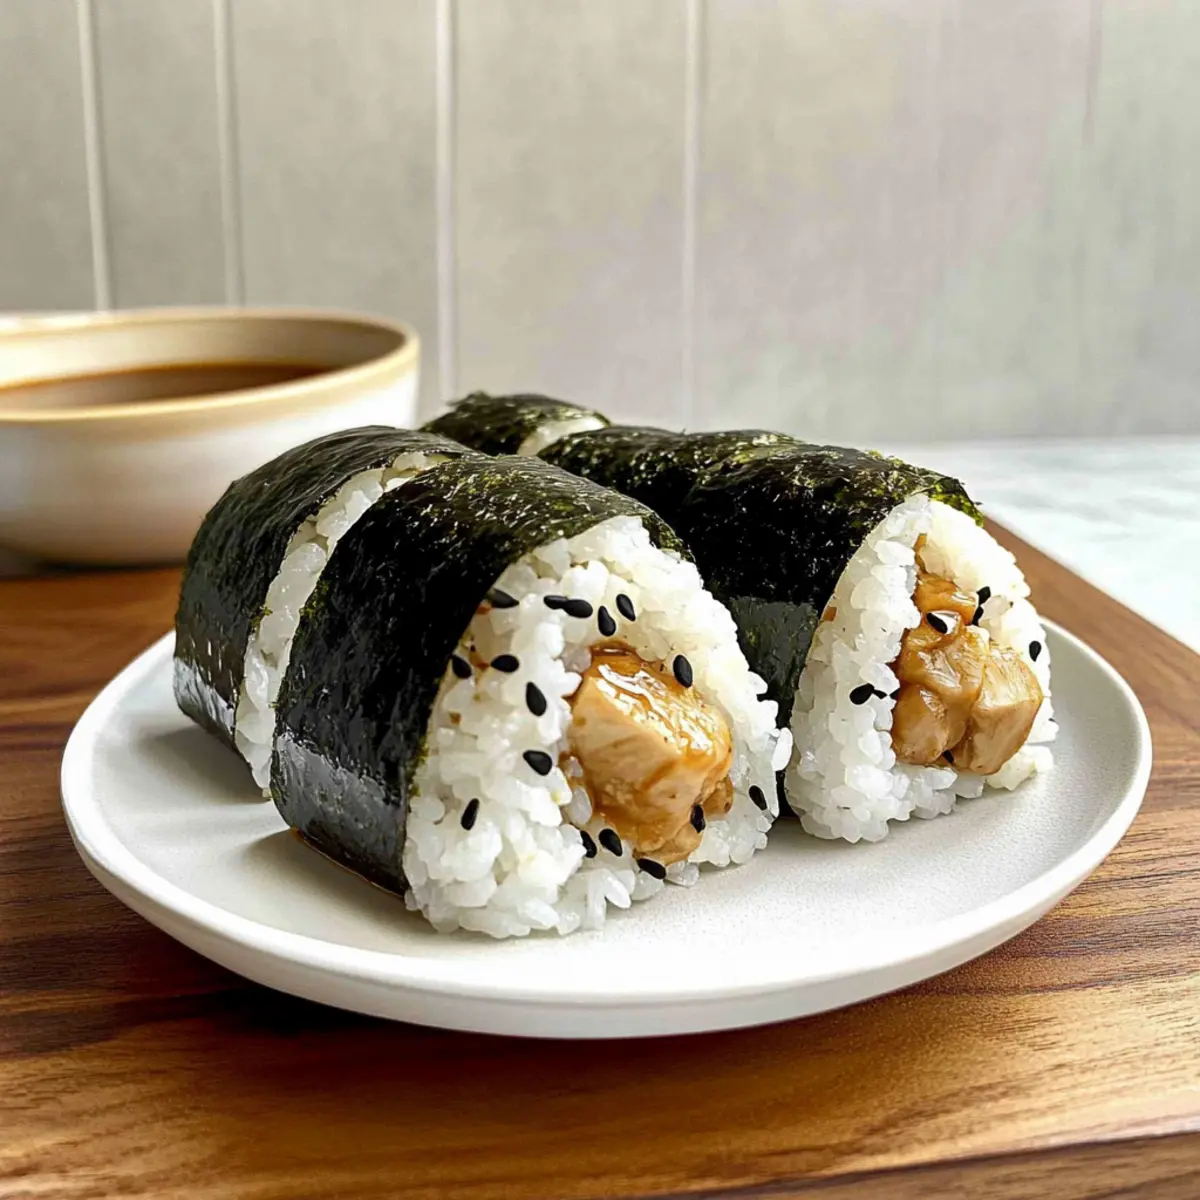
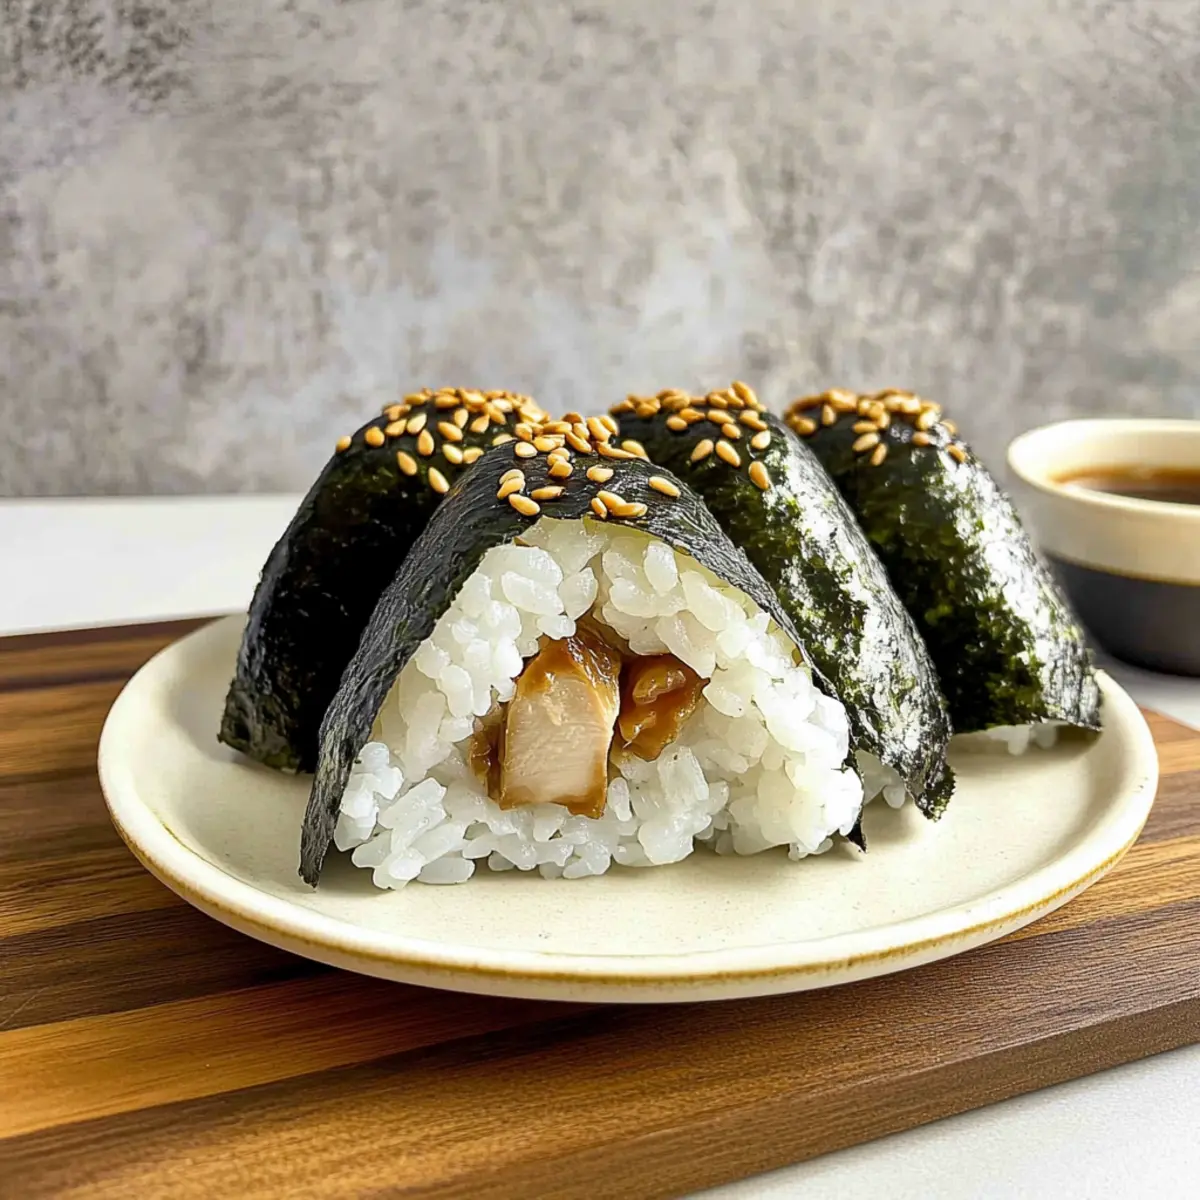
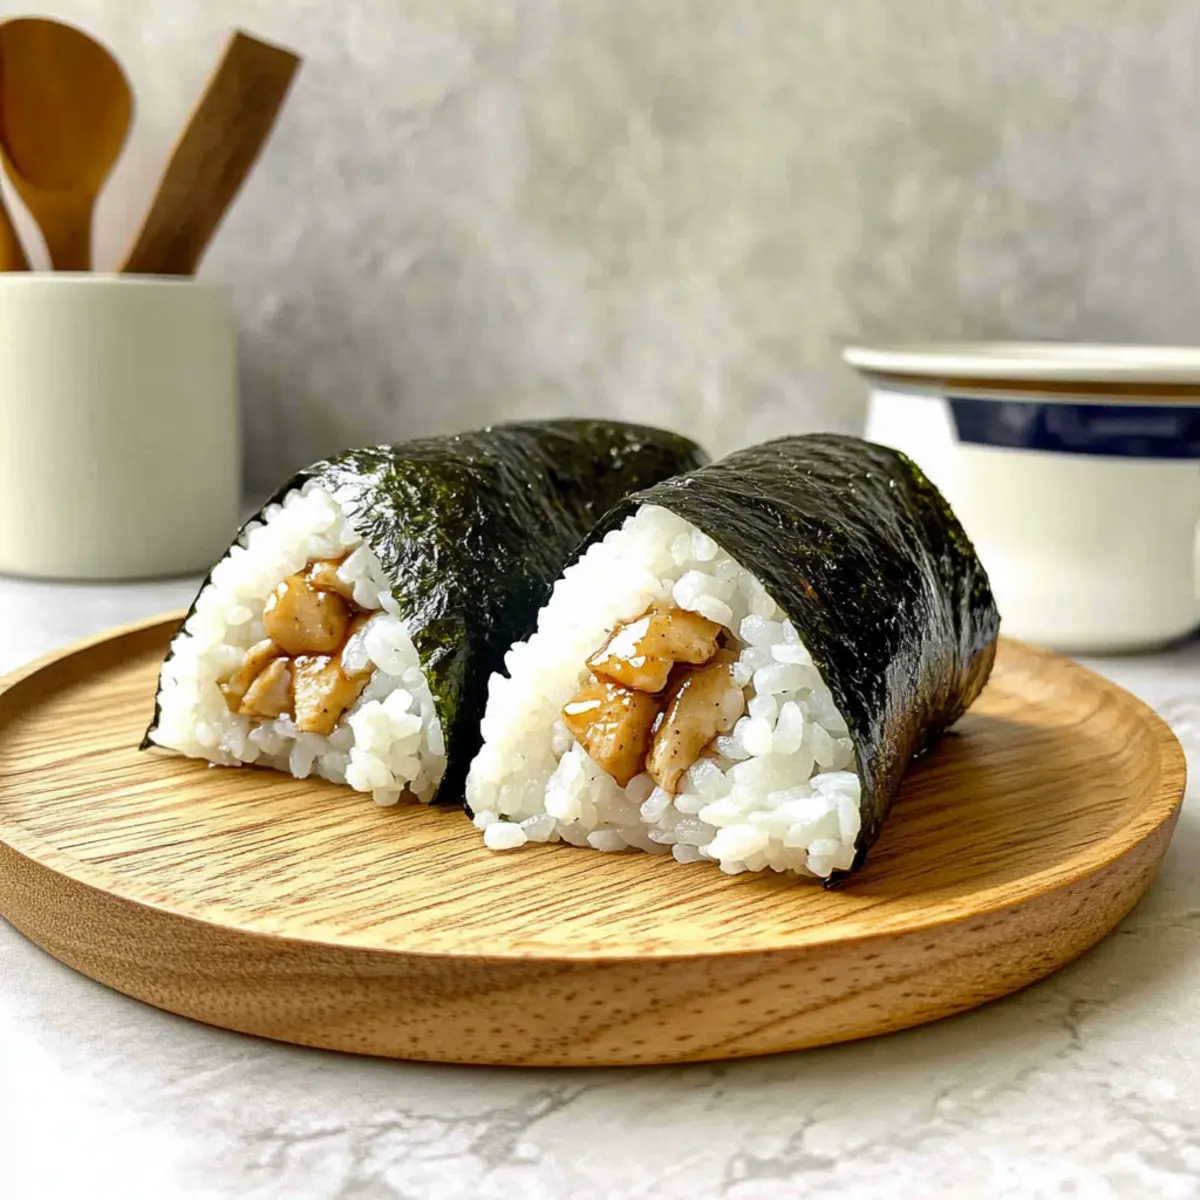
Moisten your hands with water to prevent sticking, then take about ⅓ cup of the seasoned sushi rice and press it into your palm. Create a small well in the center of the rice, add 1 tablespoon of the cooked teriyaki chicken, and cover it with another ⅓ cup of rice. Firmly shape the rice into a triangle, ensuring the filling is completely encased and secure.
Step 6: Wrap with Nori
Once you’ve shaped your Chicken Onigiri, cut nori sheets into small rectangles and wrap a strip around the bottom portion of the rice triangle. This adds flavor and makes it easier to hold. Repeat the process until all your rice and chicken are used. Serve your onigiri fresh as a delightful snack or meal on the go!
What to Serve with Teriyaki Chicken Onigiri?
Savoring these delightful rice balls opens the door to a world of complementary flavors and textures that will take your meal to the next level.
-
Crispy Tempura Vegetables: Perfectly fried veggies add a satisfying crunch; their lightness contrasts beautifully with the chewy onigiri.
-
Miso Soup: Warm and comforting, this savory soup enhances the umami experience, wrapping your meal in a soothing embrace.
-
Pickled Cucumbers: The tartness of pickled cucumbers brightens the palate, balancing the rich teriyaki flavors while adding a refreshing crunch.
-
Edamame: These protein-packed green soybeans are a nutritious addition, offering a pop of freshness that complements the onigiri wonderfully.
-
Seaweed Salad: Its tangy and slightly sweet dressing pairs delightfully and introduces an exciting texture that harmonizes with your chicken-filled rice balls.
-
Japanese Beer: A chilled sip of Sapporo or Asahi brings a refreshing finish to each bite, enhancing the entire dining experience.
-
Green Tea: Light and earthy, this warm beverage provides a cleansing effect, making each bite of your Chicken Onigiri even more enjoyable.
-
Mochi Ice Cream: For dessert, the chewiness of mochi filled with creamy ice cream rounds out your meal with a sweet finale that is simply irresistible!
Make Ahead Options
Preparing Chicken Onigiri in advance is a perfect way to save time during busy weeknights! You can marinate the chicken up to 24 hours ahead, allowing the flavors to deepen. Simply cut the chicken and combine it with the marinade ingredients, then refrigerate it until you’re ready to cook. You can also prepare the sushi rice a day prior; just cool it down, mix in salt and furikake, and store it in an airtight container in the fridge. When you’re ready to serve, shape the rice and chicken into onigiri, wrap them in nori, and enjoy these savory delights just as deliciously as if you made them fresh!
Chicken Onigiri Variations & Substitutions
Feel free to get creative with your Chicken Onigiri and make it uniquely yours!
-
Dairy-Free: Substitute any butter or dairy-based elements with plant-based alternatives like coconut oil for cooking.
-
Gluten-Free: Use tamari instead of soy sauce in your marinade for a gluten-free option without sacrificing flavor.
-
Spicy Kick: Add a teaspoon of sriracha or your favorite hot sauce to the teriyaki sauce for a zesty twist. This adds a lovely heat to each bite!
-
Vegetable Boost: Mix in finely chopped vegetables like carrots or cucumbers for crunch, enhancing both texture and nutrition in your onigiri.
-
Pork Variation: Swap out chicken for tender pork belly, marinating it the same way, to create a rich, flavorful filling. The result is a different flavor profile that brings something exciting to your table!
-
Avocado Creaminess: Include a slice of avocado along with the chicken filling for a creamy, rich texture in every bite. It balances the savory notes delightfully!
-
Sushi-Style: Roll your onigiri in sesame seeds before wrapping with nori for extra flavor and a delightful appearance. This offers a nutty crunch that’s hard to resist!
If you’re feeling adventurous, you might also explore additional traditional fillings, such as pickled plum or salmon, to further embrace the essence of Japanese cuisine. For serving suggestions, consider pairing these onigiri with a light and refreshing miso soup, or enjoy them alongside some homemade Japanese pickles for a complete experience!
How to Store and Freeze Chicken Onigiri
Fridge: Store leftover Chicken Onigiri in an airtight container for up to 2 days. Wrap them in plastic wrap to maintain freshness and prevent drying out.
Freezer: For longer storage, freeze your onigiri individually wrapped in plastic wrap, then place them in a freezer-safe bag. They can last up to 3 months, keeping that delightful taste intact.
Reheating: Gently thaw frozen Chicken Onigiri in the fridge overnight. To reheat, microwave on low for about 30 seconds or until warm. Wrap in a damp paper towel to keep the rice moist.
Nori Wrap: If you’ve added nori, consider wrapping it just before serving to maintain its crisp texture for the best eating experience.
Expert Tips for Chicken Onigiri
-
Perfect Rice: Use short-grain sushi rice to achieve that ideal stickiness, ensuring your chicken onigiri holds its shape effortlessly.
-
Water Adjustment: Remember to add approximately 15% more water than usual when cooking sushi rice for the perfect consistency and texture.
-
Wet Hands: Always moisten your hands with water before handling the rice. This prevents sticking and makes shaping the onigiri easier and cleaner.
-
Flavor Boost: For an extra flavor kick, consider mixing furikake directly into the sushi rice. This will elevate your Chicken Onigiri experience tremendously!
-
Storage Tips: If you’re making onigiri in advance, store them in an airtight container in the refrigerator for up to 2 days, wrapping in nori just before serving to keep it crisp.
Chicken Onigiri Recipe FAQs
How can I choose the best sushi rice for Chicken Onigiri?
Absolutely! When selecting sushi rice, always opt for short-grain options that provide the perfect stickiness needed for shaping onigiri. Look for brands labeled “sushi rice” or “Japanese rice” to ensure optimal results. The texture is key to holding your onigiri together, making your experience much more delightful!
What’s the best way to store leftover Chicken Onigiri?
You can store leftover Chicken Onigiri in an airtight container in your refrigerator for up to 2 days. To maintain their freshness and prevent them from drying out, wrap them in plastic wrap. This method helps keep the rice moist and ensures they remain delicious for your next snacking occasion!
Can I freeze Chicken Onigiri for later?
Yes, you can! For freezing, individually wrap your Chicken Onigiri in plastic wrap, then place all wrapped onigiri into a freezer-safe bag. They can be stored in the freezer for up to 3 months. When you’re ready to enjoy them, thaw them in the fridge overnight. To reheat, microwave on low for about 30 seconds, wrapping them in a damp paper towel to keep the rice moist.
How can I prevent the rice from sticking to my hands while shaping?
A simple trick is to moisten your hands with water before handling the rice. This prevents sticking and makes shaping your onigiri into triangles super easy. I often do this to ensure the rice forms perfectly without any hassle!
Are there any dietary considerations for Chicken Onigiri?
Certainly! For those with gluten allergies, be cautious with soy sauce, as it typically contains gluten. You can substitute with tamari, a gluten-free alternative. Additionally, if you’re allergic to specific proteins, feel free to customize the filling by using ground turkey or plant-based proteins for a delicious but safe alternative.
Can I use different fillings for the Chicken Onigiri?
Very! You can easily customize the filling to your liking. Consider using avocado, pickled vegetables, or even tofu for a vegetarian alternative. The key is to ensure whatever filling you choose is well-seasoned to enhance the overall flavor of your Chicken Onigiri!
Savory Chicken Onigiri: Irresistible Japanese Snack Delight
Ingredients
Equipment
Method
- Rinse 4 cups of sushi rice until the water runs clear. Cook according to rice cooker instructions with 15% more water. Let cool slightly, then mix in salt and furikake, if using.
- Cut chicken into small pieces. In a bowl, combine soy sauce, sake, baking soda, and cornstarch, then marinate chicken for at least 30 minutes.
- Whisk together soy sauce, mirin, and brown sugar in a bowl until dissolved. This is your teriyaki sauce.
- Heat a skillet, add oil, then add marinated chicken. Cook until no longer pink, stir in minced garlic and cook for 30 seconds. Add teriyaki sauce until thickened.
- Moisten hands, take ⅓ cup of rice, press in palm, add 1 tablespoon of chicken, cover with another ⅓ cup of rice and shape into a triangle.
- Wrap shaped onigiri with nori before serving.
Leave a Reply