
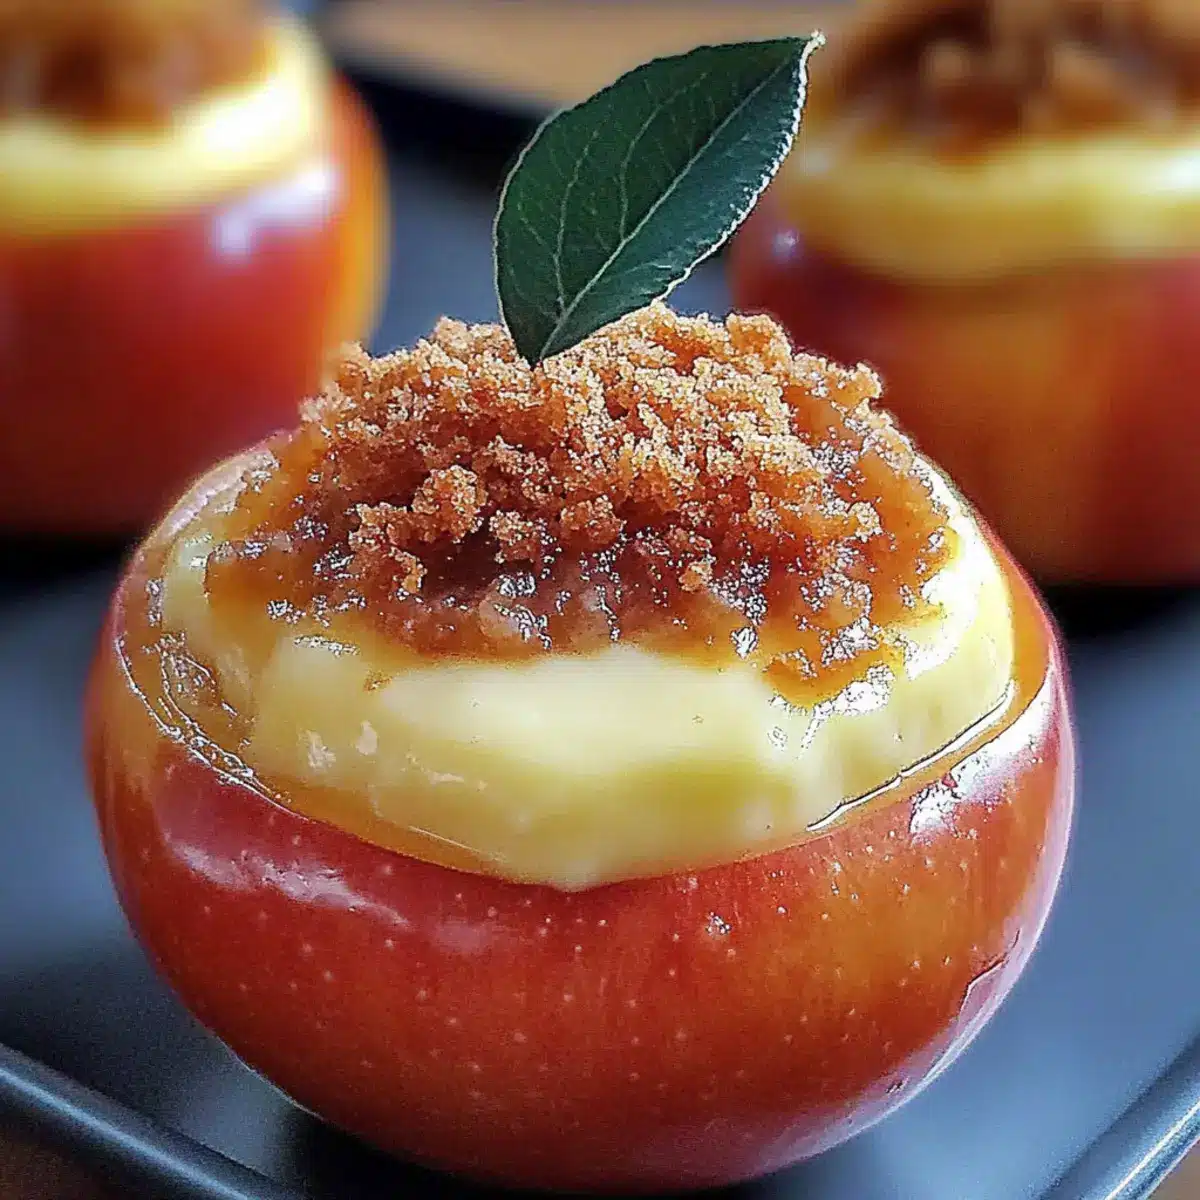
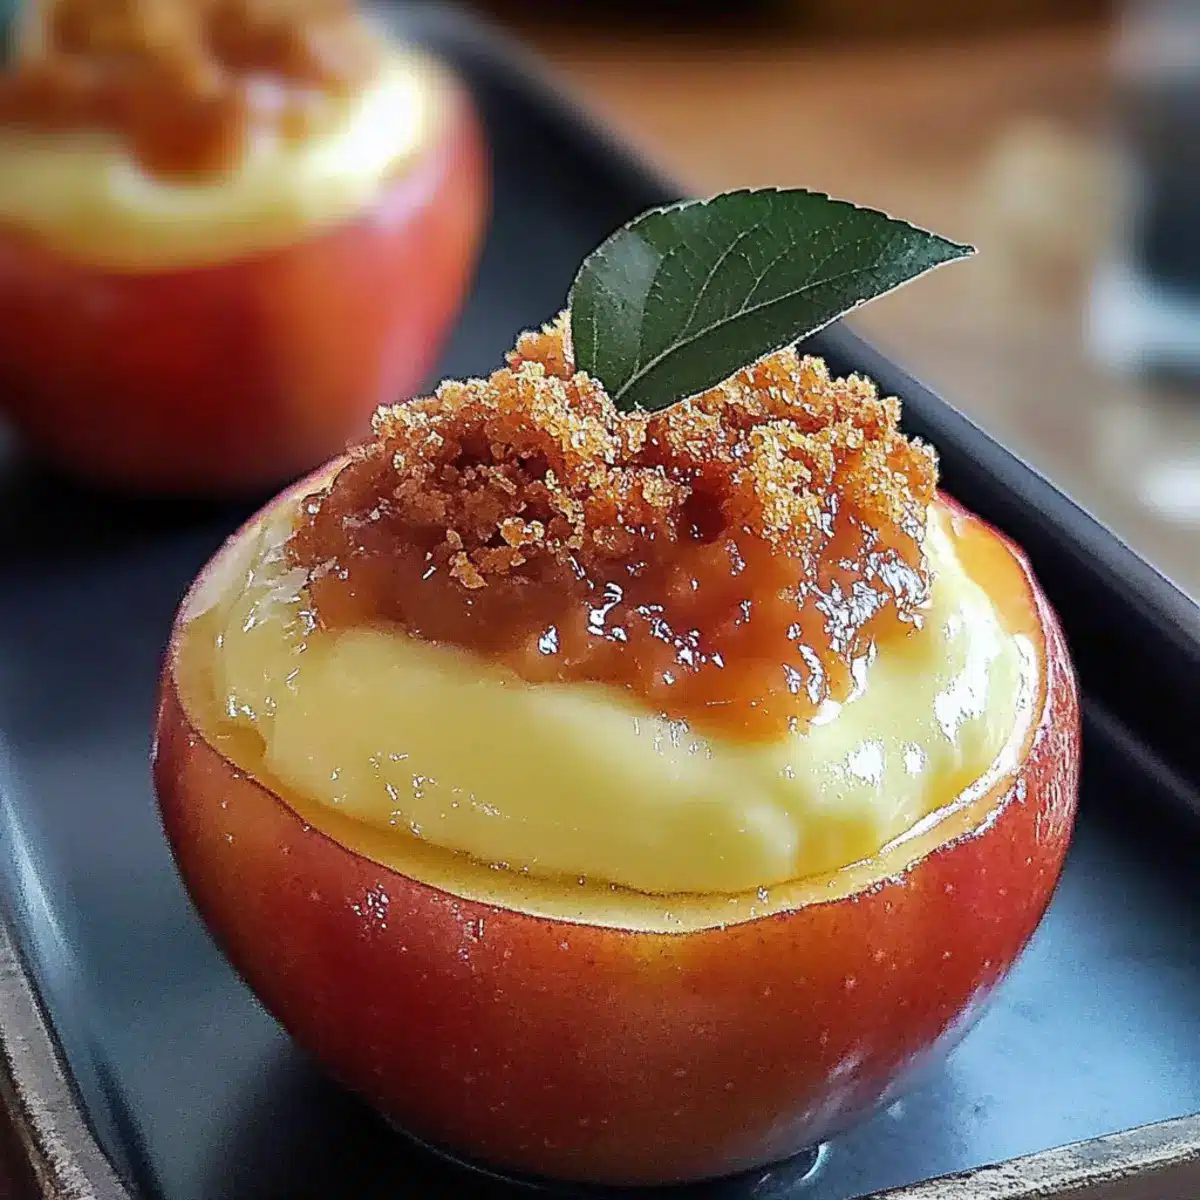
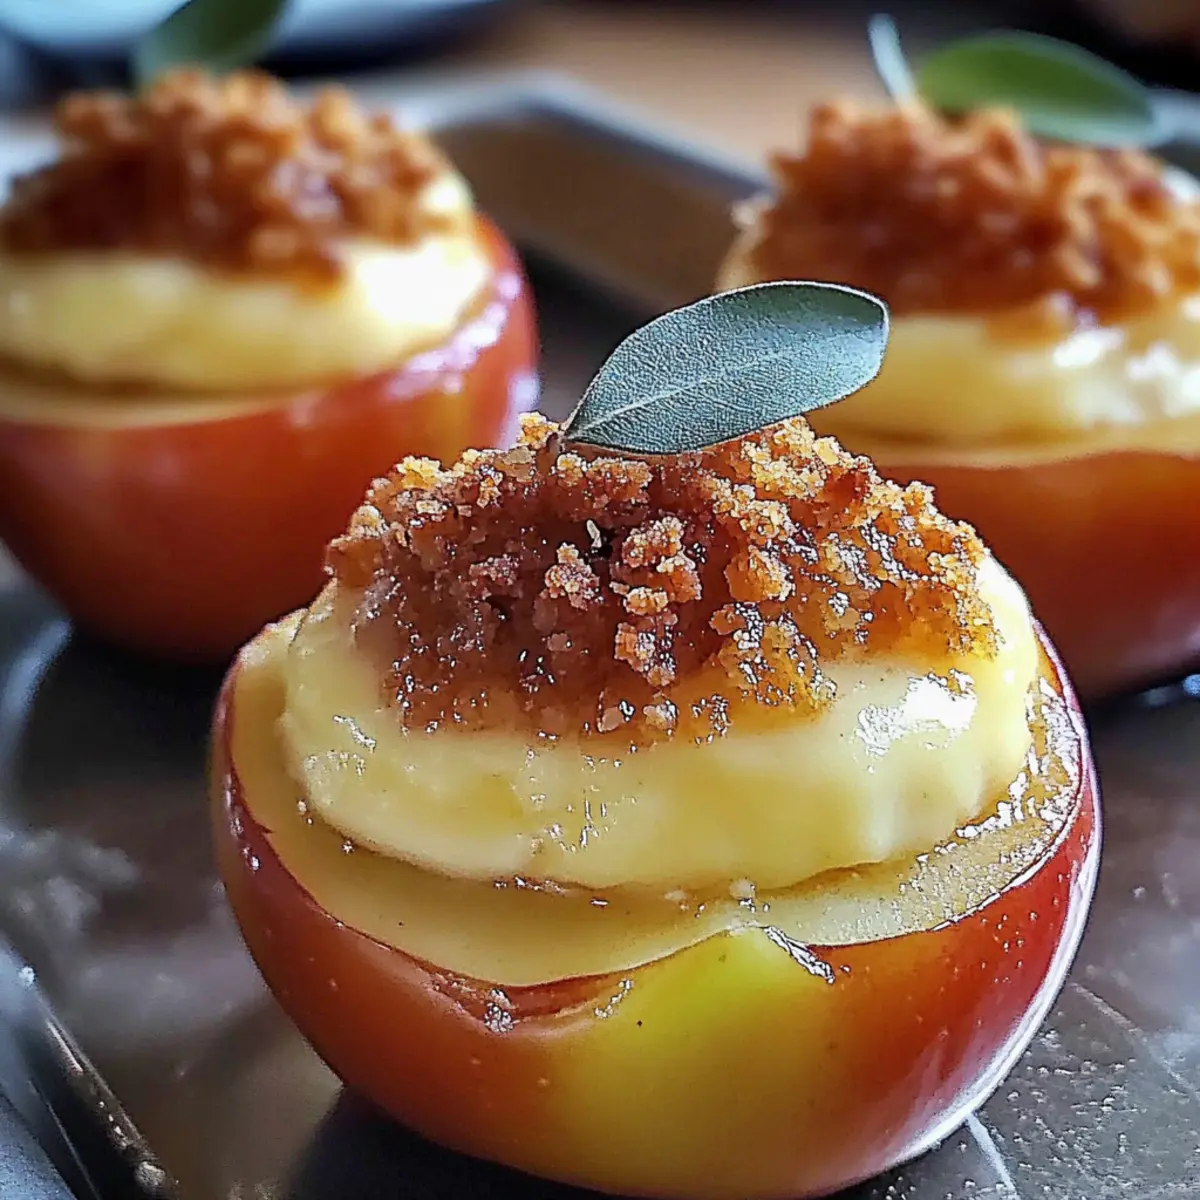
As the warm aroma of baked apples fills the kitchen, I can’t help but feel a wave of nostalgia wash over me. It’s hard to resist the charm of Cheesecake Stuffed Apples, a delightful twist that not only offers the perfect dessert for cozy evenings but also showcases a creative way to enjoy fruit. This recipe marries the rich, creamy texture of cheesecake with tender, caramelized apples, creating a warm contrast that never fails to impress. Best of all, it’s simple enough for anyone to whip up, making it a favorite for gatherings or quiet nights at home. Are you ready to dive into this delicious creation that’s as pleasing to the eye as it is to the palate? Let’s get started!
Why are Cheesecake Stuffed Apples a Must-Try?
Warm, Cozy Delight: The moment you pull these Cheesecake Stuffed Apples from the oven, the delightful aroma will enhance your home’s cozy vibe.
Simple to Prepare: With straightforward steps and accessible ingredients, this recipe invites even novice chefs to shine in the kitchen.
Versatile Options: Whether you crave tartness from Granny Smith or the sweetness of Honeycrisp, the variations are endless! You can even try a flavor twist, like adding cocoa or pumpkin puree.
Crowd-Pleasing Appeal: These charming treats are guaranteed to impress both family and guests, making any meal feel special. For more cozy treats, check out my Spinach Ricotta Stuffed dish!
Nostalgic Touch: Perfect as a comforting dessert, they evoke cherished memories while introducing a fresh, delightful concept to your dessert table.
Cheesecake Stuffed Apples Ingredients
Discover the delicious components of these delightful Cheesecake Stuffed Apples!
For the Apples
• Medium Apples – 4 medium-sized apples (like Granny Smith or Honeycrisp) provide the base structure and natural sweetness for a refreshing twist.
• Lemon Juice – 1 tbsp prevents browning and brightens flavor; feel free to swap with orange juice if preferred.
For the Cheesecake Filling
• Cream Cheese – 8 oz, softened is the essential element for that delightful creamy texture.
• Granulated Sugar – 1/2 cup sweetens the filling; adjust according to your taste.
• Brown Sugar – 1/4 cup adds depth and moisture to the mixture.
• Vanilla Extract – 1 tsp enhances the flavor profile of the rich filling.
• Ground Cinnamon – 1/2 tsp offers warmth and spice; nutmeg can work well as a substitute too.
• Salt – 1/4 tsp balances the sweetness of the filling, so don’t skip this!
• Sour Cream – 1/2 cup adds creaminess; Greek yogurt can be used as a substitute.
For the Topping and Texture
• Crushed Graham Crackers – 1/2 cup delivers that classic cheesecake flavor and satisfying crunch; feel free to use crushed cookies instead.
• Chopped Nuts – 1/4 cup (optional) introduces extra texture; walnuts or pecans are recommended.
• Caramel Sauce – 1/4 cup is optional for drizzling, adding a sweet finish to your warm apples.
• Butter – 1 tbsp for greasing the dish prevents any sticking during baking.
Now, let’s transform these simple ingredients into a dessert that’s sure to warm your heart and home!
Step‑by‑Step Instructions for Cheesecake Stuffed Apples
Step 1: Preheat the Oven
Begin by preheating your oven to 350°F (175°C). This temperature will create the perfect warm environment to bake the Cheesecake Stuffed Apples, allowing apples to soften while the cheesecake filling becomes wonderfully creamy. Ensure your oven is fully preheated before placing your baking dish inside for even cooking.
Step 2: Prepare the Apples
Wash the four medium-sized apples under cool running water, gently scrubbing their skins. Once cleaned, dry them thoroughly with a clean towel and core each apple, making sure to leave the bottom intact to hold the cheesecake filling. Drizzle a tablespoon of lemon juice inside each apple to prevent browning and enhance their flavor.
Step 3: Grease the Baking Dish
Take a suitable baking dish and smear one tablespoon of butter all over the bottom and sides to prevent the Cheesecake Stuffed Apples from sticking during baking. Once greased, stand the prepared apples upright in the dish, ensuring they are snug to avoid tipping over while baking.
Step 4: Make the Cheesecake Filling
In a mixing bowl, combine 8 ounces of softened cream cheese and 1/2 cup granulated sugar. Use a hand mixer to blend until smooth and creamy, about 2–3 minutes. The mixture should be free of lumps and easily spreadable, ensuring a delightful cheesecake experience within the apples.
Step 5: Add Flavorings and Mix
To the creamy mixture, add 1/4 cup brown sugar, 1 teaspoon of vanilla extract, 1/2 teaspoon of ground cinnamon, and 1/4 teaspoon of salt. Blend these ingredients together until well incorporated, which will create a rich and delicious filling for your Cheesecake Stuffed Apples.
Step 6: Incorporate the Sour Cream
Once the flavors are melded, gently fold in 1/2 cup of sour cream, ensuring not to over-mix. The addition of sour cream will enhance the creaminess and provide a delightful tang that contrasts beautifully with the sweet filling. Keep folding until no visible streaks remain in your mixture.
Step 7: Add the Crunch
Next, introduce 1/2 cup of crushed graham crackers to your cheesecake mixture, along with 1/4 cup of chopped nuts if you’re using them. Stir until everything is evenly coated and the filling has a lovely texture, ready to be spooned into the apples.
Step 8: Stuff the Apples
Carefully scoop the cheesecake mixture into each cored apple, filling them generously and mounding a bit on top. This way, the cheesecake filling will bake beautifully, providing a luscious bite in every spoonful of your finished Cheesecake Stuffed Apples.
Step 9: Bake the Stuffed Apples
Cover the baking dish with foil and place it in your preheated oven. Bake the apples for 25 to 30 minutes, or until they are tender to the touch. The foil will help steam the apples, ensuring they become perfectly soft without losing shape.
Step 10: Finish Baking Without Foil
After the initial baking time, carefully remove the foil and allow the Cheesecake Stuffed Apples to bake for an additional 10 to 15 minutes. This final step will allow the tops to turn golden brown and develop a slight crust, enhancing both flavor and presentation.
Step 11: Cool Before Serving
Once baked to perfection, take the dish out of the oven and let the Cheesecake Stuffed Apples cool for about 10 minutes. This resting period allows the filling to set slightly, ensuring a deliciously creamy dessert that is easy to serve and enjoy.
Make Ahead Options
These Cheesecake Stuffed Apples are perfect for meal prep, allowing you to enjoy a comforting dessert even on the busiest of nights! You can prepare the cheesecake filling up to 24 hours in advance; simply mix the cream cheese, sugars, spices, sour cream, and crushed graham crackers, and refrigerate it in an airtight container. Core your apples and drizzle them with lemon juice to prevent browning, and they can be prepped up to 3 days ahead as well. When you’re ready to serve, fill the apples and bake them just before enjoying for warm, delightful results that are just as delicious as when freshly made!
How to Store and Freeze Cheesecake Stuffed Apples
Fridge: Store leftover Cheesecake Stuffed Apples in an airtight container for up to 3 days. This keeps them fresh and ready for a quick dessert fix.
Freezer: For longer storage, freeze the unbaked Cheesecake Stuffed Apples by wrapping them tightly in plastic wrap and then in foil. They can last up to 3 months in the freezer.
Reheating: To enjoy the stored apples, reheat in a preheated oven at 350°F (175°C) for 15–20 minutes until warmed through, ensuring the texture remains delightful.
Room Temperature: If serving immediately, keep them covered at room temperature for up to 2 hours. Enjoy them warm for the best flavor experience.
Cheesecake Stuffed Apples Variations
Feel free to let your creativity shine with these delightful twist ideas that will make each bite a unique experience!
-
Apple Varieties: Switch to Granny Smith for a tart contrast or Honeycrisp for a sweeter, juicier bite. Each variety offers its own unique sweetness and texture.
-
Chocolate Twist: Add 2 tablespoons of cocoa powder to the filling for a decadent chocolate cheesecake flavor. It’s a delightful way to indulge your chocolate cravings!
-
Pumpkin Spice: Stir in 1/2 cup of pumpkin puree and a pinch of nutmeg for a seasonal flavor that’s especially comforting in the fall. These pumpkin cheesecake stuffed apples are a crowd-pleaser!
-
Nutty Flavor Boost: Incorporate chopped pecans or walnuts into the filling for added crunch. Nuts elevate the texture and add an irresistible element to each delightful bite.
-
Salted Caramel Touch: After baking, sprinkle a bit of sea salt on top for a delicious contrast that enhances the sweetness, reminiscent of caramel apples. You might just find yourself reaching for more!
-
Creamy Layer Swap: Substitute sour cream with Greek yogurt for a tangier flavor, while still keeping the filling luscious and creamy. This is a great option for those keeping an eye on creaminess!
-
Dried Fruit Addition: Fold in a handful of raisins or dried cranberries into the cheesecake mixture for a fruity surprise. They’ll provide a lovely texture and burst of sweetness!
-
Syrup Drizzle: Drizzle with maple syrup instead of caramel for a unique flavor. This warm, cozy sweetness pairs beautifully with the apples and rich cheesecake filling.
For an added treat this fall, why not try these variations and see which becomes your new favorite? You can also pair your Cheesecake Stuffed Apples with my delicious Spinach Ricotta Stuffed dish for a cozy dinner idea!
Expert Tips for Cheesecake Stuffed Apples
Cream Cheese Consistency: Ensure your cream cheese is softened to room temperature for easy mixing; cold cream cheese can lead to lumps.
Avoid Over-Baking: Check the apples for tenderness; they should be soft but not mushy. Over-baking can cause them to lose structure.
Nut Options: If using chopped nuts, finely chop walnuts or pecans for a better texture in the filling. Larger pieces can disrupt the smoothness.
Foil Technique: Covering the dish with foil helps steam the apples, but removing it later allows the tops to achieve that delightful golden crust.
Apple Variations: Don’t hesitate to experiment with different apple varieties! Tart Granny Smith works great, but sweet Honeycrisp is a crowd favorite, adding a delightful contrast to the cheesecake filling.
What to Serve with Cheesecake Stuffed Apples
As you savor the enchanting flavors of this cozy dessert, imagine the perfect side dishes that will complete your meal and delight your guests.
-
Creamy Mashed Potatoes: These buttery potatoes create a wonderful contrast with the sweet stuffed apples, enhancing the meal’s comfort factor.
-
Warm Cinnamon Roll Casserole: This sweet breakfast dish can double as dessert, harmonizing beautifully with the spiced flavors in the cheesecake filling for a delightful brunch.
-
Fresh Spinach Salad: A light and refreshing salad drizzled with a tangy vinaigrette serves as a lovely counterpart to the richness of the cheesecake, helping to balance the meal.
-
Homemade Vanilla Ice Cream: A scoop of velvety ice cream beside your warm cheesecake stuffed apples creates the ultimate luxurious dessert experience, perfect for those who love creamy textures.
-
Hot Chocolate: Serve this indulgent drink to enhance the warmth of your apples, making each bite feel even more comforting on a chilly evening.
-
Roasted Brussels Sprouts: Their slight bitterness and crispy texture provide a pleasant contrast to the soft, sweet apples, while also adding a hearty element to your meal.
-
Autumn Spiced Tea: A steaming cup of spiced tea is the ideal beverage pairing—its aromatic warmth complements the cozy flavors of the apples with a hint of warmth.

Cheesecake Stuffed Apples Recipe FAQs
What type of apples should I use for Cheesecake Stuffed Apples?
You can use medium-sized apples like Granny Smith for a tart bite or Honeycrisp for a sweeter filling. Each variety brings its own unique flavor, so feel free to experiment with different types!
How should I store leftover Cheesecake Stuffed Apples?
Store any uneaten Cheesecake Stuffed Apples in an airtight container in the refrigerator for up to 3 days. This way, you can enjoy them fresh even after the gathering!
Can I freeze Cheesecake Stuffed Apples?
Absolutely! For longer storage, wrap the unbaked Cheesecake Stuffed Apples tightly in plastic wrap and then in foil. They can be frozen for up to 3 months. When ready to bake, thaw them in the refrigerator overnight before following the baking instructions.
What should I do if the cheesecake filling is too thin?
If you find your filling is on the thinner side, try adding a bit more crushed graham crackers to firm it up. Mix in a few tablespoons gradually, ensuring you reach your desired consistency before stuffing the apples.
Can I modify this recipe for dietary restrictions?
Yes! You can substitute the cream cheese with a dairy-free alternative if needed. Additionally, use gluten-free crushed cookies instead of graham crackers to accommodate gluten sensitivities. Always check with any guests about allergies to nuts or other ingredients to ensure everyone can enjoy this delightful dessert!
What if my apples are browning before baking?
If you notice your apples browning while you prepare other ingredients, a quick drizzle of lemon juice helps preserve their color and brightness. This keeps them looking fresh and inviting until baking time.
Cheesecake Stuffed Apples: Warm, Comforting Dessert Delight
Ingredients
Equipment
Method
- Preheat the oven to 350°F (175°C).
- Wash, dry, and core the apples, leaving the bottom intact. Drizzle lemon juice inside each apple.
- Grease the baking dish with butter and stand the apples upright in it.
- In a mixing bowl, combine cream cheese and granulated sugar and blend until smooth.
- Add brown sugar, vanilla extract, ground cinnamon, and salt to the mixture and blend until combined.
- Gently fold in the sour cream until no visible streaks remain.
- Stir in crushed graham crackers and chopped nuts until evenly coated.
- Stuff the cheesecake mixture into the cored apples generously.
- Cover the dish with foil and bake for 25 to 30 minutes until tender.
- Remove the foil and bake for an additional 10 to 15 minutes until tops are golden brown.
- Cool for 10 minutes before serving.
Leave a Reply