
The warm, inviting aroma of baked apples and cinnamon wafts through the kitchen, instantly transporting me to cozy fall afternoons spent with family. This classic Apple Pie recipe is more than just a dessert; it’s a celebration of tradition, featuring a flaky, buttery crust wrapped around tender apples that perfectly balance sweet and tart flavors. One of the joys of making this pie is its deceptively simple prep—ideal for both novice bakers and seasoned home chefs looking for that nostalgic touch. Plus, it’s a crowd-pleaser that brings everyone together, whether served warm with a scoop of ice cream or enjoyed on its own. Ready to create a delightful masterpiece that fills your home with love? Let’s dive into the art of crafting this timeless treat!
Why is This Apple Pie Special?
Homemade Comfort: This classic recipe holds a special place in your heart, evoking warm memories of family gatherings and festive celebrations.
Flaky Perfection: The buttery crust is not just a vessel; it’s the star that provides the perfect texture to complement the luscious filling.
Fruity Goodness: Bursting with fresh apples, the filling delivers balanced sweetness and a delightful tartness that keeps you coming back for more.
Easy to Make: Perfect for both novice bakers and culinary pros, this pie requires minimal ingredients and straightforward steps, making it an ideal weekend project.
Versatile Serving: Pair it with a scoop of ice cream or enjoy it warm with a sprinkle of cinnamon; this pie is tailored to your cravings. For more apple-inspired desserts, check out these fantastic apple dessert ideas.
Apple Pie Recipe Ingredients
For the Crust
• Perfect Pie Crust Recipe – This flaky crust is the essential foundation for your irresistible apple pie.
• ¼ cup butter – Adds richness and flavor; margarine can be used as a substitute if needed.
• 1 egg – Creates a beautiful egg wash for the crust; skipping it will make the finish less glossy.
• 1 teaspoon water – Mix with egg for an effective wash.
For the Filling
• 8 cups thinly sliced apples – The heart of your pie; a mix of Granny Smith and Gala apples provides the best flavor.
• 2/3 cup lightly packed brown sugar – Sweetens the filling perfectly; white sugar works as a suitable substitute.
• 1 tablespoon all-purpose flour – Helps thicken the filling; use cornstarch for a gluten-free option.
• 2 teaspoons cinnamon – Adds warmth and spice to enhance the filling; nutmeg can also be included for extra depth.
• 1 teaspoon lemon juice – Brightens the flavors and balances the sweetness; fresh lemon juice is best.
• ¼ teaspoon salt – Enhances the overall flavor of the filling.
Catch that sweet and slightly tart aroma wafting from your classic apple pie recipe and let your baking adventure begin!
Step‑by‑Step Instructions for Classic Flaky Apple Pie
Step 1: Preheat the Oven
Begin by preheating your oven to 425°F (220°C). While the oven heats, take a moment to prepare your 9-inch pie plate by greasing it lightly or setting it aside. This prep work ensures that your classic apple pie will bake evenly and come out beautifully.
Step 2: Prepare the Apple Filling
In a large pot over medium heat, melt ¼ cup of butter until bubbly. Add in 8 cups of thinly sliced apples, 2/3 cup of brown sugar, 1 tablespoon of flour, 2 teaspoons of cinnamon, 1 teaspoon of lemon juice, and ¼ teaspoon of salt. Cook the mixture for about 8–10 minutes, stirring occasionally until the apples are just softened. Remove from heat and let the filling cool.
Step 3: Roll Out the Crust
On a lightly floured surface, take half of your prepared pie crust and roll it out into a large circle, about ¼ inch thick. Carefully place this crust into your greased pie plate, ensuring it fits snugly against the sides and bottom. Gently press down to settle the crust, creating a sturdy base for your apple pie.
Step 4: Fill the Pie with Apples
Pour the cooled apple filling into the crust, making sure it’s evenly distributed. The gooey, spiced apple mixture should mound slightly in the center for that classic pie shape. This delightful filling is what makes your classic flaky apple pie so irresistible!
Step 5: Create the Top Crust
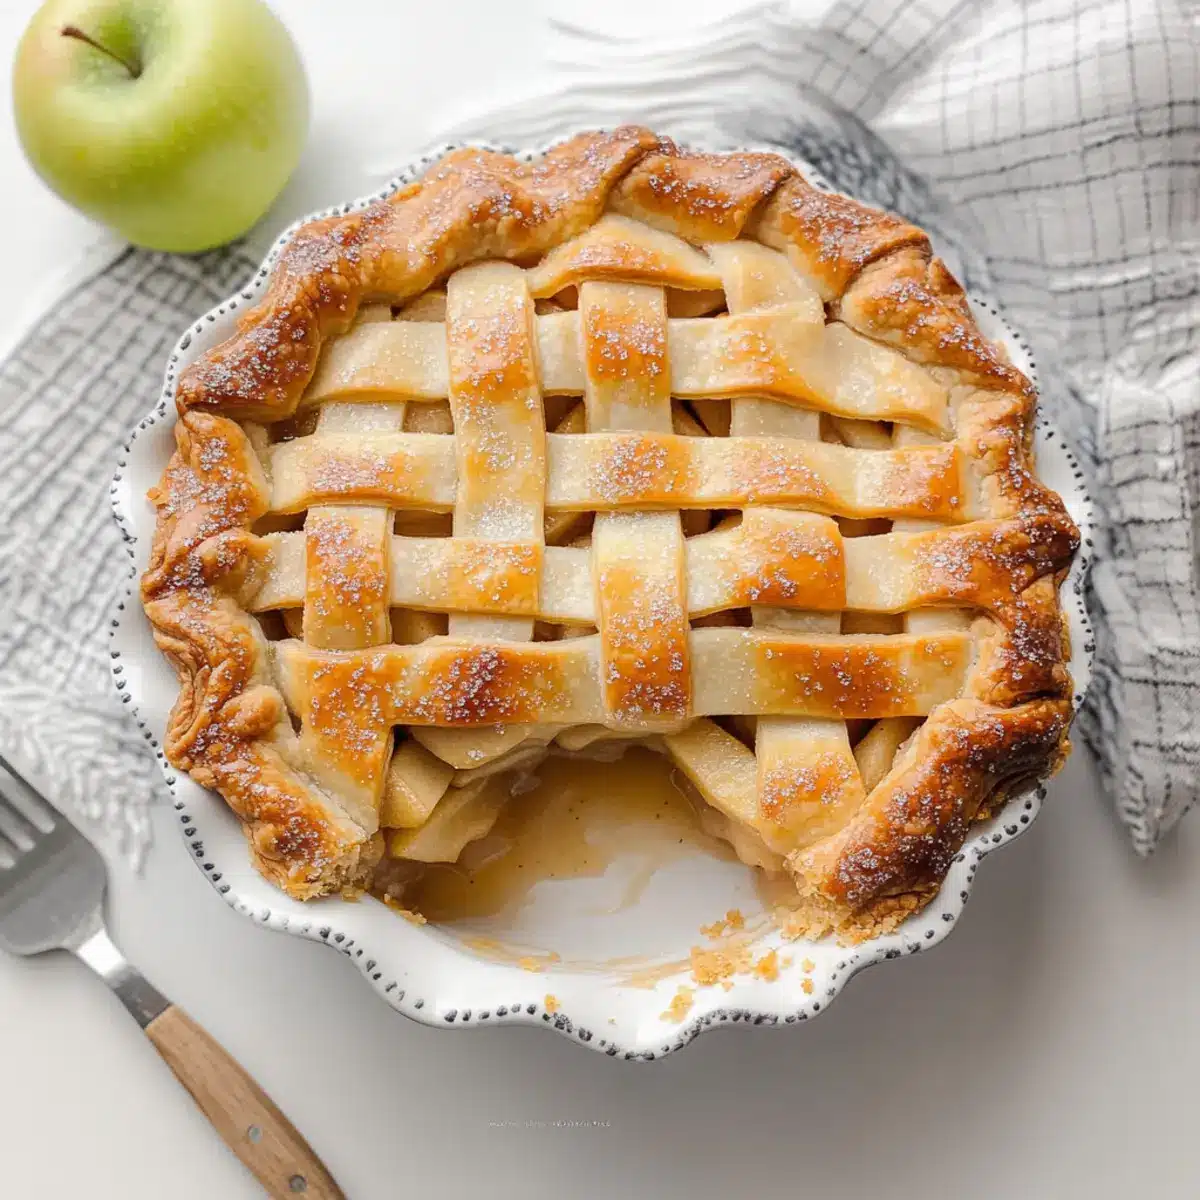
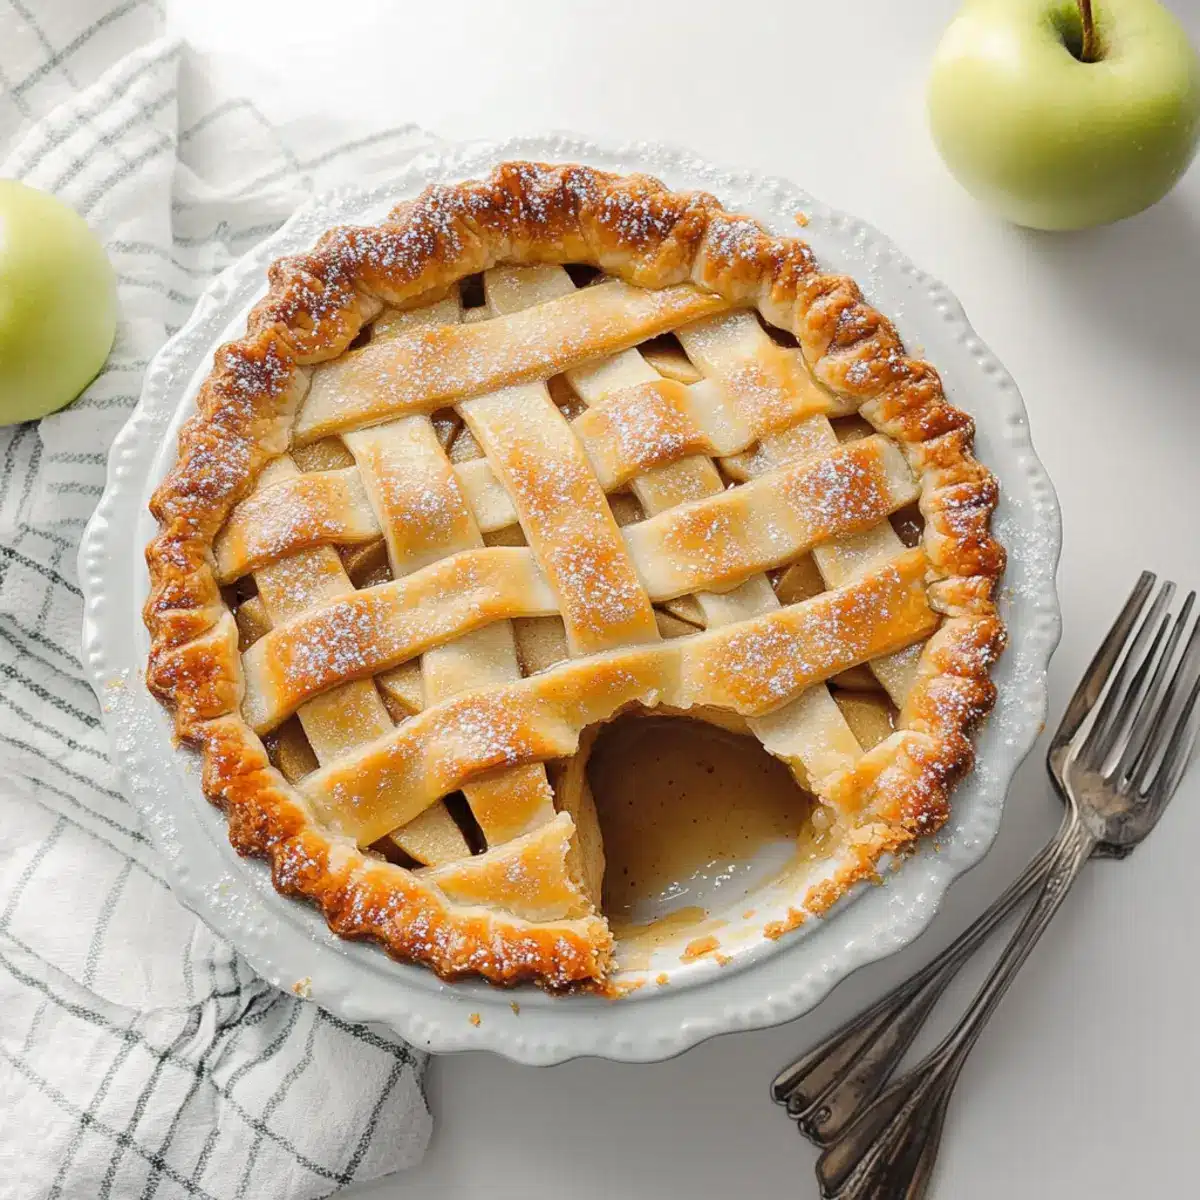
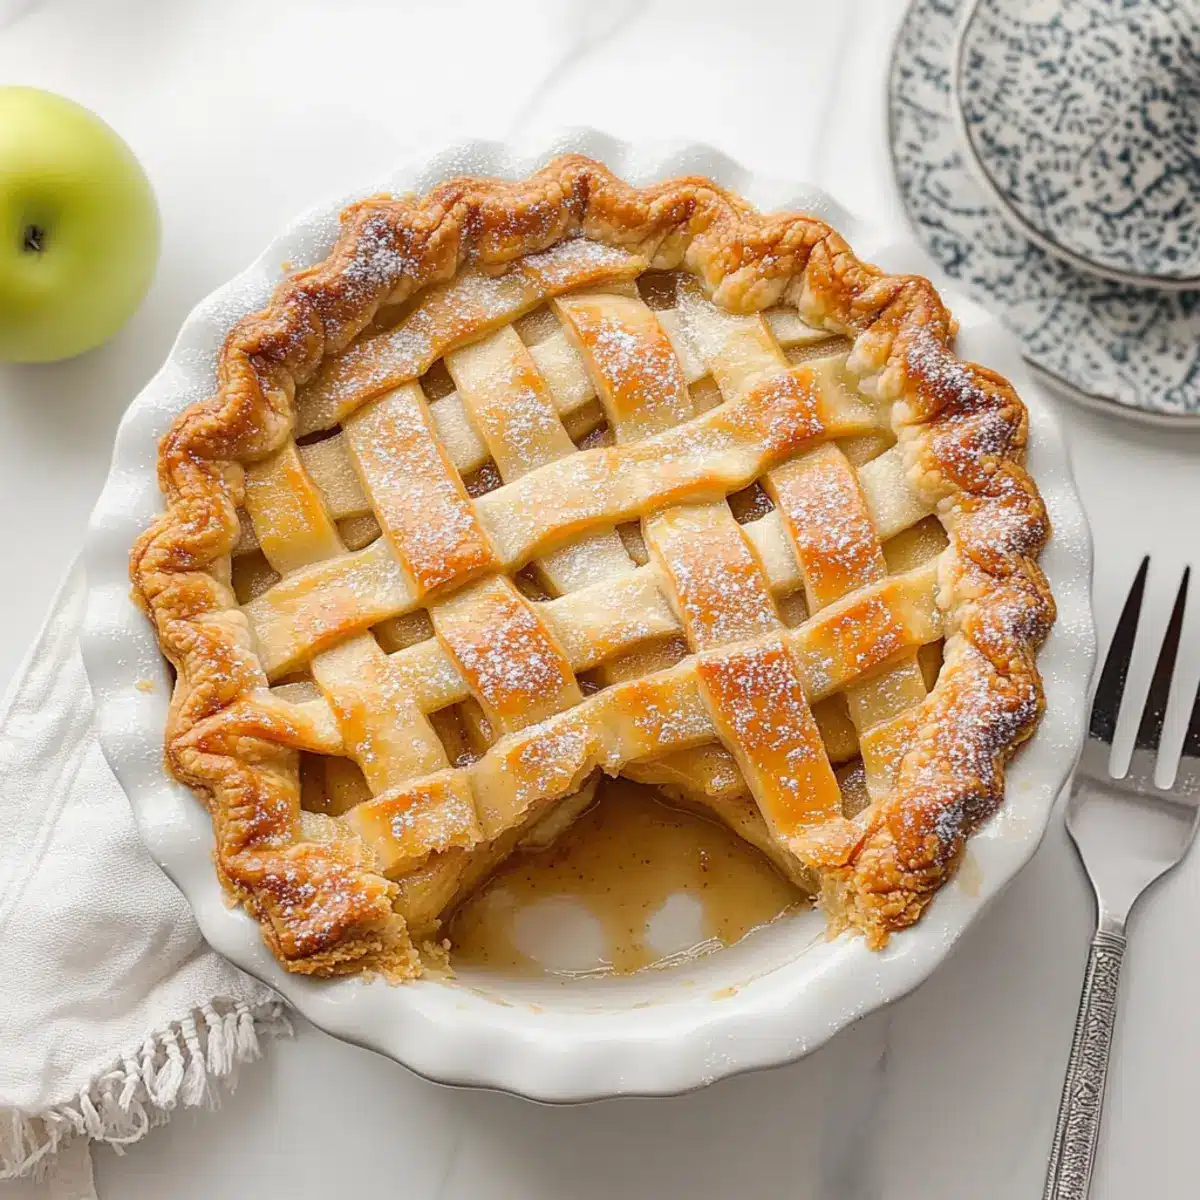
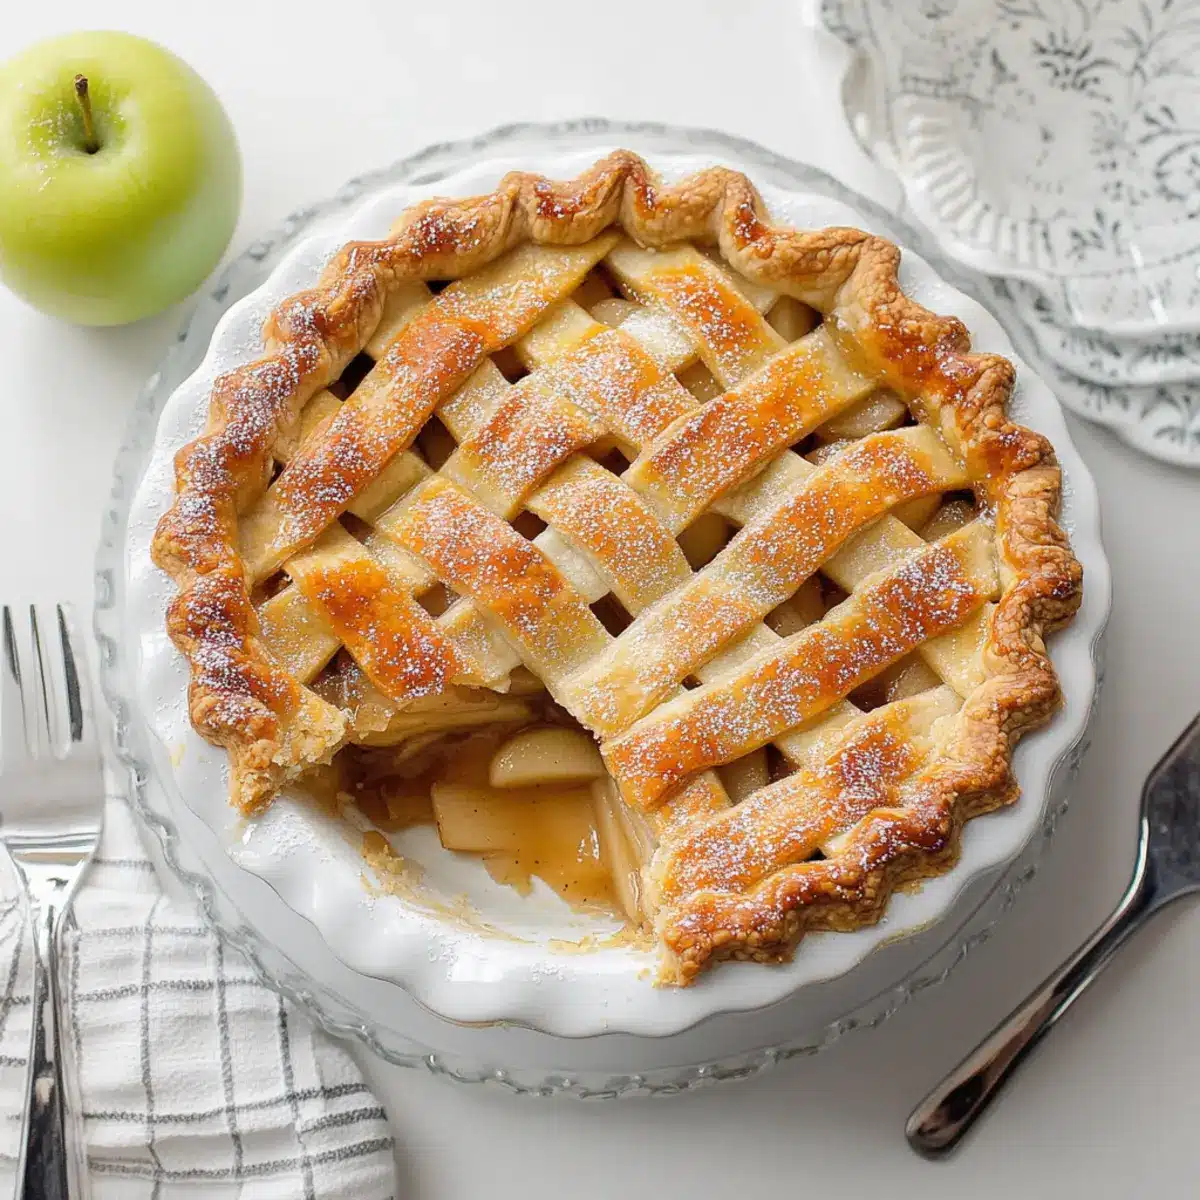
Next, roll out the remaining dough to form your top crust, keeping it at about ¼ inch thick. You can either lay it flat over the filling or cut strips to create a delightful lattice design. If opting for the lattice, weave the strips over and under to achieve a beautiful crisscross look.
Step 6: Seal the Edges
Trim any excess dough from the edges of the pie, leaving about an inch hanging over. Fold this excess dough under itself, crimping the edges with your fingers or a fork to seal the pie. This step not only secures the filling but also adds an elegant touch to your classic apple pie.
Step 7: Vent and Dress the Pie
Using a sharp knife, cut several small vents in the top crust to allow steam to escape while baking. For an extra special touch, mix 1 beaten egg with 1 teaspoon of water to create an egg wash, brushing it lightly over the crust. This will give your apple pie a golden and glossy finish.
Step 8: Bake the Pie
Place your prepared classic apple pie in the preheated oven and bake at 425°F (220°C) for 15 minutes. Then, reduce the temperature to 350°F (175°C) and continue baking for another 40 minutes or until the crust is golden brown and the filling is bubbly. Keep an eye on it to prevent over-browning.
Step 9: Allow to Cool
Once baked, remove the apple pie from the oven and let it cool for at least 2 hours. This cooling period allows the filling to set, making it easier to slice and serve. As the pie cools, the wonderful aroma will fill your kitchen, signaling that your classic apple pie is ready to be enjoyed!
Expert Tips for Apple Pie Recipe
- Keep Ingredients Cold: Ensure butter and water are cold before mixing to create a flaky crust. Warm ingredients may lead to a dense texture.
- Choose the Right Apples: Use a mix of tart and sweet apples, like Granny Smith and Gala, for a balanced flavor profile in your classic apple pie.
- Prevent Soggy Bottom: Precook the apple filling slightly before adding it to the crust to avoid a soggy bottom. This technique allows excess moisture to escape.
- Watch the Baking Time: If the edges brown too quickly, cover them with aluminum foil to prevent burning while the rest of the pie bakes to a golden perfection.
- Let It Cool: Allow the pie to cool for at least 2 hours before slicing. This helps the filling set, ensuring each slice holds its shape beautifully.
Storage Tips for Apple Pie
Room Temperature: Store any uneaten apple pie covered at room temperature for up to 2 days for optimal flavor and texture.
Fridge: For longer freshness, refrigerate your apple pie for up to 5 days. Make sure it’s wrapped tightly or in an airtight container.
Freezer: You can freeze the apple pie before baking. Wrap it well in plastic wrap and aluminum foil, and it can last for up to 3 months. Adjust baking times accordingly if baking from frozen.
Reheating: To reheat, place slices in a preheated oven at 350°F (175°C) for about 10-15 minutes until warmed through, allowing you to enjoy this classic apple pie recipe again!
What to Serve with Classic Flaky Apple Pie
Enjoying a slice of warm apple pie creates a perfect moment, so why not build a delightful meal around it?
- Vanilla Ice Cream: The classic pairing with apple pie, its creamy texture and sweet flavor enhance the warm spices beautifully.
- Whipped Cream: A light dollop of whipped cream adds a fluffy texture that contrasts the pie’s flaky crust, making each bite heavenly.
- Cheddar Cheese: Sharp cheddar complements the sweetness of the pie, creating a rich, savory counterpoint that’s surprisingly delicious.
- Cinnamon Sugar Dust: A sprinkle of cinnamon sugar on top brings extra sweetness and warmth, enhancing the lovely spice profile of the pie.
- Caramel Sauce: Drizzling warm caramel over the pie introduces an indulgent sweetness that elevates the dessert experience to new heights.
For a complete feast, consider starting with a fresh salad dressed in a tangy vinaigrette. Paired with a warm apple pie, the meal blends contrasting textures and flavors for an unforgettable culinary experience.
Make Ahead Options
These Classic Apple Pie preparations are perfect for meal prep enthusiasts! You can prepare the apple filling up to 3 days in advance, simply store it in an airtight container in the refrigerator to keep the flavors fresh. Additionally, you can roll out the pie crust and store it tightly wrapped in plastic wrap in the fridge for up to 24 hours. When you’re ready to serve, just combine the crust with the filling, seal the edges, and bake as directed for a delightful dessert that’s just as delicious as if made from scratch that day. This saves you valuable time while ensuring your homemade apple pie is bursting with fresh flavors!
Apple Pie Recipe Variations
Feel free to personalize this beloved dessert and cater to your tastebuds with these delightful twists.
-
Nutty Crust: Add 1/2 cup finely chopped walnuts or pecans into the crust for a unique texture and flavor boost. The nuts bring a rich, earthy taste that harmonizes beautifully with the apples. You’ll savor that delightful crunch in every bite!
-
Sugar-Free: Use a sugar alternative like erythritol or stevia to create a guilt-free dessert. This variation allows everyone to enjoy a slice without the added sugar, making it perfect for those watching their intake.
-
Spiced Up: For a spicy kick, add 1/4 teaspoon of ground ginger or a pinch of cayenne to the filling. This twist enhances warmth and depth, enticing those who love a little heat in their dessert.
-
Mixed Fruits: Combine apples with other fruits like pears, cranberries, or even peaches for a vibrant flavor profile. Mixing fruits can introduce an exciting sweetness and extra layers of flavor that elevate your classic pie!
-
Caramel Swirl: Drizzle melted caramel sauce over the apple filling before adding the top crust for a decadent touch. The sweet, gooey ribbons of caramel will create an irresistibly rich filling that leaves everyone wanting more.
-
Vegan Version: Substitute butter with coconut oil or vegan butter and use a flax egg instead of a traditional egg wash. This adaptation allows your dessert to be enjoyed by a wider audience while still maintaining that flaky crust you love.
-
Lemon Zest Addition: Add the zest of one lemon to the apple filling to brighten the flavors. This small touch enhances the overall taste, giving your pie a refreshing and vibrant finish.
-
Cinnamon Roll Crust: Use pre-made cinnamon roll dough as the crust for a sweet twist on the classic. The aroma of cinnamon will fill your home, bringing an extra cozy feel to your apple pie experience.
Whichever variation you choose, these ideas will elevate your classic apple pie into a treasure of flavors and textures. For more delightful dessert inspirations, check out these incredible apple dessert ideas.
Classic Flaky Apple Pie Recipe FAQs
How do I choose the best apples for my apple pie?
Absolutely! For a classic apple pie, I recommend using a mix of tart Granny Smith apples and sweeter Gala or Ambrosia apples. This combination creates a filling with a delightful balance between sweet and tart flavors, enhancing the overall taste of your pie. Look for firm apples without dark spots for the best results.
What is the best way to store leftover apple pie?
For optimal flavor, store any uneaten apple pie covered at room temperature for up to 2 days. If you want it to last longer, refrigerate it for up to 5 days. Just make sure it’s wrapped tightly or in an airtight container to maintain its freshness and prevent it from drying out.
Can I freeze my apple pie?
Yes, you can! To freeze before baking, wrap the assembled pie tightly in plastic wrap and then in aluminum foil; it will keep well for up to 3 months. When you’re ready to bake, simply preheat your oven and bake the frozen pie directly; just add an extra 10-15 minutes to the baking time. This method keeps the crust flaky and the filling deliciously warm!
Why is my apple filling too runny?
If you find your apple filling is runny, it’s often due to excess moisture from the apples. To prevent this, I recommend precooking the apple filling with the sugar and flour for about 8-10 minutes until they soften slightly before adding it to the pie crust. This extra step will help release some moisture and keep the filling thick and gooey rather than watery.
Are there any dietary considerations I should keep in mind?
Indeed! This classic apple pie recipe is vegetarian, but if you’re concerned about allergies, always check for common ones in your ingredients such as gluten, dairy, and egg. For a gluten-free option, you can substitute regular flour with a gluten-free blend, and you can use applesauce or almond milk as an alternative to butter in the crust. Always consult with those you’re serving to ensure you’re accommodating any dietary needs.
How can I ensure my pie crust is perfectly flaky?
To achieve that flaky crust, it’s crucial to keep your ingredients, especially the butter and water, cold. When mixing, avoid overworking the dough; just blend until it comes together. If you can, chill the formed crust in the refrigerator for 30 minutes before rolling it out. This process allows the fat to solidify slightly, leading to that airy, crispy texture we all love in a classic apple pie!
Irresistible Apple Pie Recipe: Flaky, Sweet, and Tart Delight
Ingredients
Equipment
Method
- Preheat your oven to 425°F (220°C) and prepare your pie plate.
- Melt ¼ cup of butter in a large pot. Add apples, brown sugar, flour, cinnamon, lemon juice, and salt. Cook for 8–10 minutes until apples are softened. Let cool.
- Roll out half of the pie crust into a circle, about ¼ inch thick, and place it in the greased pie plate.
- Pour the cooled apple filling into the crust, mounding slightly in the center.
- Roll out the remaining dough for the top crust, either laying it flat or cutting strips for lattice topping.
- Trim excess dough, fold it under, and crimp edges to seal.
- Cut vents in the top crust and apply egg wash for a glossy finish.
- Bake for 15 minutes at 425°F, then reduce to 350°F (175°C) and bake for 40 minutes more until golden brown and bubbly.
- Allow the pie to cool for at least 2 hours before serving.
Leave a Reply